1981 15 foot Yazoo. FINALLY - UPDATE!!

TinBoats.net

Help Support TinBoats.net:

This site may earn a commission from merchant affiliate links, including eBay, Amazon, and others.

bassboy1

Well-known member
TinBoats Sponsor
Joined
May 29, 2007
Messages
3,325
Reaction score
0
Location
Cartersville, Ga
Well, I picked this rig up for 600 bucks. It looks like it has a nice deck, but a good carpet job can hide quite a bit. I bought it with the intention of stripping it, and redoing it with my own decking. The trailer is in pretty good condition overall. It has new wheels and tires, and the steel isn't rusted much. The tongue is a bit to short, but that will be fixed pretty easy. But, it does need minor things. The bunks are held on with bungee cords, and the lights, and rollers are held on with zip ties.
Here are a few pictures.
newfolder001.jpg

newfolder004.jpg

It has a 20 inch transom, which is good in a way, as we have a 40 horse Evinrude in the shop with a 20 inch shaft, but now I have to fab up a kicker bracket, since I will also use this rig to troll. And, when I get a 9.9 for use on limited lakes, I will have to have another bracket, or get a long shaft 9.9.
newfolder003.jpg

Although it doesn't look at it, the stern deck is very large - so large that you cannot sit on the front and reach the tiller. The previous owner said the guy before him sat on his bike seat to operate a 40 tiller. :shock:
newfolder005.jpg


I think I am limited on pictures, so see the next post.
 
Alright, so far, it really doesn't look that bad. Now, look at these hatches.
newfolder009.jpg

newfolder010.jpg

newfolder011.jpg

Now, it works, but I cannot stand the unfinished look. I have always despised the hatches where there is no liner, and it just opens up to the hull. It just looks very unfinished, and besides, that is bilge area, and I don't want my stuff getting soaked in the bilge.
Here is the battery storage area.
newfolder016.jpg

Here is the livewell (more like baitwell. There are 2 this size in here, but you couldn't put a limit of dinks in either one) Is there such thing as a limit of dinks?
newfolder014.jpg

Also, all of the plywood is just worn out. The top deck pieces are bubbly, and waterlogged.
Here is the bow cap, I guess we will call it.
I like these a lot. They give a factory mount for trolling motors, and give a place to mount plugs and all. If this boat didn't have one, I would ad it myself.
I am not sure where the glove box came into play, or what the 120 volt household plugs were for.
newfolder013.jpg

I got it mostly stripped down today, but pictures are going to have to wait until tomorrow. Then comes planning for all my new structure. I am really hoping to get this one done with a quicker timeframe than the other boats. Hopefully, I will be doing most of the work myself, so the lack of dads time won't be an issue. Until the buyer comes to pick up the Grumman though, I won't have any cash to put into this one.
 
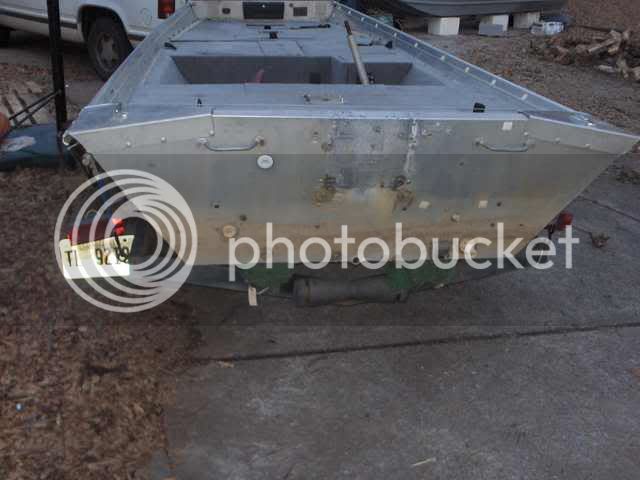
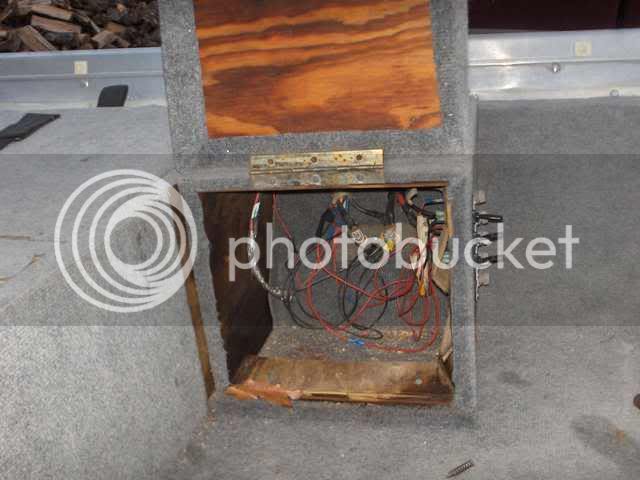
Well, I finished stripping it down today, for the most part. It still needs a major cleanup, and the transom stuff needs work (I am not sure what the previous owner did - something like 6 holes with wood screws going into the aluminum to mount a transducer - not to mention the mess of bilge and livewell pumps)

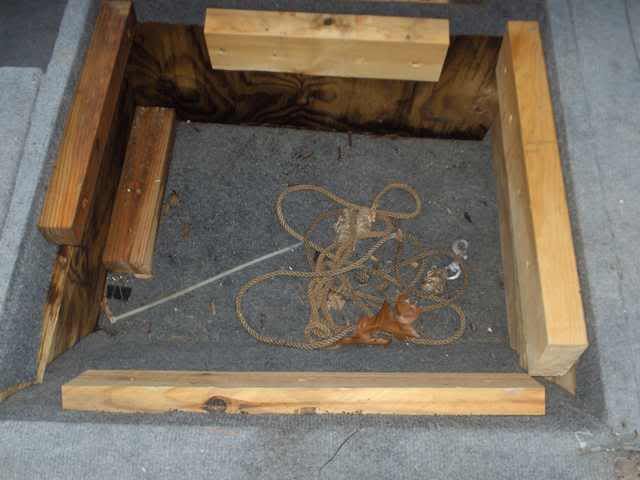
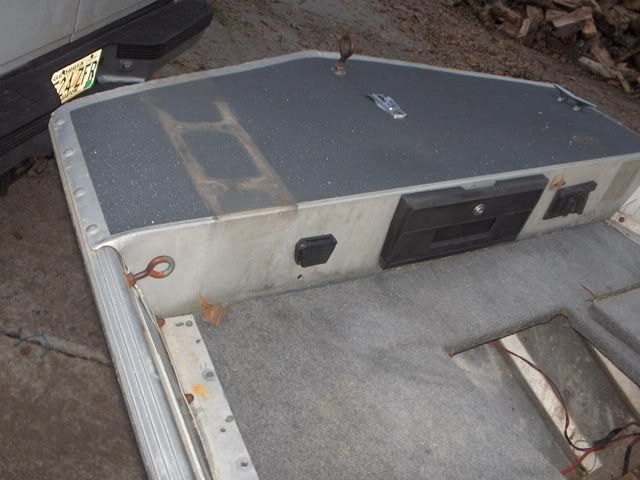
Here is the picture of the bow after I finished stripping it.
newfolder001-1.jpg

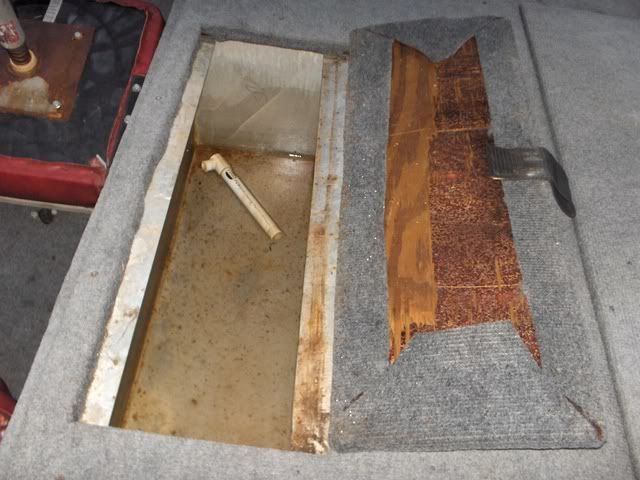
Ignore the pile of rusty fasteners there. If you remember, there was that hatch that opened up to the hull, and for some reason, every time I pulled a fastener out, it got tossed into that hatch. Now, towards the bottom of the picture, you can see a bulkhead that I had no clue existed, until pulling out the deck. Seems the boat had a short casting deck originally, that was then replaced by the previous owner. Also, that lip in the bow, and the two pieces of aluminum, that were angled with the hull to provide a level mounting surface were a dead giveaway as to the original deck in the bow. The deck mate screws holding the 2 x 8s underneath the deck were a giveaway as to the fact that it had been indeed replaced once.

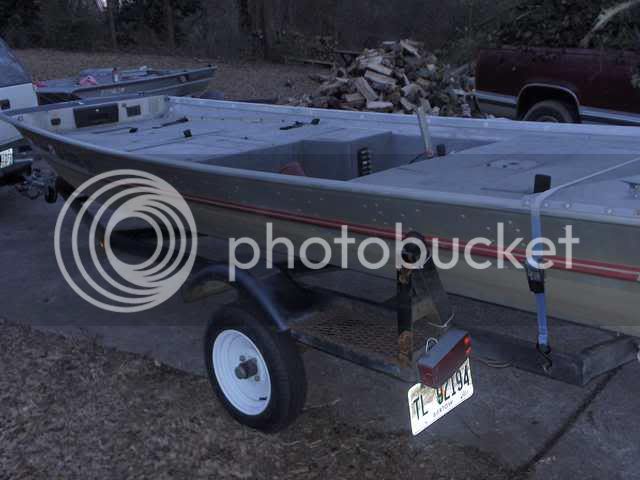
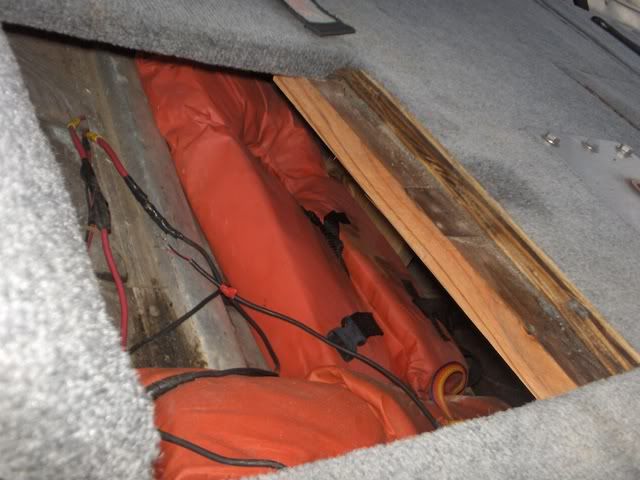
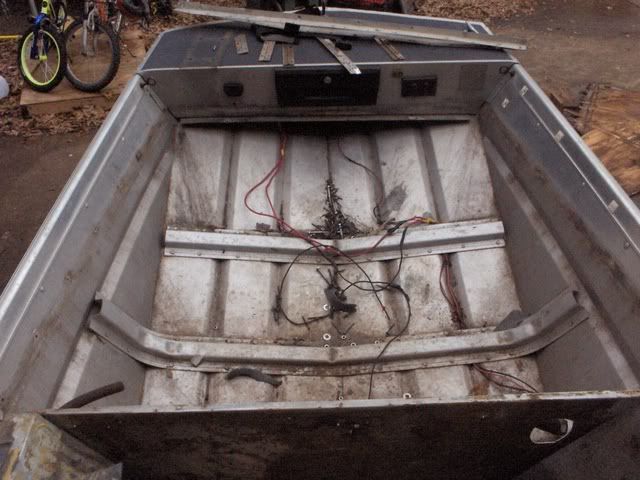
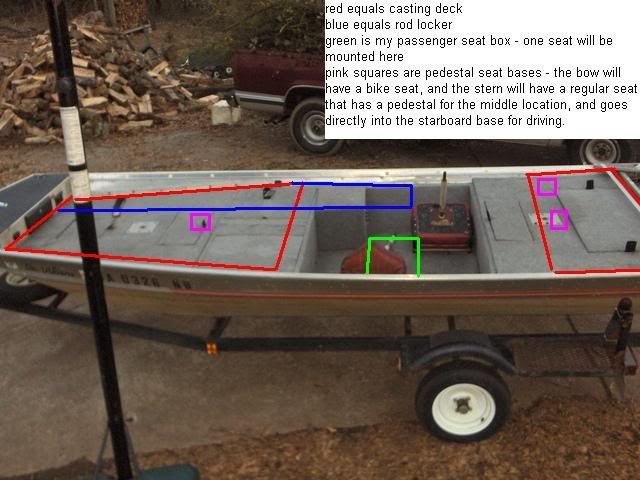
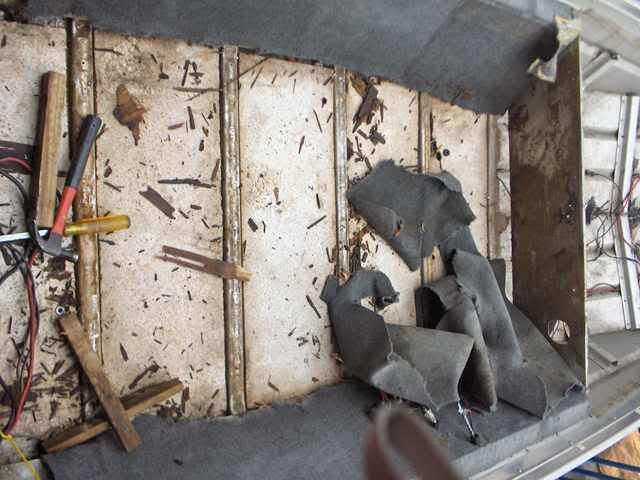
Here is a shot of the stern, with the deck removed. The stern deck extended forward to the dark spot on the carpet. That is too far forward to sit and reach the tiller, and I don't relish the idea of being way up on a pedestal to operate it. My new deck will extend to those seat pods, but no further.
newfolder005-1.jpg


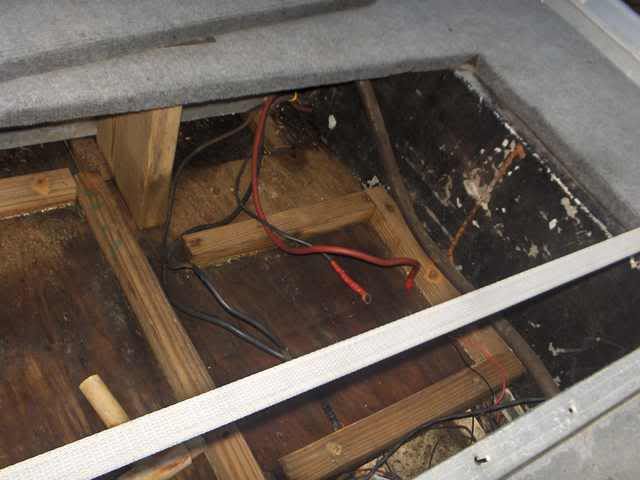
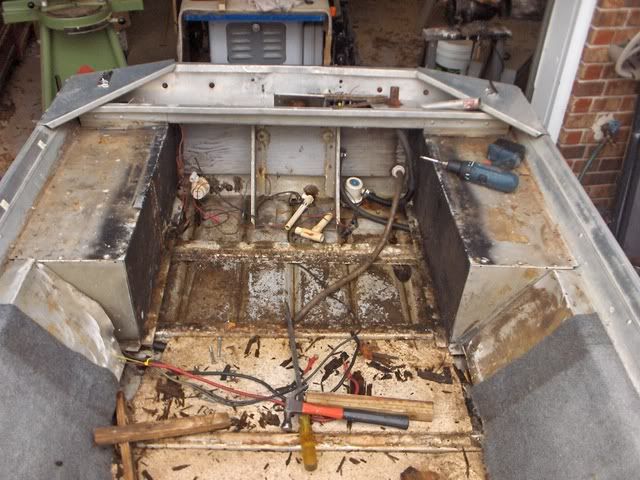
Now I get to the bottom deck. I am positive this was factory, as it used marine grade plywood, instead of pressure treated (which has NO place in an aluminum boat) and the fact that stainless fasteners were used, not a combination of trim and cabinet screws, and deck mate screws. Not to mention the fact that it was much more rotted - it had obviously been in there much longer than the rest. Also, there is some saturated flotation foam under there.
newfolder004-1.jpg


All the rest of the carpet had been taken off with the deck, plus it was stapled, and not glued, but on the side panels, it was glued. I have not seen a more durable glue in my life. It took me an hour and 15 minutes to remove the carpet from the two sides. Not to mention, it is something like 2 pieces, 7 feet by 2 feet. Notice that 2 1/2 foot long screwdriver (prybar) on the bottom? I had to use that as a chisel to dig up the glue. Seeing that it was an internal panel, I wasn't as worried about it. If it were on the hull, I don't know what I would do, as that could punch a hole in the hull, and the carpet wasn't coming off any other way.

I have a pretty good plan of the layout when I put her back together. The rest of my week is pretty busy, but I will try to have it cleaned out by the end of this week. Then, if all goes to plan, I will try to start, if not finish, any work the trailer needs next week.

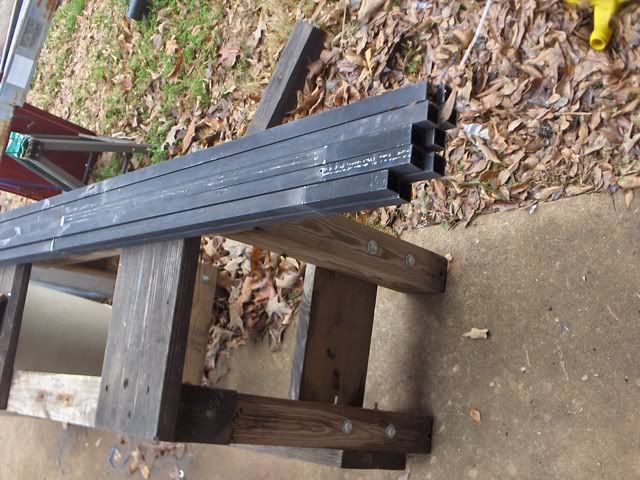
Hopefully, in the next 3 weeks, I will start framing. We have a few hundred feet of aluminum stock in the shop here, that I won't have to repay dad for until later, so that will allow me an early start. But, I will have to wait until the buyer picks up the Grumman for me to have a bit of cash to start with everything else. I am searching for a deal on some 1/8 inch aluminum sheet, that isn't diamond plate, in the right alloy. The search is somewhat futile. Luckily though, aside from the aluminum sheet, and buying the motor from my dad, I have most of the large expenses covered - boat, trailer, trolling motor, kicker motor, batteries etc. It is just left to the millions of small expenses that ad up to be killer. But, for me, as my money comes in small amounts over time, they are easier, as I can spread the purchases out with my income.
 
Waterwings said:
Looks like you got yourself a good deal! How many boats are you working on now?
This is the only one I am working on. The rest are just sitting there, unfinished, or unstarted even. But, this one is on my paycheck, and timeclock, so it should go faster, than the other 2, which are on my dads. Fortunately, it looks as if we may be able to start on the Alumacraft shortly after finishing this. The Lund we will get to eventually.
 
bassboy1 said:
I am not sure where the glove box came into play, or what the 120 volt household plugs were for.
[.

I have talked with several people that use 120 outlets, wired 12v; then changing the clip on fishing lights over to a extension cord plug end. You can also get the old style alum dome shop light and put a 12v rv bulb in it to light the inside of boat. That way you can plug in a light where you want it and dont have 30' of cord laying on the floor. Just a thought.

Project looks like a great start. Keep us posted.
 
Well, time for an update. A little lacking, but it is here. The boat is on styrofoam blocks, next to the rest of the boats we have on styrofoam blocks, and the trailer is up on sawhorses, right next to the other trailer on sawhorses. I have gotten all the parts stripped off, and will hopefully prep and paint it next week. I will probably go with a machinery gray, as that is what it originally had, and the Alumacraft trailer is that color. I am leaving out of town on Thursday, and won't be back till late Sunday night, but am out of school on Monday, so I hope to at least have it primed then. I will need new springs for it, as one is sagged, and will order them in the next day or so. Also, I am going ahead and replacing the bearings. Some people prolly woulda cleaned and repacked them, but they are kinda on the line, so I will replace them now, while it is apart. The hubs are sitting in the parts washer soaking as we speak. This weekend, while I am gone, dad will weld a new tongue on, as this one is too short for my liking, and in front of the fender, we will be adding an angled forward step, since I kept slamming my knee on the square bracket, I want the angled step.

I went to the scrapyard last week, and came back with the material for the inside of my hatches. Found a whole pallet of this 1/16 honeycombish aluminum. The only difference from real honeycomb, is the inside is made of some plastic material. The cutoffs are about 2 feet, by 7.5 feet, and seeing as they are the honeycomb material, they are much lighter, which is good, as we buy used material by the pound. We thought we had a deal on some 1/8 inch for the decks, but upon going to pick it up, I found that it was 1/16 inch diamond plate, so that wasn't going to work at all. I have the interior layout planned out, and am working up the structure plan in my head, everytime I pass by.

Hope to finish the trailer by next weekend (not this coming one) and then make a trip to the scrapyard that Saturday, and hopefully come back with some 1/8 sheet. Then, I will start my structure the week after, and hopefully have it done within a week and a half or so.
 
Well, I got most of my supplies together. Went to the scrapyard this morning, and came back with this.
yazoomods006.jpg

It is 4 sheets of (.090) aluminum sheet that are 48 by 56 inches, and 1 sheet that is 18 inches by 7.5 feet. Ideally, I woulda gone with 1/8 inch (.125), but finding that for scrap value wasn't going to be feasible. Plus, this is 6061 T6, so it is one of the strongest aluminum grades there is, and will be the most resistant to bending and flexing. Even so, I can ad an extra brace or three, and it will still be much cheaper and easier than waiting on a deal on 1/8 inch.
Also, I got a piece of 3/16s thickness, 1 1/2 inch angle. I wanted 1/8 inch, but the guy was able to give me this 8 foot stick of this stuff for half the price of about 6 foot of new 1/8. So, a little overkill here won't hurt, as this is going to be cut into 1 inch lengths, and used for angle brackets.

I already had at least 15 or so pieces of this.
yazoomods007.jpg

They are 1 x 1 aluminum square tubing, 1/16 wall, about 70 inches long. I cut these out of a section of aluminum fence that I got from the scrapyard when I was planning to do the conversion on the Cherokee that I ended up selling. The will provide most of my main structure.

Then, these are the sandwich board aluminum (which I have incorrectly called honeycomb, but these have a glue of some sort in the middle, not aluminum foil)
yazoomods008.jpg


Hope to finish the welding on the trailer by the end of the weekend, if the weather will cooperate, and then strip and repaint and reassemble it by the end of next week. I already have new bearings and springs ordered.
 
Well, my time estimates were shot to heck and back. I ended up having 6 various band practices a week for a while, plus 2 various scout meetings a week, plus scout trips on consecutive weekends, so my free time has been non existent. Anyway, I got the last coat of paint on the trailer, and have pressed the new bearings into the hubs, and bolted the new springs and all on the trailer. Right now, it just lacks lights, bunks, and a winch post. Dad and I welded up the adjustable bunk brackets on Sunday, just have yet to install them, and I have some LED lights that I picked up for half price. Then, after the boat is on, I will measure and make a better winch post. The last one didn't suite my liking.

Here is a picture of my new layout. I don't have a real good vertical shot, so I had to make do with this one. My ribs are on 16" centers, so even though the drawing isn't to scale, everything will start and end on those ribs. IE, the stern casting deck will come forward until it gets to the second rib from the transom, and my center seat box is 16 inches long.

yazoo3.jpg
 
Jim said:
Sorry bassboy1 :cry:

The stupid picture resizer mod ruins the words.
Click on the picture, and it will get bigger. Then, your cursor should turn into a magnifying glass, and click on the text. It should still be legible. Least it is on my computer.
 
Being that it is spring break, I finally managed to get something done. My original plan was to finish the trailer before starting the boat, but I am not allowed to use the welder on my own, and correlating dads schedule, with my schedule and the rain hasn't been practical, so I put the boat up near the shop, on a whole bunch of blocks, and started working on it.

Today, I got all the pieces that go underneath the bottom level deck.
yazoomods009.jpg


On the longer pieces, I used some of the 3/16 angle, cutting one side down to 1 inch, to hold it down.
yazoomods010.jpg


At the stern, I only put them 4 across, as there will be a casting deck above it, so it will only support the fuel tanks and such. Also, I got tired of using the angle brackets, so I cut the ends at a 45, and then was able to rivet directly into the rib.
yazoomods011.jpg


At the gussets, I just put 2 rivets in from the gussets to the square.
 

Latest posts

Top