1990 Yamaha 25

TinBoats.net

Help Support TinBoats.net:

This site may earn a commission from merchant affiliate links, including eBay, Amazon, and others.

wmk0002

Well-known member
Joined
Apr 17, 2014
Messages
1,037
Reaction score
52
Location
North Alabama
I picked up a 1990 Yamaha 25, model 25ESD, Friday. Had good even compression and started and briefly ran so I got it. Got home and checked the spark and looked it over good and found nothing that stood out....until I looked up the plugs that came out of it. Thought they looked incredibly small when I was buying it and turns out someone had put small weedeater or chainsaw plugs in it lol. Put the correct ones in it and it actually sounds halfway decent when it runs now. Like I said, I can't find any issues or concerns that stand out as of yet but it really makes you wonder what all else someone who would swap plugs like that my try to have "fixed".

I ordered a used $20 factory service manual from Ebay and went ahead and ordered a new fuel filter, generic kill switch, and lower unit plug washers. Surprisingly, the water pump was done correctly by someone as it pumps like a champ. Plan to pressure test the lower unit and reseal if necessary, then clean the carbs, replace fuel lines/filter, and do a full link and sync and I guess let her rip.

My only concern is the oiler system. I know the service manual will give me the procedure and flow rate to test it for but as someone who has never had a direct oil injection motor (or one not already disabled) it gives me pause as at least someone in the past has touched this thing who shouldn't have been wrenching on anything. I have 3 gallons mixed at 50:1so I am covered though. Is this a motor where I should fully delete the oil system or should I test it and if it passes just roll with it?
 
nccatfisher said:
It has made it 31 years, that ought to tell you something.

I know the yamaha oil injection systems are the best of the best. My concerns just lie with what all else the weedeater mechanic may have touched lol. I would imagine the injection system isn't something that typically gets messed with unless it gets totally deleted though so odds are its all good.
 
Yamaha and Suzuki had oil injection mastered long before OMC and Merc figured it out, so I would run it. Deleting it is not that easy on them either.

The gear driven oil pumps are generally pretty bullet proof. Check over the nylon oil lines, they may have gotten brittle with age. I replaced all of them on my Suzuki with the kind of fuel line that you see on chainsaws and stuff.

To check the oil pump output on my Suzuki, I took a large syringe (the manual calls for a special service tool that essentially amounts to a graduated cylinder with a hose barb on the bottom), pulled the plunger out, stuck it in the oil pump inlet hose, and tied it to the motor. First fill the syringe and bleed the system. Then refill to a reference point on the syringe, run the motor at a certain RPM for a certain period of time, and note how much oil was used. The exact parameters will be outlined in your manual. The rod running from the throttle to the oil pump should be threaded to allow for oil pump output adjustment.

If you want some parts, I have a bunch of stuff for an 89 25hp. Carbs, oil injection, electrical, etc. Lower unit is gone and the powerhead is toast. I'll let them go cheap just to get rid of them, I bought it cheap thinking I could fix the powerhead, decided not to and just sold the lower unit on Ebay for a little profit. Was going to list the rest but may never get to it.
 
MrGiggles said:
Yamaha and Suzuki had oil injection mastered long before OMC and Merc figured it out, so I would run it. Deleting it is not that easy on them either.

The gear driven oil pumps are generally pretty bullet proof. Check over the nylon oil lines, they may have gotten brittle with age. I replaced all of them on my Suzuki with the kind of fuel line that you see on chainsaws and stuff.

To check the oil pump output on my Suzuki, I took a large syringe (the manual calls for a special service tool that essentially amounts to a graduated cylinder with a hose barb on the bottom), pulled the plunger out, stuck it in the oil pump inlet hose, and tied it to the motor. First fill the syringe and bleed the system. Then refill to a reference point on the syringe, run the motor at a certain RPM for a certain period of time, and note how much oil was used. The exact parameters will be outlined in your manual. The rod running from the throttle to the oil pump should be threaded to allow for oil pump output adjustment.

If you want some parts, I have a bunch of stuff for an 89 25hp. Carbs, oil injection, electrical, etc. Lower unit is gone and the powerhead is toast. I'll let them go cheap just to get rid of them, I bought it cheap thinking I could fix the powerhead, decided not to and just sold the lower unit on Ebay for a little profit. Was going to list the rest but may never get to it.

Yeah, I would lean to replacing the oil lines as a precaution. Its pretty oily on that side of the motor pan so they may be leaking, although I suspect it's the fill cap as it feels rather loose. I thought the cap was missing an o-ring but I didn't see one in the parts list nor one on the picture of the replacement cap part.

I would be interested in at least some some parts. I know for sure I could use the swivel tube/clamps portion if you had that. This motor is missing the piece that locks down on the trim pin so even with the pin in the highest setting the motor still is tucked down pretty good. I can give you a better idea of what I may need after a couple of weeks. I may be interested in everything you got though if you could somehow ship that without a huge hassle.
 
they have the oiling system totally figured out on those. I have never seen one give any trouble in 30 years of working on them. They used the same system on wave runners, also almost bulletproof. I say "almost" because on jet ski's, they oft roll them over and this introduces air into the oil pump. When air gets in it, it dont' pump. When it don't pump the engine don't last long. 30 minutes maybe. But fear not, there is a bleeder screw on the top of the oil pump. You remove the silver bolt on the top and let oil run out of it. If u don't see no bubbles, there wasn't no air in it. Bubbles would be an indication of being run out of oil or perhaps sitting in a position where air could have gotten into the feed line, perhaps stored upside down or something odd like that. Rare for an outboard.

That system works great as said. The oil is pumped directly to the engine and not into the carbs. Just look at the lines/hoses. If you see any kinks or cracking, replace the hoses. IF you have to do that, make sure to premix the fuel for a couple tanks of fuel afterwards, so that any air in the lines is pushed out and the engine still gets it's oil. Simply bleeding the oil pump, you won't need any premix afterwards.

lower pan is always oily. That doesnt always mean theres a leak. It's just backwash from the air box/engine. They all did that. On oil injected models it wasn't uncommon for a user to try to dump 5 quarts of oil into a tank that holds less than one quart, and the remainder just runs all over everything into the pan etc. Those are issues that the newer 4 strokes just dont' have, and is one of many reasons that the old 2 strokes are long gone. Not that they were bad motors.

if you pull and clean the carbs be aware that the jets may be different sizes for upper and lower carb. Look at your engine model on boats.net parts diagrams. Also after reinstalling make sure to sync the linkage between the carbs and while you're in there check the ignition timing. as close to 7atdc as u can get at idle. Pickup timing zero. Maximum 26btdc. Properly adjusted idle screws, timing, good fuel, and good parts in the carbs, these things idle smoother than a new 4 stroke does down to 700 rpm. That's one reason they used twin carbs on them (better idle).
 
Appreciate the reply as always Todd.

Parts diagrams show the carbs to have identical jets. I'll still check them to make sure some goob didnt try to up the main jet size for whatever reason. I've got a the service manual on the way so in the meantime I will clean the carbs, sync the butterflies, get the pickup pointer synced to the roller, and get my TDC flywheel pointer set.

Could you offer any insight on what the the throttle diaphragm's purpose is on these motors?
 
It slows down the rate that the timing retards so that it don't sneeze on quick deceleration. The holes on the newer ones are slotted so that it can be moved forward or backward, which kinda tailors deceleration. When I say deceleration, I mean just before the carbs go back to idle. When the roller fully retards timing it will be around 7 deg ATDC which is real retarded, but the throttle is still open just a little bit-so it has a tendency to sneeze and sometime die. The diaphragm helps eliminate that. I don't remember the shop manual saying anything about them, so I just got everything else working properly and then played with it until it was satisfactory. Also remember that the cowling being on the motor will affect the mixture just a little bit, so with the cowl off you're best bet is to set the idle mixtures just barely on the lean side. Then when you're on the water, it will be closer to perfect.
 
That makes sense. I could tell it wasn't tied to anything else so it looked like it was just acting as a damper but that seemed odd to me as I haven't seen one on any outboard before.
 
I drained the lower and the oil looked like someone had filled it with carolina gold bbq sauce lol. So I put my pressure tester on it and had a bad enough leak it wouldn't pressurize at all and could hear it coming from the shift rod boot. Pulled the lower and found the bellowed portion of the boot had a large tear/hole. Covered with my finger and was able to pressurize it to about 8 psi but then the prop seals began leaking audibly so not even any need for soapy water. I didn't pull the waterpump to check the driveshaft seals - just assumed they were bad. Just ordered a lower seal kit as it was cheaper than everything separately and included all 4 shaft seals, the bearing housing gasket, plus some extra things I can replace while in there. Got the shift rod boot separate as it wasn't in the kit. $45 shipped. Opted not to get any water pump parts as it pumps water very good as is.Lower isn't pretty but it seems fine plus no corrosion (motor seems to be freshwater only) so hopefully it's good as new with all new seals. I plan to paint this motor with the later model color anyways when/if I get it right mechanically so I cna make the lower look better at that point.
 
Got the lower unit totally resealed and successfully pressure tested it to 15 psi for 10 seconds per the shop manual. Let it sit for about 10 minutes for good measure and pressure held perfectly, so I'm pretty happy with that. I'm leaving the lower unit off for the time being so I can rotate the flywheel both directions while I get my TDC pointer verified/set. It's a little easier that way imo. The manual says to use a dial indicator to set the the piston travel at a specified distance BTDC for the timing link and sync which is new to me but guess I will try it. I have a harbor freight indicator and am going to try to gut an old spark plug, fill with jb weld and then drill it out to allow the indicator to slide in. May add a set screw but likely will just glue the indicator in since its such a cheap one. Any thoughts on this? I'm sure in a way it's totally unnecessary - I could easily just use my piston stop tool to set my TDC pointer and then get the linkages close per the timing marks on the mag plate and verify with my timing light but what the heck. Seems like it may be a useful tool to have around for future use.
 
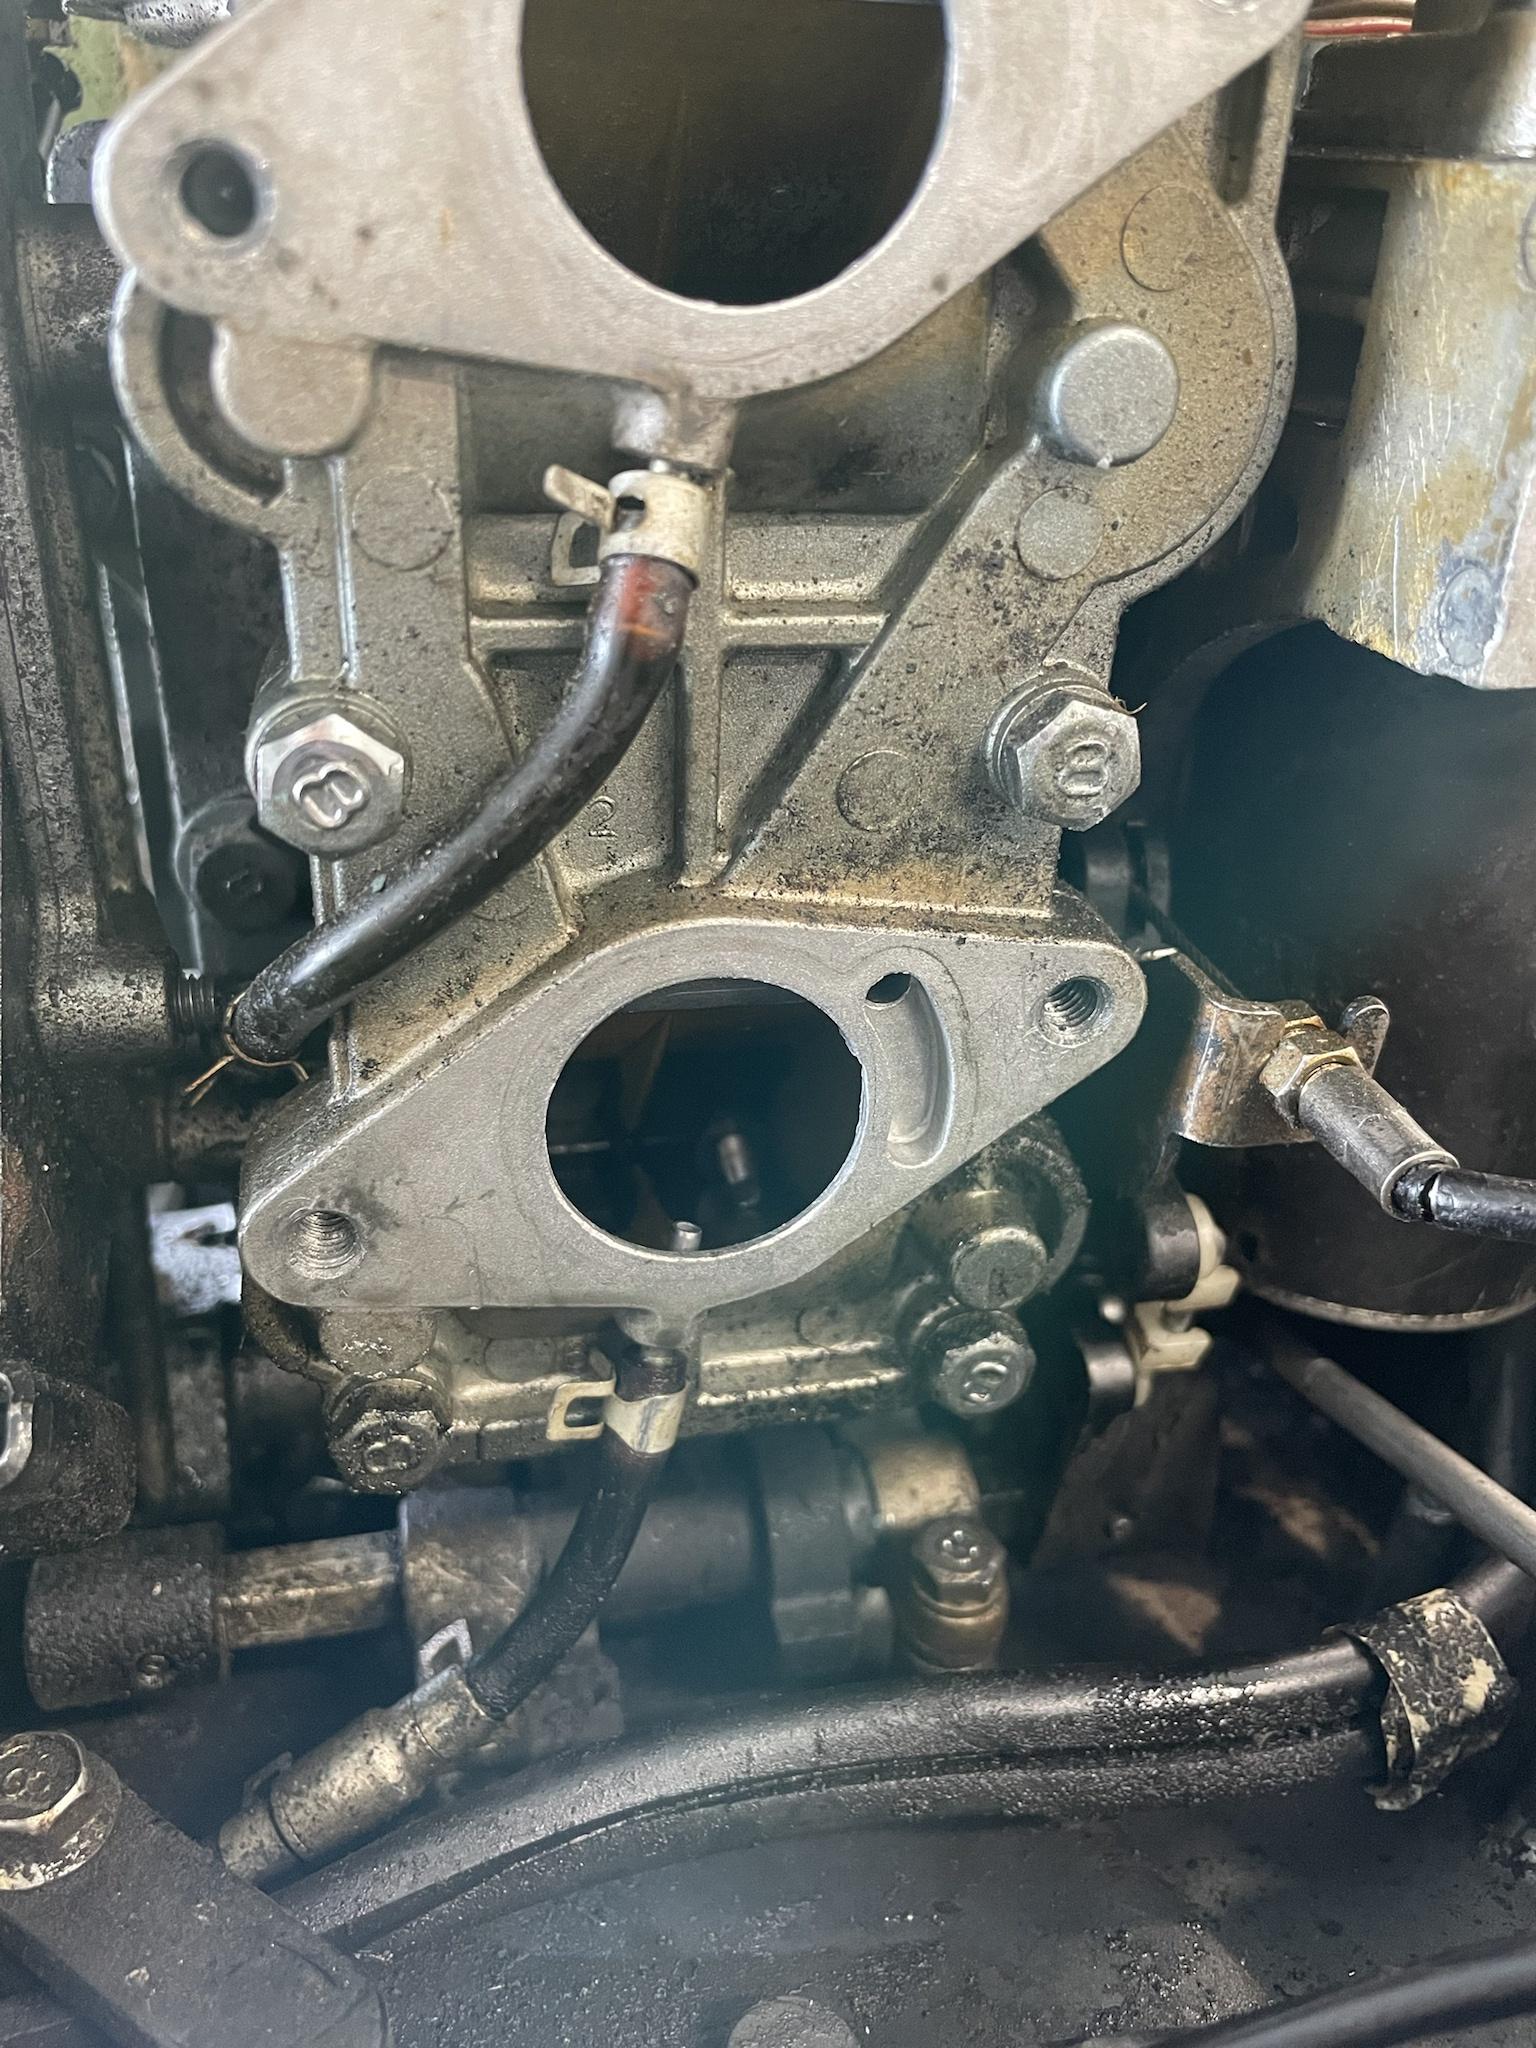
Yikes! Pulled the carbs off to both clean and do some examination of the electrical tucked away under there and saw this. That's one of the bolts that attach the air box adapter to the carbs. Top carb had that lug broken off so the carbs can only accept 3 bolts instead of four now and somehow the spare ends up in here??? Thankfully it's too big to fit through the reeds but I need to go back and check and see if those bolts use a washer and see if its still on there.

2PVIXW4.jpg


So far I've found this and the small engine spark plugs that were in there which go on the list of what the heck was someone doing who tinkered with this thing before. Hopefully no more big time surprises.

It did have some stray current as last time I ran it before really starting to work on it, I saw some small sparks jumping between the throttle cables and what looked like the carb although I wasn't hooked to a battery. The electric start system is what I was working on prior to pulling the carbs. The battery cables are pretty much trash but I put some new terminals on them to try out. Got continuity between each terminal lug and the ground on the starter and on the solenoid input side but the solenoid wouldn't work (using my remote trigger starter as the motors push button is bad). Took it off and it bench tested ok. Then tested the ground that the solenoid uses and got continuity between there and the starter ground - so I'm pretty sure there are major issues in the cables, for sure the negative side. Electric start isn't something I'm going to dig too much into until I get the motor up and running good so I think for now I will just unhook and remove the battery cables and cap off the +12V wire coming off the rectifier.
 
On your stray current. Check the bottom of the leg, where the foot and leg come together. There is a little ground wire down there and it's known for them to be burnt. This can cause stray current among other things.

On your starting issue. Have you done a voltage drop test? I've found several battery cables "bad" this way. In other words, take your digital volt meter and put one probe on the battery negative (not the cable, the battery post) and the other probe on the starter's ground. Remove spark plugs and/or ground the high tension leads somehow so it won't start up. Then try to crank it over. Your volt meter should read less than 0.5v while attempting to crank.. Repeat for the other cable except this time you will want to put one probe on the battery just like before (use the + this time) and the other probe goes to the starter relay, right where your cable goes. Try to crank. Again, 0.5v or less displayed on the meter. The voltage displayed is the actual amount of drop across the cable and it's connections. Lots of times I've found them with 8-12v drop, indicating that the cable is corroded internally, or sometimes it's just the ends. Now you know how to do a voltage drop test. A lot of times a simple continuity test is inconclusive. Why? Because 1 strand will carry enough current for your DVOM to show 0.0 ohm during a continuity test. But when you place the circuit under a load, that one strand will not carry the current but it will still always say 0.0 ohm resistance. So you do a drop test under a load and that tells you the integrity of the conductors and if you continue on with the test across your components, you can quickly and easily find a problem. This test is very VERY handy to keep in your "hard drive" (brain).

I was working on a Ranger 900 the other day (Polaris) and had a 4x4 engagement issue. Without the drop test, I would never have figured out this issue. Turned out to be a broken wire inside the insulation. That was fun to find. One strand was all that was left which is why the ECU did not recognize a failure, and other tech did not conclude any wiring issue via continuity test.

Based on the thread and your findings, one could conclude that a hack job was doing some work on it previously. Trust me, I've seen plenty of that. Unfortunate but it was part of what kept me in business for almost 30 years.
 
turbotodd said:
On your stray current. Check the bottom of the leg, where the foot and leg come together. There is a little ground wire down there and it's known for them to be burnt. This can cause stray current among other things.

I'll have to check but I do believe that ground wire may be broken now that I think about it.

On the electric start, I actually wasn't even able to get the solenoid to click using my remote starter. I opted not to try going straight from battery to the starter using jumper cables but I guess I do need to make sure the starter is good before buying a new starter push button and cables. I put a thread in the electrical forum on battery cables and based on the replies decided when I do replace the cables, I will just use some relatively cheap automotive jumper cables unless I can find some nice used OEM cables for cheap.

My latest hack job findings include a stripped out main jet in one carb. Also the upper and lower bushings on the swivel tube are toast, I mean I'm not sure there is any plastic left in there.
 
Tested the starter the hack way by touching battery cables straight to it, but it worked fine. So I know the starter and solenoid are good and the starter button is bad. Going to order a new push button and make some new cables from a set of cheap jumper cables I think.

I did the link and sync per the manual, set the carbs mixture screws to 2 turns out, and synced the carb butterflies. I got it idling decent in forward gear idle but the idle timing was reading about 2 ATDC with my timing light. I made some adjustments to the adjustable advance linkage and the idle timing stop screw as well as the throttle cables and finally got it to 7 ATDC and idling pretty well but I feel like I probably through the WOT timing off from when I adjusted the advance linkage. Guess I will just leave everything as is and get it on the water and get the WOT timing good so I can leave that linkage alone. I'll add the caveat that I haven't tested the oiler system yet so I'm currently running it on 50:1 plus whatever the oiler may be doing so I'm not expecting the best idle. I'd like to water test it and get the wot set before moving on to the oiler so I may remix a batch of fuel at 100:1 for the water test.
 
you can set the WOT timing without going WOT.

Look at your linkages. You can physically watch how it all works, and where the stops are. There is an idle stop and a max stop. You can manually push the big black linkage all the way to the WOT stop while watching the timing, without actually moving the throttles. 26 deg BTDC +/- 2. That +/- 2 deg makes no difference. It just needs to be close to 26 and you'll be fine.
 
Thanks, I never considered doing that. I'll give it a try.

Do you happen to know if this 1990 powerhead will mount onto the lower pan/upper casing of the other models up to the 2009 range? I purchased a parts lot which included a bunch of those empty 'shells' (no powerhead or lower). They range in years but all look the same to me and all are in much better shape than what my powerhead is currently mounted to.
 
Top