Navigation lights: battery-operated to wired conversion

TinBoats.net

Help Support TinBoats.net:

This site may earn a commission from merchant affiliate links, including eBay, Amazon, and others.

azekologi

Well-known member
Joined
Dec 1, 2009
Messages
355
Reaction score
0
Location
The Barren Deserts of Arizona
O.k. ya'll, the old (and I mean REALLY OLD!) battery-operated lights that came with my 'new-to-me' boat need to be replaced. The plastic housing, lenses, etc. finally gave way to the ol' Arizona sun and it's time to upgrade to something better....(ooohhh, wired.....ooohhh, chrome......oooohhhh BOTH!)

I've been wanting to go with wired lights, have a plan for disaster, and hope ya'll can either tell me I'm going about all this the wrong way, or be my partners in crime with this mod.

So, here's what I'm thinkin':

I'm trying to think about the future of the boat in hopes to head off problems that I might run into with upcoming modifications/additions.

First, some structural history of the boat:

The original owner had a bimini shade for the boat, some of the original hardware is still attached, but the top was lost during the craft's 10-year barn dry dock. So, unfortunately, the shade didn't come with the boat #-o . I plan to add a new top next season, $$$ permitting of course [-o< , so I need to make sure that any wires I run won't interfere with a) the new hardware, b) any existing (old) hardware that I can use in liu of the new hardware.

Second, where I think I want to go, electrically-speaking:

I'm pretty sure that I don't want to deck this boat, so I can rule out some of the crazy conversions that some industrious people on this site do end up doing :wink: . That said, I believe that I'd like to add some power 'options', for both now and the future.

a) Add wired navigation (and possibly anchor) lighting
b) Leave 'openings' for switchable electrical 'options' (...I'm thinking maybe a removable livewell :?: , or interior lights)

From the research that I've done on this site (and others) I think that the best way to approach this mod would be a) a switch panel, b) a battery-box power center (like the Minn Kota Power Center below), or c) both. (I like the Minn Kota box as it has two (2) integrated 12V accessory plugs...for...ya know...stuff, but I think that the built-in "current state of charge" battery meter display is worthless as I don't trust such things and ALWAYS carry a multimeter to watch battery voltage).

minn_kota_power_center.jpg


So, my uneducated, virgin-marine, idea is to do the following :idea: :


1) Remove the existing (screwed-in) plastic mounting plate on the bow for the old battery-operated lights.

2) Drill a small (3/8"-ish) circular hole in the bow for the wired-light's wires to pass through (and use a rubber grommet of course)

3) Drill a 2nd small (3/8"ish) circular hole in the interior wall of the gunwale (again, using a rubber grommet) for the wires to enter the gunwale, and fish (no pun intended :mrgreen: ) the wires through to the stern of the boat where I commonly place the 12V battery.


Here are some pics of my boat that I've 'doctored' (standard red & black lines to denote wiring):

nav-01.jpg


nav-02.jpg


The immediate problems that I see running into are: a) where the existing hardware for the old bimini top go into the gunwale, b) potential hardware impediments with the bimini top I plan to add in the near future (I figure if the wires are there and I drill/screw new hardware in, I run the risk of hitting the wires either severing them or causing a short).

nav-03.jpg


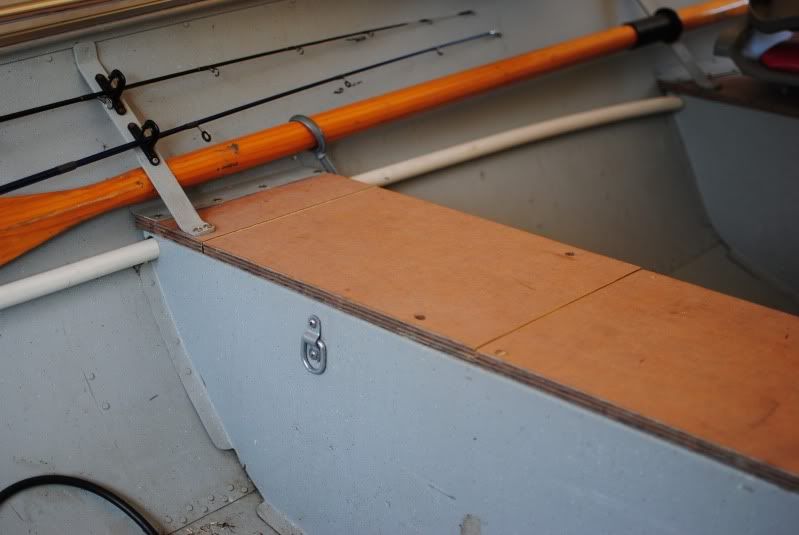
The oarlock hardware doesn't seem to be a problem as it's riveted through the hull, not the gunwale (just sorts of cups the gunwale, rather than going through).

nav-04.jpg


nav-05.jpg


4) At the stern of the boat, in the aft-most interior wall of the gunwale, under the cover-thingy (yup, technical jargin :mrgreen: ), I plan to drill a 3rd small (3/8"ish) circular hole in the interior wall of the gunwale (again, using a rubber grommet) and have the wires exit the gunwale.


nav-06.jpg


From here, I'd either a) wire up the lights directly to the battery as needed, or b) get CRAZY :!: and install a 3-4 switch panel (I'm guessing mounting to the transom would be the best choice :?: .

nav-07.jpg


Ok, that said, I know NOTHING about cutting, drilling, wiring, in a MARINE setting, other than I need to use marine-grade electrical wire and that water comes through holes in the hull :shock: SO DON'T SCREW UP! I have limited-moderate experience wiring in automotive settings (stereos, speakers, lights, gauges, etc), so, ANY and ALL advice would be most helpful.

I'd also welcome some suggestions on panels to use (if ya'll think I should even incorporate a panel) that are in the 'less-than' $100 range (I've seen a few from West Marine https://www.westmarine.com/webapp/w...01&storeId=11151&partNumber=1954916&langId=-1 that seem to fit the bill...I especially like the 3-circuit model with the integrated analog voltmeter). I haven't seen one, but a panel with an integrated DIGITAL voltmeter would be AWESOME :shock: !

Thanks (in advance) everyone, I know that your 'know-how' will definitely help guide my brooding lack of experience.
 
Bass Pro has a nice 4 and 6 circuit panel for $23-$28. I am in the process of wiring it up in my boat now.

Here is the link:

https://www.basspro.com/webapp/wcs/stores/servlet/Product_10151_-1_10001_861_225005001_225000000_225005000?cmCat=CROSSSELL_SEARCH
 
I am kind of in your shoes when it comes to electrical. I know some things - usually enough to get in trouble or make something start smoking somewhere. But...I have a brother who used to restore cars and did the electrical harnesses and he knows how to do things. So I watched and learned. My brother soldered all connections and used heat shrink tube to cover them. He had a boat on which the connections were all done with the crimp style connectors and they began to corrode and fail.

Your idea to run the wires through the gunwale is a good one. Hopefully there won't be any obstructions in there, including the screws from the bimini top to hang you up. I used a wire (maybe a 14ga?) as a fish tape because I couldn't fit a fish tape through. I had something in the gunwale that stopped the wire about half way so I had to go to plan B. In my case plan B was to run a 3/8" diameter vinyl tube under the gunwale to act as a conduit. I attached it with cable ties because no glue seems to stick to that tubing. I am not entirely happy with this because it is kind of silly looking and the tubing is always growing and shrinking with the temp. Another (better) option is to run a tube through the inside cavity created by the spray rail. I have done this on two boat projects and it works well. You can see in the photo below a black gas line on the right and a red plastic tube on the left. I ran my navigation light wires through the red tube.

deckcompleted.jpg


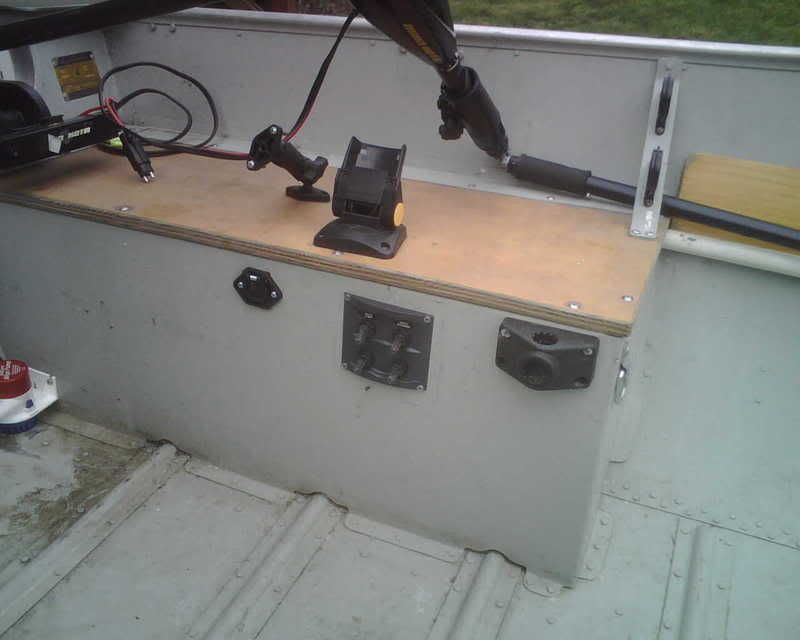
I used a 4-switch panel on my current boat and it works well. One thing to add would be a switch to turn off power to everything. I accidentally hit a light switch once while covering the boat and it ran the battery down. You can see the switch panel in this pic. Remember, you have to have a cover or box of some type to enclose the back of the switch panel. Mine is where it is because it was the easiest way for me to cover the switch in an area that was easiest to pull all the wires together.

P1011997.jpg


Sounds to me like you're on the right track. There are lots of people on this site who know more than me and I'm sure you'll get more advice. Good luck.
 
bobberboy said:
I am kind of in your shoes when it comes to electrical. I know some things - usually enough to get in trouble or make something start smoking somewhere.

:beer: I know this ALL TOO WELL!

bobberboy said:
My brother soldered all connections and used heat shrink tube to cover them. He had a boat on which the connections were all done with the crimp style connectors and they began to corrode and fail.

Excellent advice that I'll make sure to follow. Soldering is a little more work, but it's worth it in the long run I'm sure.

bobberboy said:
Your idea to run the wires through the gunwale is a good one. Hopefully there won't be any obstructions in there, including the screws from the bimini top to hang you up.

This is the ONE THING that's kinda keeping this semi-easy project on the back burner. Sure, I might be able to fish the wire past any obstructions now, but, when I put a new top on (hopefully next season) what's gonna keep those new screws from severing the wire that will be in there? That's right; NOTHING! And I sure as heck don't want to do the work now, just to redo it again later (either under the guise of pulling the wire for safety if/when I put new screws in it, or afterwards because it screwed it up and doesn't work). So, I'm between a rock and a hard spot.

bobberboy said:
...so I had to go to plan B. In my case plan B was to run a 3/8" diameter vinyl tube under the gunwale to act as a conduit. I attached it with cable ties because no glue seems to stick to that tubing. I am not entirely happy with this because it is kind of silly looking and the tubing is always growing and shrinking with the temp. Another (better) option is to run a tube through the inside cavity created by the spray rail.

These are some excellent ideas, but I don't think that either will work very well for my application. If I was to attach tubing under the gunwale I think that it would end up looking beyond silly; the biggest problem would be getting past the oarlock hardware (both the mount and the oarlock shaft itself) without looking like utter hell. I think that the spray rail is the best option, BUT, my rail is mounted entirely on the outside of the boat. I think that drilling through the hull, that close to the waterline, just seems like inviting water to leak into the boat...not good.
 
The extra time it takes to solder will pay off in the long run. I had to learn the hard way by spending more time finding bad crimp connections. I would also suggest you look into a different switch panel. The one your looking at is junk! I went through 2 of them before I looked around and found a better quality switch.
 
bear7625 said:
The extra time it takes to solder will pay off in the long run. I had to learn the hard way by spending more time finding bad crimp connections. I would also suggest you look into a different switch panel. The one your looking at is junk! I went through 2 of them before I looked around and found a better quality switch.

I have the same one as bobberboy and it works great. Since purchasing mine, they came out with a new one the same size, 4 switches, plus a power outlet. That would be nice for running my GPS or any other Aux power needed.
 
How hard is it to get the floor up?

If you can pull the floor you could run this conduit https://www.lowes.com/pd_72948-223-...t_4294821889_4294937087_?Ns=p_product_price|1 down one of the keelsons or if you are really cheap an old garden hose and pull your wires through that. Just make sure you bring each end up a couple of inches so water in the bottom of the boat can't get in it. I usually try to grab a keelson on the opposite side of the drain plug.

A little trick, especially if you use garden hose, is to preload your wires and then feed the conduit/hose and wire down the keelson as a unit. If you use the conduit you'll need to make one splice (Or buy a 25 ft roll from Home Depot) because the sticks are only 10 ft long. I used a 3/4" gray PVC coupling and PVC glue but you should fit it at the store to make sure it'll work, if the electrical PVC fitting won't fit then try the plumbing department PVC fittings.

Another trick is to get a 25 ft 16-3 extension cord, cut the ends off and feed that down a keelson. Just use two of the wires and you can save the third wire for in case one of the other wires gets cut then you won't have to pull up the floor again. I got one at Walmart for 5 or 6 bucks and used it to feed a string of accessory plugs around my boat for plugging in some of my custom LED lighting for night fishing. I finally got around to buying a new camera (Mine broke a few weeks back) so I'll be uploading some pictures in the next couple of days.
 
I suggest leaving the wiring exposed but neatly attached to the underside of your gunwales - any marina store will have wire hangers to enable you to do this with minimum muss and fuss

That way you can see and fix anything that might go wrong. Good Luck and let us know what you do
 
longjohn119 said:
How hard is it to get the floor up?

If you can pull the floor you could run conduit down one of the keelsons.

Longjohn119 - No floor to speak of in my tin, other than the weird rubbery floor things in the pic. No keelsons either. From what I can tell, the rubbery stuff is adhered directly to the hull, so I can't run under them; taking them out would be a chore, not to mention getting them (or something better) back in place.

img_7964.jpg


img_7965.jpg


Captain Ahab said:
I suggest leaving the wiring exposed but neatly attached to the underside of your gunwales - any marina store will have wire hangers to enable you to do this with minimum muss and fuss.

That way you can see and fix anything that might go wrong. Good Luck and let us know what you do.

Captain Ahab - not a bad idea, not sure if I'd like the end result though. Going through the gunwales would end up with a clean finished look, but I've already stated the potential problems with the current/future hardware.

Is going through the GWs a poor choice, other than the above stated potential problems?
 
The gunwales might be a challenge if they’re blocked in any way. My suggestion would be to run conduit down the port side through the seats. I used a length of ¾” PVC to run all the wiring front to back. The PVC runs through the seats and contours the boat. I holesawed through the seat to allow the conduit to sit just under the wooden seat top.

DSC_0022.jpg


IMG00046.jpg
 
clarkbre said:
The gunwales might be a challenge if they’re blocked in any way. My suggestion would be to run conduit down the port side through the seats. I used a length of ¾” PVC to run all the wiring front to back. The PVC runs through the seats and contours the boat. I holesawed through the seat to allow the conduit to sit just under the wooden seat top.

Clarkbre - I definitely like this idea! I just happened to have a 10' piece of ¾” PVC from a previous project and took it out to the boat for a mock-up this morning just to see how it would look installed. Not too shabby, but I still have some issues; my tin has a pretty wide beam (64") for it's length (12'), and it's quite curved - if I run the PVC near the top of the seats I would definitely have to attach it to (read: through) the hull by way of some u-shaped hardware (I know these exist as I've seen them for holding pipes to studs in home plumbing, electrical, etc.). Running it near the top of the seat would be above the waterline, so that scares me a little less (no big deal really, I'm just a little nervous as I've never done anything like this before). There's an "indention" in the hull that I could run the PVC along if I put it near the bottom of the seat, but the curve of the hull would still require that I affix the PVC to (through) the hull. The biggest problem running it in the lower location would be that I'd run into the splash rails that are riveted on the outside of the hull about 3/4 the length of the boat. (I can post a pic, but ya'll get the idea).

The GWs still seem, to me anyway, the cleanest installation option. My GWs are about 1" - 1.25" in diameter, so I'm thinking that I should have enough room to get by any screws in there now, or that the new shade might require. If I want the lights now (and I do), at a switch near the aft, I think I have no choice but to do the work twice...once now to fish the wires, and again later when I install the bimini shade (pull the wires, screw in the required hardware, re-run the wiring and hope that I don't run into any problems).

I can get by doing the work twice if I attach the light to the bow, but don't run the wires through the GW (or anywhere really) at this point. I can p/u a small 12V battery for $15-$30 (I already have an older, 33Ah, sealed AGM that I could swipe from another project to use as needed) and just use clips to attach the wires to the battery as needed (heck, they're only there for night use, being underway or adrift). It would be a little bit of a pain to move from aft to forward every time I'd have to turn on/off the lights, but since I don't fish THAT MUCH at night, it would just be a minor inconvenience for the time being.
 
Here's a thought...

Run your wires through the gunwale as you please. Do it right now and set up your navigation lights. Then, when it's time to install the bimini top, disconnect the wires from the front or rear, hook them to some electric fence wire or other strong/skinny wire, and pull out the wires out pulling the electric fence wire into the gunwale. This will leave your gunwales free enough to screw your bimini mounts into the boat without harming the electrical wire. Then, repull the electrical wire through and hook your lights back up. Simple, easy, and stealth.
 
SOLD! That's what I'll do! :mrgreen:

Just to be on the safe side I'll drill the bow hole first and see if I can fish all the way aft :wink:. That way, for whatever reason, if I can't fish past the existing screws I won't have an unsightly hole in the aft as a constant reminder of failure :evil:. (Of course, I won't give up that easy, I'll start removing screws as necessary to see if I can get past each obstacle that's currently there.)

I'll start gathering the proper wire and grommets this weekend, and post pics of the chaos as it ensues... :roll:
 
One more thing... :?:

Any suggestions on the gauge of marine wire I should use?

The only thing that would be connected to this wire run would be the bow nav lights (the light I bought has a single 10W bulb, 12V of course), and possibly a Blue Water LED for a bow seat storage area mod that's on the long version of my to do list (but that might end up being a separate run/switch...too early to tell).

Thanks everyone for contributing, it's really helped me converge on the best way to mod these darn lights!
 
The gunwale seems to be the best option for our Ouachita vees (mine's a 16DSV).

"If you can pull the floor you could run conduit down one of the keelsons."
This option is not an option on the Ouachitas like we have. The keelsons are all exterior (riveted on) and the ribs ate flat to the floor all the way across.

BTW...what kind of rubber matting is that? I was thinking of using the horse stall mats that Tractor Supply sells and just cutting them to fit between the ribs. The mats are 3/4" thick, so that should just about eliminate the rib height and provide a fairly flat floor surface except for the front section of the boat in the vee. I may make a floor board for that area and place a mat on top of that...time will tell.
 
Hey there, just noticed your post...I'm out camping/fishing/boating this weekend but will get back to you after.

Another Ouachita owner, eh? We'll have to swap some info about our crafts.
 

Latest posts

Top