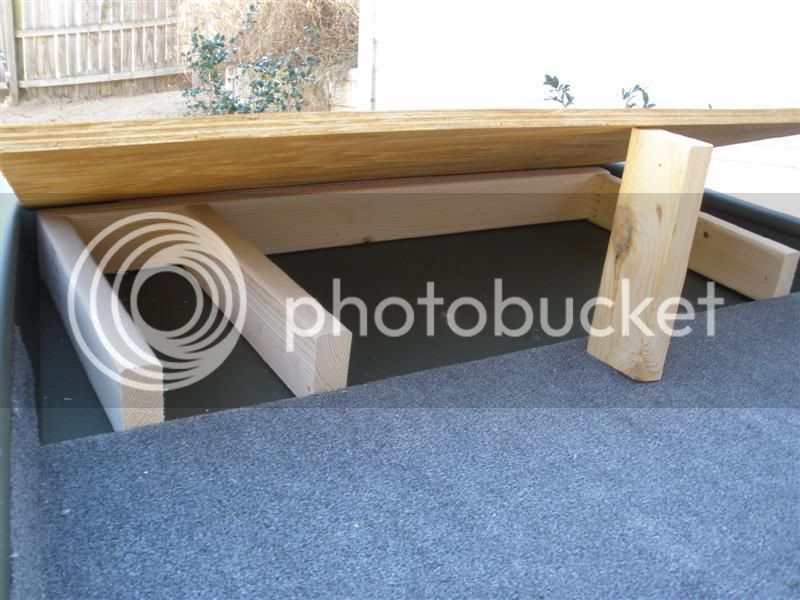
First look at front deck framing

TinBoats.net

Help Support TinBoats.net:

This site may earn a commission from merchant affiliate links, including eBay, Amazon, and others.

poolie

Well-known member
Joined
Sep 28, 2008
Messages
1,325
Reaction score
0
Location
Hiram, GA
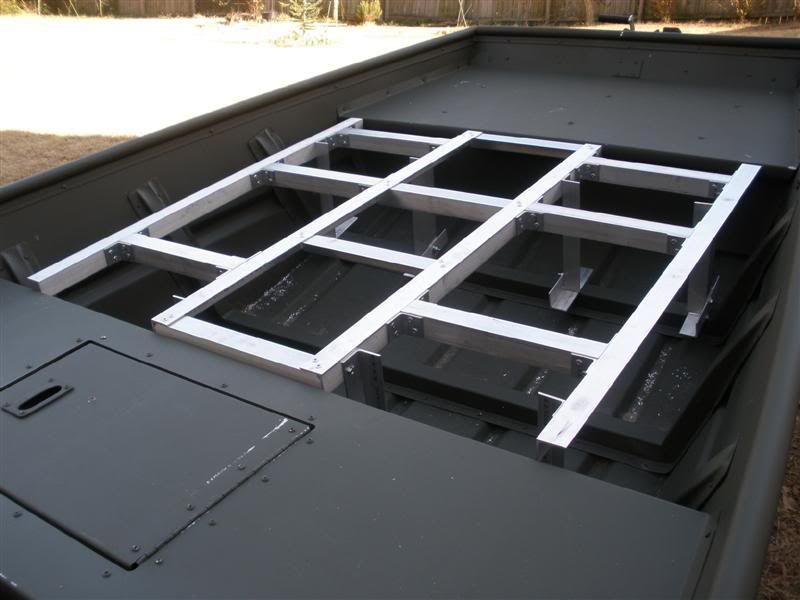
After building the frame in the basement, I finally have it sitting in place for measurement of the legs that will go down to the the boat's cross bracing. The two longer angles are just temporary and are holding the frame in the plane that I want the floor to be in.

Initially I was going to extend the floor along the same plane as the middle bench, but didn't like that it would have created about a one inch step where it intersects with the front bench and it seemed to be pointing 1 or 2 degrees downward (which could have just been an illusion). Now it will be one continuous floor from front to the back side of the middle bench. I'm going to remove the existing hatch door and move it up on the deck so that I will still have access to the LW.

More to follow...

Poolie
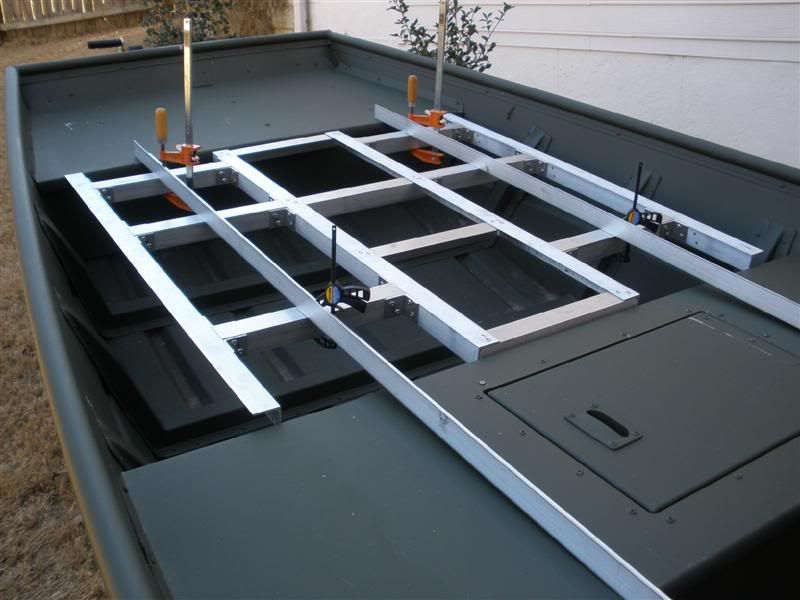
boat_framing1.jpg
 
Looks like that things gunna be sturdy. What did you coat the inside with?
 
poolie said:
That's just the standard dark green paint that came on it.

:oops: Geeeez. I need a new monitor. Looks black to me. i thought it may have been one of the bed liner products.
 
Sweet! I'm impressed... Are you going to have hatched in the front deck at the 2 largest square openings on each side of the middle bracing?

What are you going to use around the lip of the LW when you take the hatch off? I'm trying to figure out how you are going to keep it sealed...
 
russ010 said:
Sweet! I'm impressed... Are you going to have hatched in the front deck at the 2 largest square openings on each side of the middle bracing?

What are you going to use around the lip of the LW when you take the hatch off? I'm trying to figure out how you are going to keep it sealed...

Yep, going to hatch the middle openings on either side. That should give plenty access to the underside.

The built-in LW is pretty lame so will just be using it as storage. Maybe a nice place to keep the Mountain Dew's cold :) If and when I get around to tournaments I'll build an external LW like you have.
 
NEED SOME ASSISTANCE...I'm looking to do the same type of thing to my boat, but I was originally thinking to use green treated 2x4 and ripping them in half (1 byes). I see the use of angle iron quite often now. Does anyone know if the weight is a big difference? I'm sure the cost is a lot different. I'm in the process of scapping glue off the sides and cleaning the outside now but will be working on the inside real soon. Input would be great since this is my first mod to an aluminum boat for me. I will get some pics up soon since everyone can get a better idea with that.
 
wildeman said:
NEED SOME ASSISTANCE...I'm looking to do the same type of thing to my boat, but I was originally thinking to use green treated 2x4 and ripping them in half (1 byes). I see the use of angle iron quite often now. Does anyone know if the weight is a big difference? I'm sure the cost is a lot different. I'm in the process of scapping glue off the sides and cleaning the outside now but will be working on the inside real soon. Input would be great since this is my first mod to an aluminum boat for me. I will get some pics up soon since everyone can get a better idea with that.

Welcome Aboard!

I wouldn't recommend using treated lumber - the copper in it will corrode the aluminum after time. There is a difference in the weight - but unless you use the aluminum sheet for decking, I doubt you'd be able to notice much difference. I used 2x2's for my bracing and support - it's not light, but it's definitely not heavy either. Aluminum is the way to go if you can afford it, but now is a good time to get it.
 
Welcome Aboard wildeman!

As Russ mentioned you want to stay away from the pressure treated wood. Just use regular 2x2's and give it a nice coating of water sealer. Aluminum is the best way to go, but as mentioned is a lot more expensive and to really see a big weight difference you need to do both the framing and decking in aluminum. I'm going with a wooden deck, but since the framing should be pretty strong, am going with a 1/2" ply instead of the 3/4" that most use (only time will tell if it was a good decision). I plan on weighing all of the material before attaching it to the boat so will have some weight numbers later in the build.

There are plenty of nice boats here modded out of wood, so don't feel like you're the odd man out not going aluminum. Be sure to post us those picture. We love looking at what others are building.

-- Poolie
 
Poolie, looks awesome! I wish I coulda afforded to go aluminum. But you guys know how shoestring budgets are.

Wildeman, I framed my benches out of 2x2's and I used 2x4's. Cost effective and still fairly light in weight.
 
The framing turned out rock solid even if I did cut a couple corners towards the end. The weather will be warming up here in Atlanta very soon and I had to take my perfectionist hat off and just get it done.

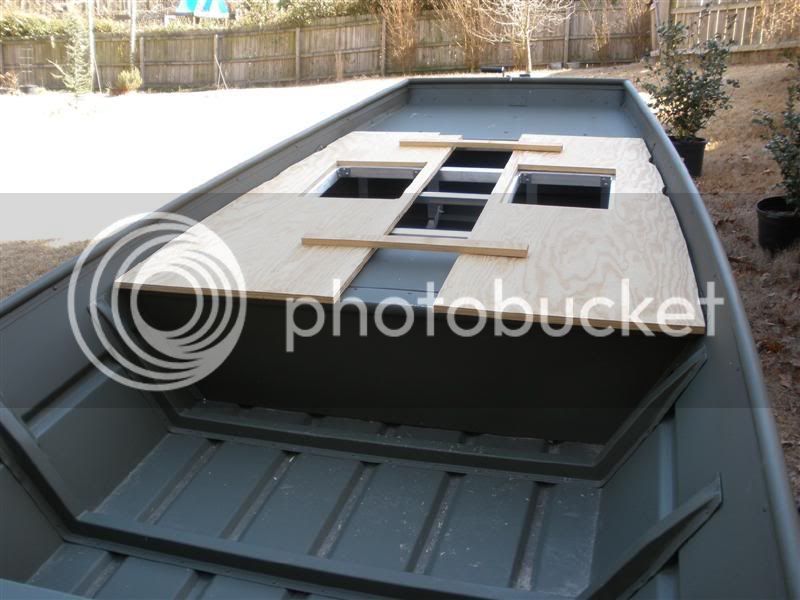
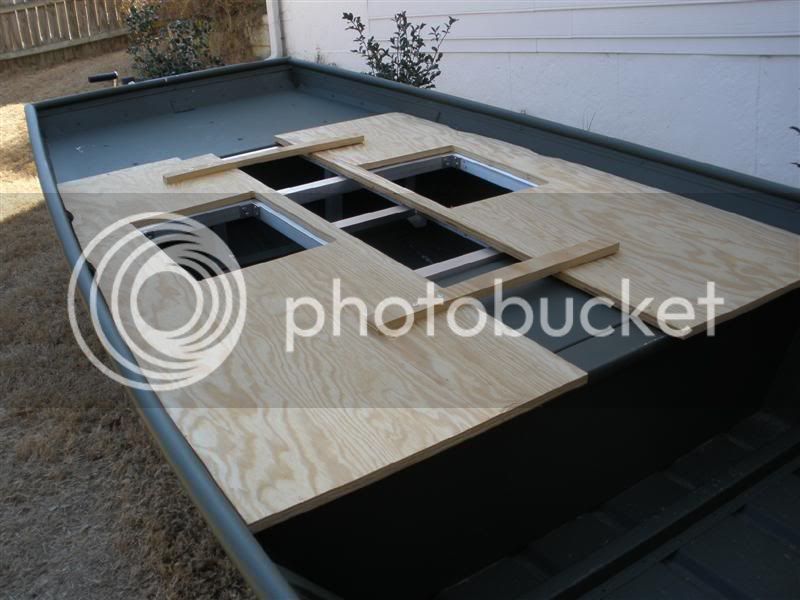
Was going to build the deck template out of cardboard, but didn't have any pieces that large, but did have a couple pieces of plywood from an old workbench so used that instead.

The front portion of the deck (where there's no plywood in the picture) where the TM will mount will be raised up to be flush with the top rails so I'll have about a 3 1/2" slot that I can use for storage.

Last week I was pondering whether to wrap the carpet under the deck and staple (after gluing of course) or to just trim it to the edge of the deck. After looking it over with the deck template in place I think I have a better idea. I think I will cut the side edges long and use velcro strips to run the carpet up the 3 or so inch high side walls. That should provide a nice finished look.

I'm finally making progress.

-- Poolie

framing-final.jpg


deck-template-2.jpg


deck-template-1.jpg
 
Lookin Good! :beer:

Are you using square as well as angle? It looks like the areas around your hatches are square because of your angle bracket placement.

Also, the legs at the front of the boat. I assume they're are cut at an angle where they meet the rib?
 
Brine,

You're correct. I'm using both angle and square, but could have done it in all angle. It just would have taken longer to notch the angle to make everything line up.

Yeah, the legs were all cut to fit... and each one was a little different. I also decided to go with bolts at that connection so that if needed I could remove the deck and framing as one piece.
 
Looks awesome! Are you still going to work on the middle bench (livewell) and use it for storage?
 
russ010 said:
Looks awesome! Are you still going to work on the middle bench (livewell) and use it for storage?

Thanks for reminding me. I need to go ahead and mark the placement of the hole in the template. Much easier to do there.

I'm getting excited now.

-- Poolie
 
I also found something that will really polish off the carpet install, but it's stupid kind of expensive. Check it out at https://www.instabind.com/ It's a DIY binding to finish off the edged of your carpet and prevent raveling. At $100 for a 50 ft roll of the marine quality stuff I doubt I'll go with it, but then again I've done crazier things.
 
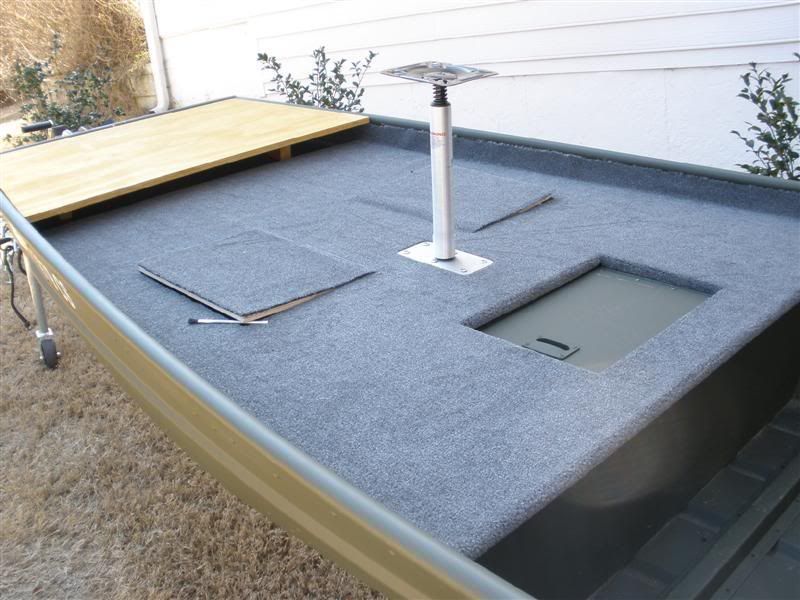
I'm sure most everyone in the Southeast was our fishing today... except me that is. I had a big project being installed at work this weekend and had hang close to the house in case the @#$% were to hit the fan. Soooo... instead I got a lot done on the boat. I'm actually quite please with the results. This evening I glued the carpet to the raised front and cut the floor out for the lower middle deck.

Will be chained to the house again tomorrow so should get most of that finished, minus the rear seat are. Haven't done anything with that area yet. Next comes the wiring. Friday a box of wires, switches and breakers showed up at the door so with daylight saving kicking in tonight I can start working on it in the evenings. Woo Hoo, will be ready for the lake before I know it.


boat_carpet1.jpg
 
Also, I hinged the front deck too. I think that will come in handy for wiring etc. Normally it will be secured down though. This was the only place where I didn't use aluminum for framing. Why? Just because a 2x4 was the right height. It's also the only place where I used 3/4" plywood. Wanted it stronger for the TM. Otherwise I used 1/2"

hinged_front.jpg
 

Latest posts

Top