Lawdog's Alumacraft 1648 first duck boat project

TinBoats.net

Help Support TinBoats.net:

This site may earn a commission from merchant affiliate links, including eBay, Amazon, and others.
Froggy said:
Looking good, I lke to see a picture of your new winch set up, I kind of have the same problem.

Froggy, the 'Y-stop' part didn't pan out. When I put it in, it was too big vertially and it hit the winch strap. I ended up simply relocating the anchor rope and now it's absolutely fine. The eye cleat area is fine for loading and unloading now with the rope out of the way.

This is the only pic of the area I could find quickly. I also added the spare tire last night.
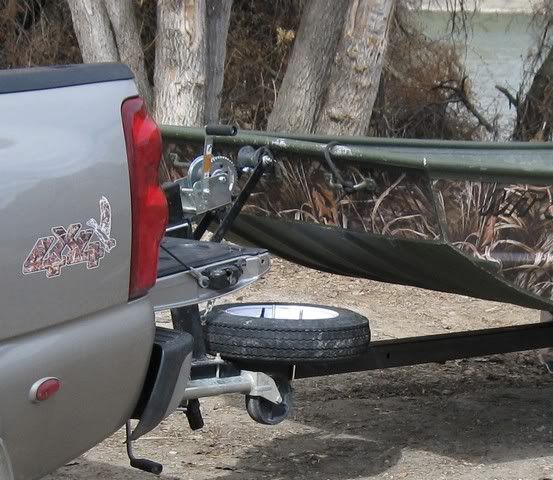
bowarea.jpg
 
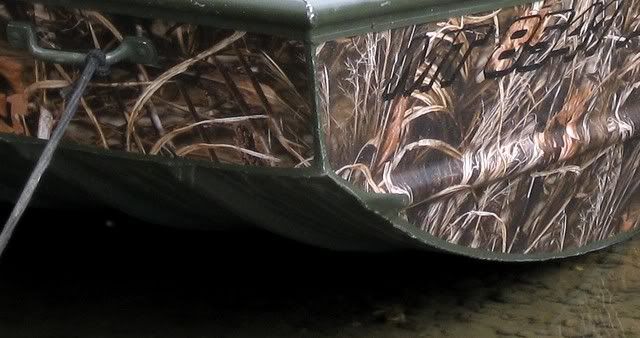
For what it's worth, the clad held up fine. Not an issue anywhere on the boat that I could find.

Here's a tight shot of the bow and side, where I would expect a problem if there was going to be one.

bowcladtight.jpg
 
Glad to see your camoclad is holding up. It looked like the stuff wasn't gonna work good for boats from what I saw in another post on here. What did you do to prep the boat prior to putting on the clad? The numbers look awesome!
 
It will probably be fine so long as it's not getting banged up. It doesn't look like Lawdog wrapped it around any corners and he stopped well above the hull seam so it should be good to go so long as he doesn't sideswipe many trees or rocks.

Lawdog, when are you doing the inside? :lol:
 
basshunter25 said:
Glad to see your camoclad is holding up. It looked like the stuff wasn't gonna work good for boats from what I saw in another post on here. What did you do to prep the boat prior to putting on the clad? The numbers look awesome!

I detailed everything I did step-by-step in posts on page 2. If you go to their website, you can download or view the PDF of installation instructions. We followed them to the letter, with one exception. In short, clean it well. Then, we wet sanded the whole surface with 2000 grit paper to smooth off any issues. Third, remove any wax and grease with Dupont Prepsol or an equivalent. Lastly, although not called for, we used a product called "Special Cleaner 582" immediately before application. Again, see post above for more info on that. This last product is supposed to improve adhesion and is used in the auto body/detailing industry.

As for the room at the edges that we left, this is expressly called for in the instructions. Camoclad.com has an installation video too. It is excellent. In it, the guy says to leave about 1/2 inch at your exterior edges and this will help resist peeling issues.

I love how the numbers turned out too. I ordered them from waterfowldecals.com. Spendy, but they're nice. They're a 3M vinyl product too. They included a third sheet, in case I ever develop a problem, I'll have an extra.
 
Quackrstackr said:
It will probably be fine so long as it's not getting banged up. It doesn't look like Lawdog wrapped it around any corners and he stopped well above the hull seam so it should be good to go so long as he doesn't sideswipe many trees or rocks.

Lawdog, when are you doing the inside? :lol:

Man, you are a skeptic! :) 1) Already sideswiped it good into some Russian Olives. 2) Sand and rocks are part of life when you run jets in rivers.

I'm telling you, this stuff is tough. We'll see how it lasts... fingers crossed.

Inside? Not soon... $$$. :(
 
No, not a skeptic. :lol:

There are many trucks in this area with the clad accent kits and several have it on boats. It can take a beating but it will eventually have chips, rips or tears in it. Hopefully, it won't start to peel on you. It may be an easier route the first time to a fully camo'd boat but there is no way to touch it up when the above happens and if it begins to peel, you are really in for it. My b-i-l's, f-i-l owns an outfitter service / outdoor real estate agency and had his Yukon custom wrapped with it. He's had it on for about 3 years now and it has not worn very well. When you get down to it, it is only vinyl after all.

I tend to keep my boats for a long time so paint is much easier to handle down the road if and when it needs to be touched up or refinished.

Just personal preference.

So long as you are happy with it and it suits your needs, that's all that matters.
 
The clad looks great, so how did you get the rivets so perfect? Just lots of time on each rivet or something special like a heat gun?

On the bow eye; You want the bow eye to be below the bow stop with the winch rope under the bow stop, like you have it. This is for safety in the vent you are rear-ended, or rear-end someone else, it helps to keep the boat from becoming airborne. You can also attach an additional safety chain from the bow cleat to the trailer tongue which will help even more. If it is above, like mine is currently, you will have a problem loading and unloading. What happens is the bow eye catches on the bow stop when the stern floats and hangs on to the boat; very frustrating to load and unload. Mine will be changing soon. :evil:
 
Well, it's been a long time since posting. Life intruded.

We have a little lake nearby that is electric motors and paddles only. One trip out with paddles and a trolling motor was in order. I added a Minn Kota Endura 50 trolling motor, a Minn Kota Power Center battery box and got that all up and running. It tools around pretty good. Pics soon.
 
Lawdog- is your motor 25hp at the engine, or at the pump? I also have a 16x48 that I'm putting a 40hp (at the engine around 25hp at the pump) jet on and I'm kind of worried about how much power or lack of it will have.
 
Howdy. I have a Merc factory jet which is rated 25 at the jet pump itself. The lower unit is made by Outboard Jets and they outfit a variety of motors by several manufacturers--Merc, Yamaha to name a couple.

Mine runs eastern Montana rivers with three guys and full load out for duck hunting just fine--two labs, dozens of dekes, three guns, three blind bags, etc. It is not a sportscar, more of a tank. I did four guys once... it was an adventure. Two guys zips pretty good. 23 mph with current, about 17 against. Only drops a couple mph adding the third guy. I run a lot in the dark in November through January, so speed is not always desired in any event. One advantage of the smaller motor I have found is that it keeps the weight of the whole deal very manageable.
 
Rat said:
The clad looks great, so how did you get the rivets so perfect? Just lots of time on each rivet or something special like a heat gun?

On the bow eye; You want the bow eye to be below the bow stop with the winch rope under the bow stop, like you have it. This is for safety in the vent you are rear-ended, or rear-end someone else, it helps to keep the boat from becoming airborne. You can also attach an additional safety chain from the bow cleat to the trailer tongue which will help even more. If it is above, like mine is currently, you will have a problem loading and unloading. What happens is the bow eye catches on the bow stop when the stern floats and hangs on to the boat; very frustrating to load and unload. Mine will be changing soon. :evil:

Rivets: a little time and effort on each and a heat gun over all of it.

Bow eye: I moved the anchor line elsewhere and that solved it for me. I agree on keeping it where it is. I just let out some slack now at launch and give the boat a little shove and it clears away nicely.
 
Good looking boat it should get the job done. I had one a lot like this to duck hunt in Arkansas finnily wore it out. I now use 1648 war eagle with 40 HP


Write your reply...
Top