Joecaler
Member
Hey everyone I have been reading this site for a while now. I have learned a lot, but I'm sure I will still need help along the way. So here is what I am doing.
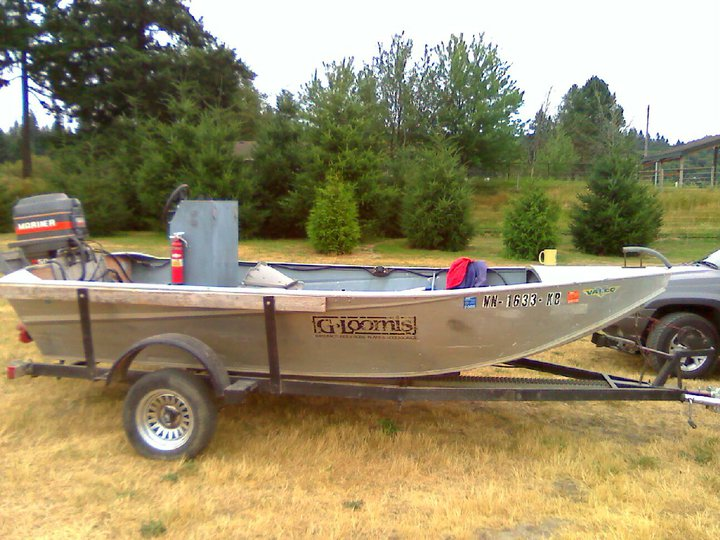
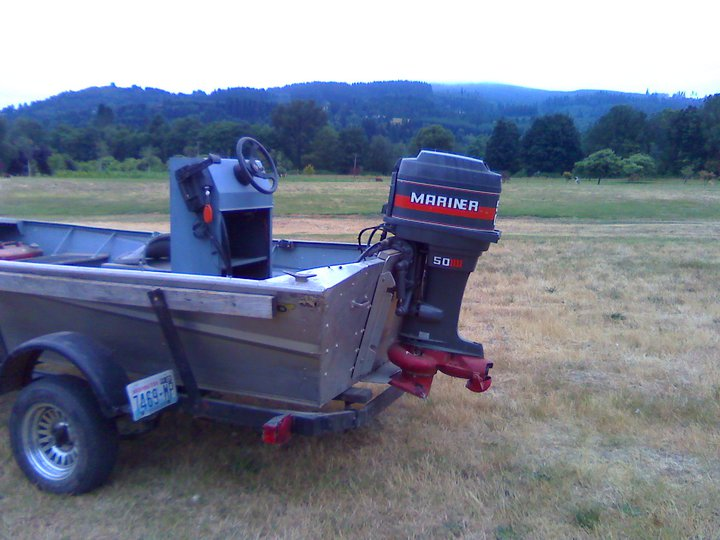
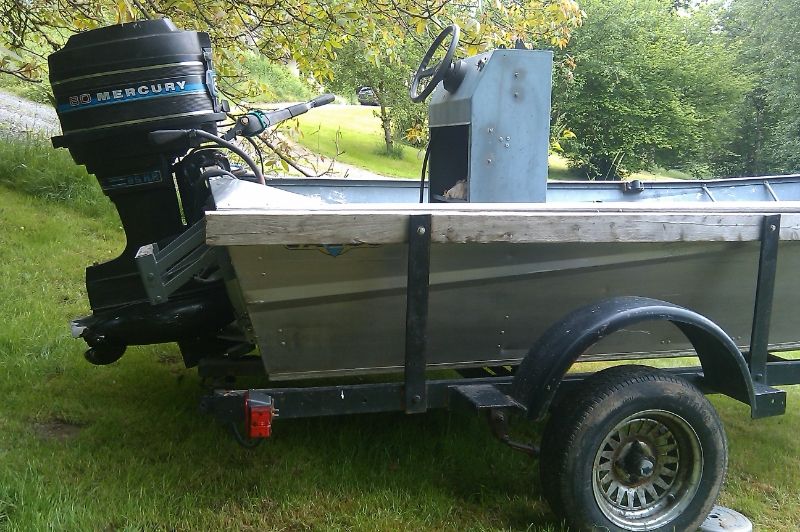
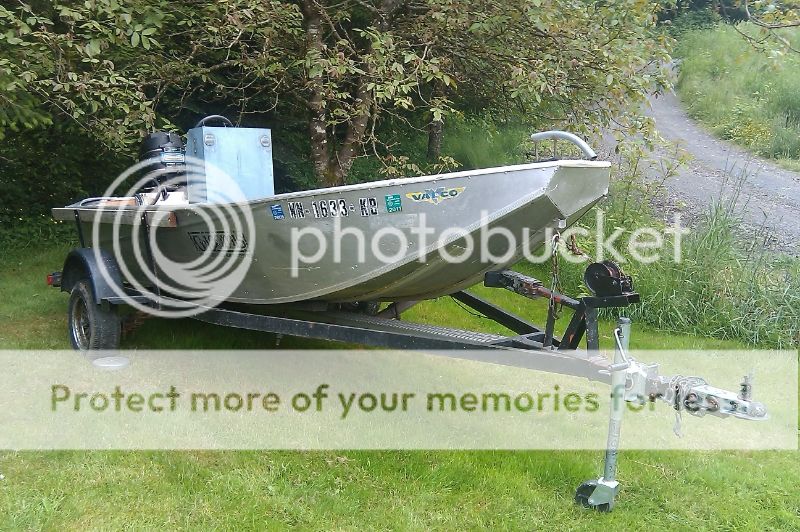
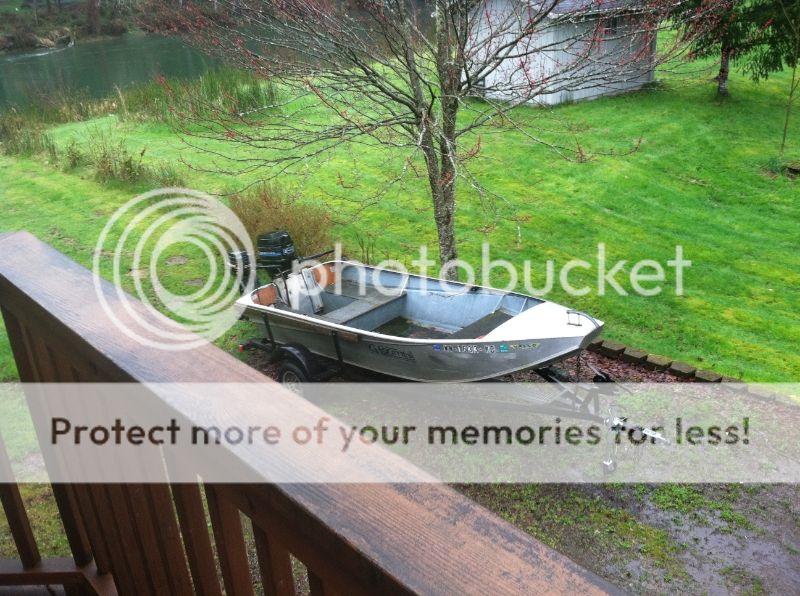
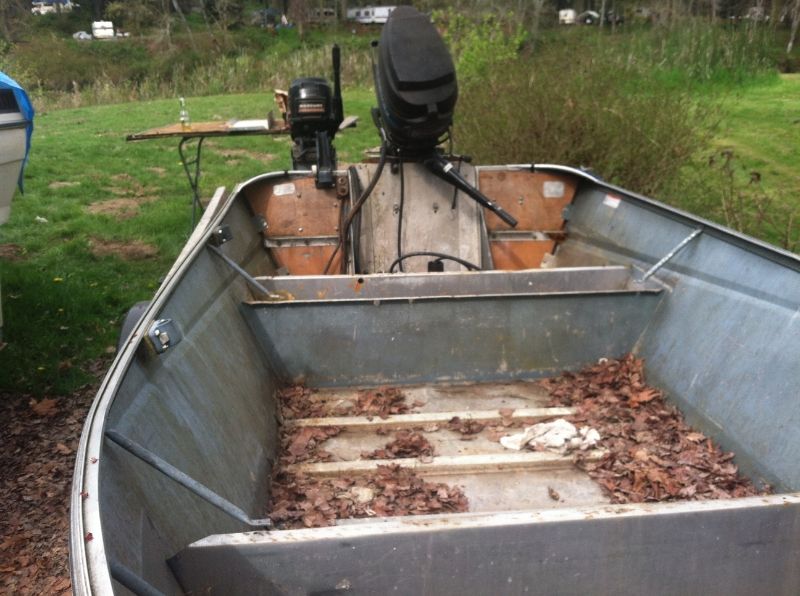
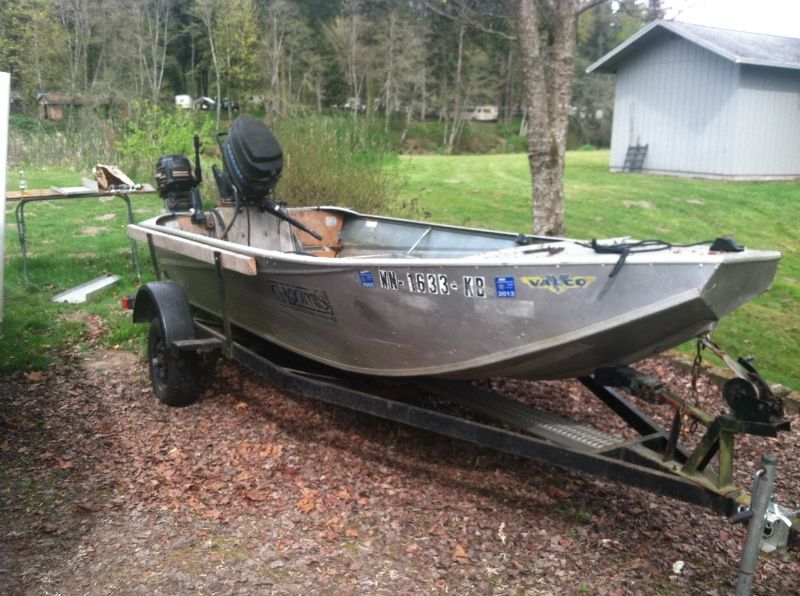
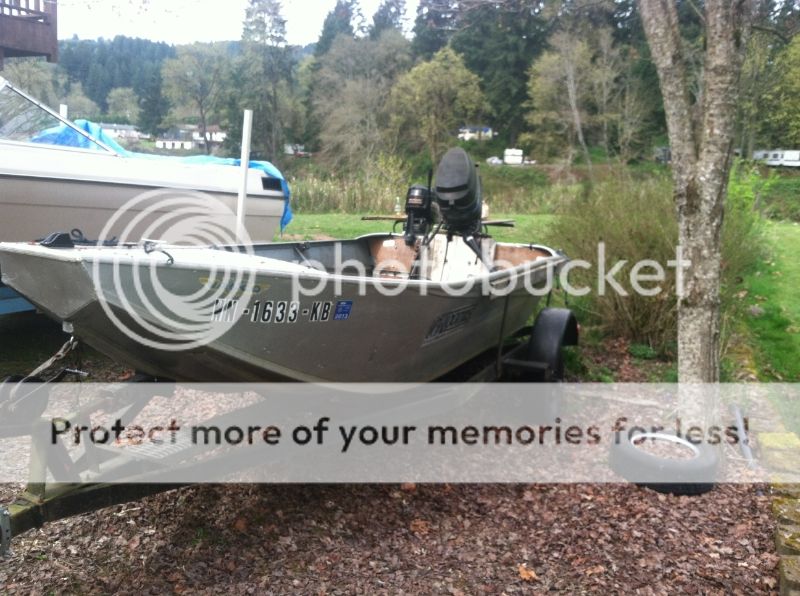
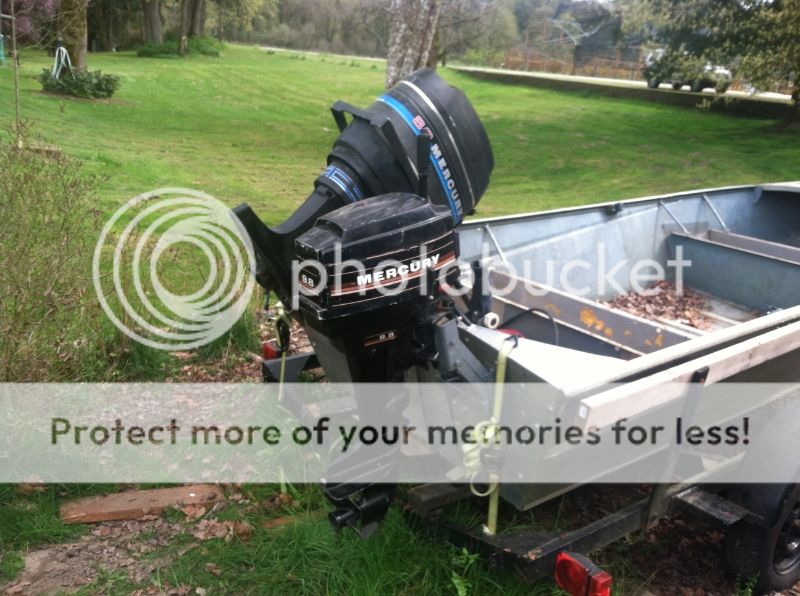
I started out with a 1979 valco semi v up front to a flat bottom. It has welded seems but the benches and chines are riveted. It does leak a bit not to bad though. (I plan to fix that) It is 14' 6" x 48' bottom. When I bought it, it had a mariner 50 jet with a center console. I lost a piston so the motor went away. I found a older 85 mercury jet (a little big I know, but I like the power really helps when I turn). It’s rated for 65hp that’s about what I have at the pump. I am looking to down size to a 65/45 jet though.
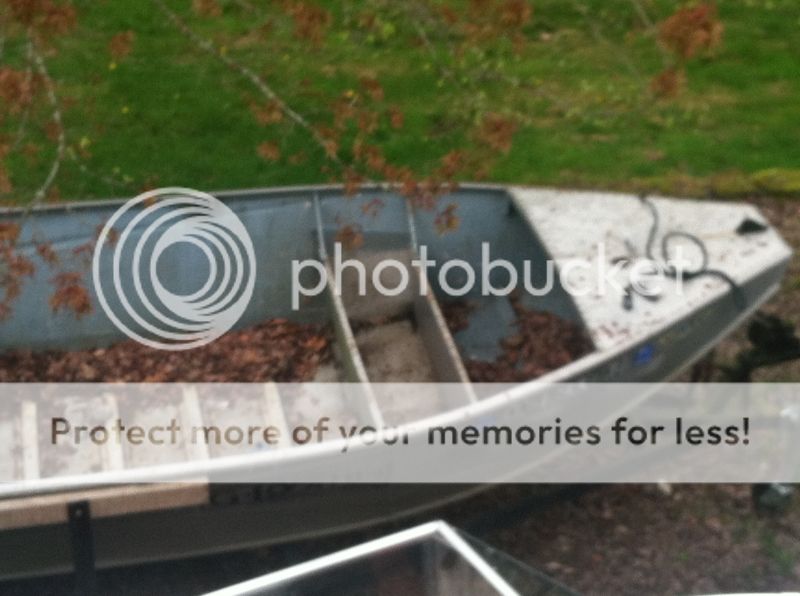
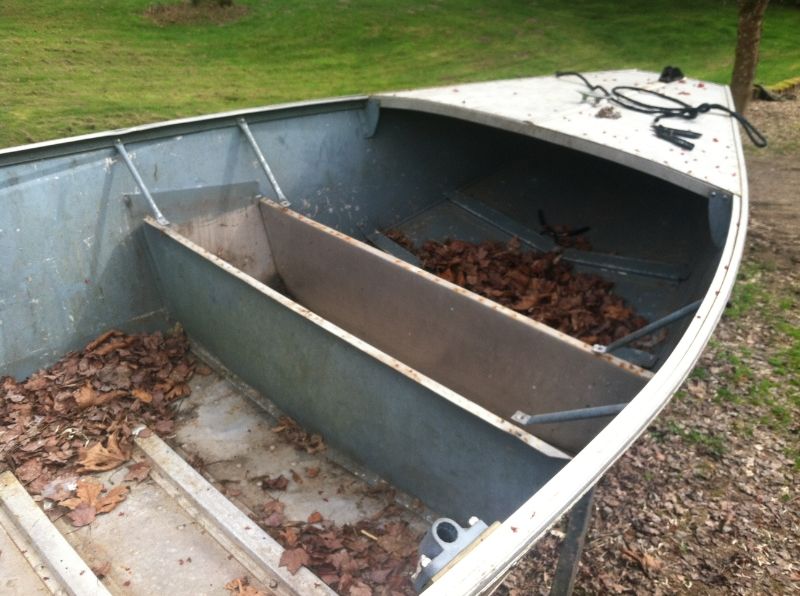
I do not like a center console with a jet so I took that out. It has a "U" shaped bench in back. The plan is to cut that out and turn the "U" the other way. I will make the sides a bit smaller than they were. I have taken the foam out of the front and back benches and floor. I might add it back to the floors but I need the space for batteries and fishing gear. In the benches I will add support back with bracing and building the new "u" shape. I will tie it all together and make it solid. This project will take me hopefully no longer then July.
I will need help with paint ideas. Outside stays the same just painting sealing the bottom.
The plan as of now.
_Buy 1x1 or something of the sort either scare or angle aluminum for making the benches and bracing
_New floors
_New carpet
_New bilge
_Battery Isolator/switch/tie down/ 2 batteries
_add navigation lights for night time anchoring
_Maybe a radio
_new Bilge pump
_New Gas lines run under floor
_Run all wires through PVC under floor
_Bait station built into side bench
_Weight station built into the other bench seat
_Redo rod holder mounts
_new anchor holder or a system where the anchor line will not rub the bow
X kicker and electric kicker
_cut and re angle and weld the bow roller on trailer.
X newer rims and tires for trailer
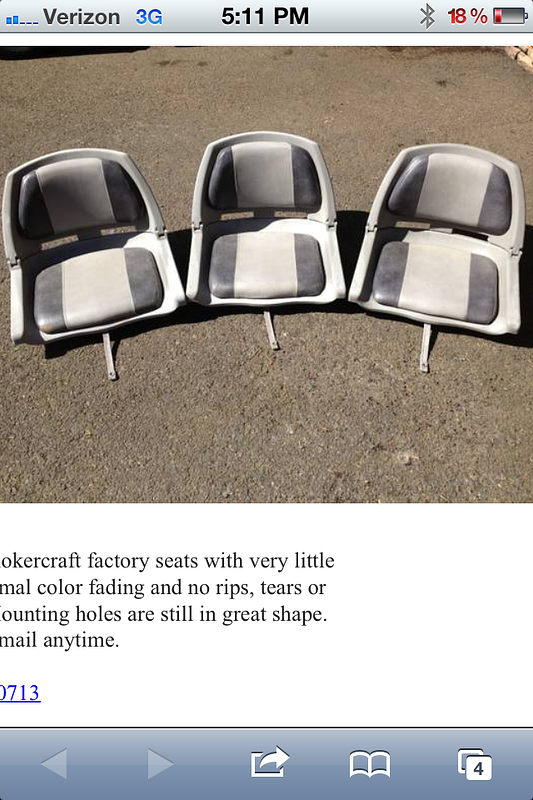
X newer seats
_Fix bad rivets
_Seal the floor with a bed liner or something? Maybe like rubberized under coating?
_buy plywood
_maybe cut middle chine 2 feet back from the back of the boat for a better water flow to jet.
_find a 65 tiller jet to replace the 85hp
_paint the inside of the boat
I know im forgetting stuff but I have a ton of phots of the progress so far. Thanks everyone and sorry if the spelling/grammer is not up to par.
I will add photos when im done editing in a few.
-Joe Caler
I started out with a 1979 valco semi v up front to a flat bottom. It has welded seems but the benches and chines are riveted. It does leak a bit not to bad though. (I plan to fix that) It is 14' 6" x 48' bottom. When I bought it, it had a mariner 50 jet with a center console. I lost a piston so the motor went away. I found a older 85 mercury jet (a little big I know, but I like the power really helps when I turn). It’s rated for 65hp that’s about what I have at the pump. I am looking to down size to a 65/45 jet though.
I do not like a center console with a jet so I took that out. It has a "U" shaped bench in back. The plan is to cut that out and turn the "U" the other way. I will make the sides a bit smaller than they were. I have taken the foam out of the front and back benches and floor. I might add it back to the floors but I need the space for batteries and fishing gear. In the benches I will add support back with bracing and building the new "u" shape. I will tie it all together and make it solid. This project will take me hopefully no longer then July.
I will need help with paint ideas. Outside stays the same just painting sealing the bottom.
The plan as of now.
_Buy 1x1 or something of the sort either scare or angle aluminum for making the benches and bracing
_New floors
_New carpet
_New bilge
_Battery Isolator/switch/tie down/ 2 batteries
_add navigation lights for night time anchoring
_Maybe a radio
_new Bilge pump
_New Gas lines run under floor
_Run all wires through PVC under floor
_Bait station built into side bench
_Weight station built into the other bench seat
_Redo rod holder mounts
_new anchor holder or a system where the anchor line will not rub the bow
X kicker and electric kicker
_cut and re angle and weld the bow roller on trailer.
X newer rims and tires for trailer
X newer seats
_Fix bad rivets
_Seal the floor with a bed liner or something? Maybe like rubberized under coating?
_buy plywood
_maybe cut middle chine 2 feet back from the back of the boat for a better water flow to jet.
_find a 65 tiller jet to replace the 85hp
_paint the inside of the boat
I know im forgetting stuff but I have a ton of phots of the progress so far. Thanks everyone and sorry if the spelling/grammer is not up to par.
I will add photos when im done editing in a few.
-Joe Caler