Hey all,
New guy here, I've been reading this forum for about a year now, but never posted. I love the projects you all have going on here, and if you've built anything on here, I've probably read it. So, I thought it's about time to contribute.
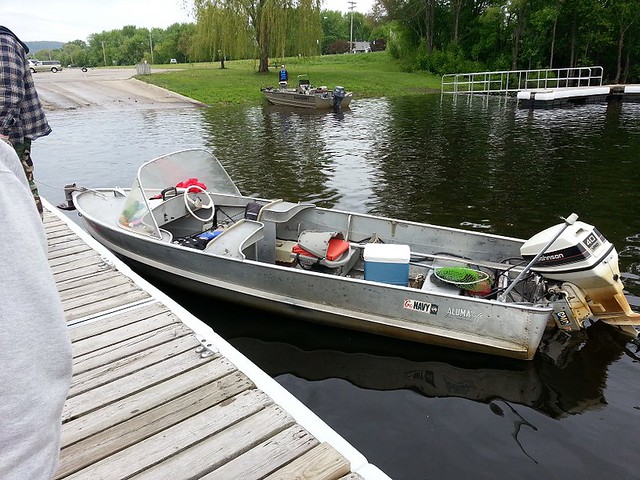
It all started last spring when I was at a boat ramp on the Mississippi River and saw this awesome piece of tin pull up to the dock:
2013-05-25 10.36.12 by Photo 144, on Flickr
I knew right then I needed to find one. So I scoured craigslist for a month or two and found one that looked appealing, it was about 2 hours from home, but I went there immediately. It looked in decent shape. I heard it run, hooked it up and pulled it home for $1200. The PO was a shadetree mechanic type, so everything worked fine, but the looks left something to be desired. As I was pulling out I got the "Oh I think I have the windshield in a brush pile in the back 40"....and he did.
Specs:
1958 Alumacraft Deep C - 15'
1976 Evinrude 40hp long shaft Model 40655A
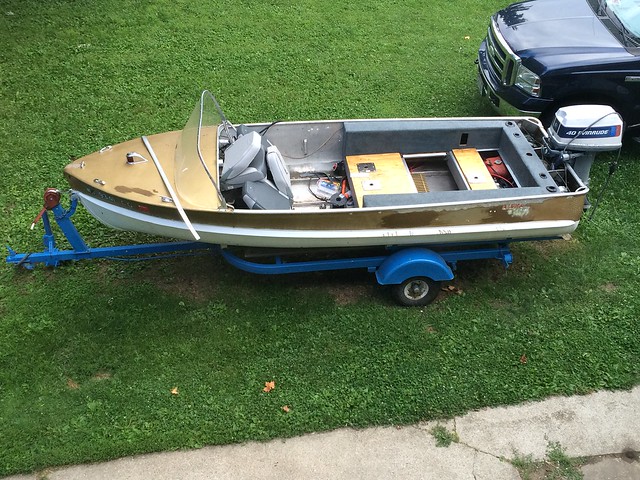
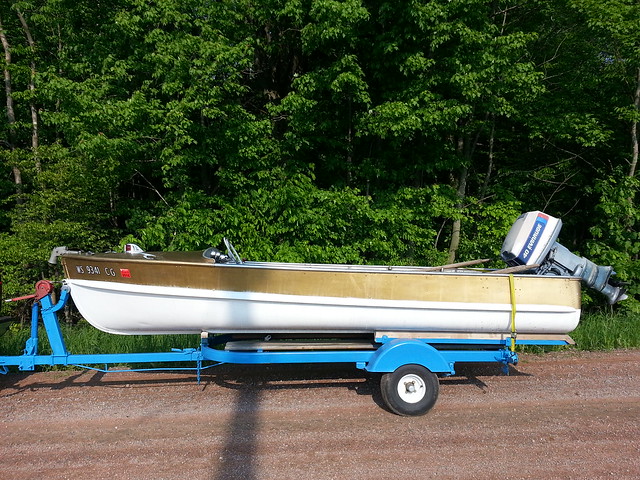
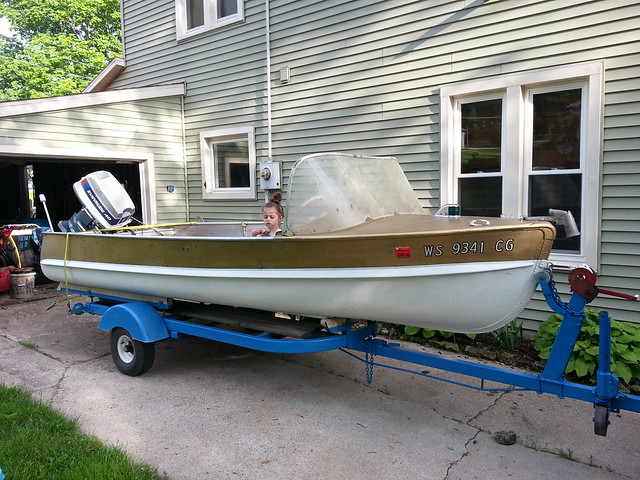
This is the day I brought it home:
2013-06-10 08.37.34 by Photo 144, on Flickr
2013-06-11 18.39.05 by Photo 144, on Flickr
I started doing some research on it, and that's when I found tinboats. I decided to run it as-is last summer just to decide how I liked it, and what sort of amenities I wanted. I love fishing, but the wife said if I wanted her to come along, she needed a place to sun tan on the boat. So, I'm trying to get a best case scenario for the two. I dug through pretty much every build on here to get the basic newbie questions sorted out (used the 'search' function a lot, and didn't post a "hey I'm new, tell me what I should do" topic....that drives me nuts).
Here's the original brochure, just for fun:
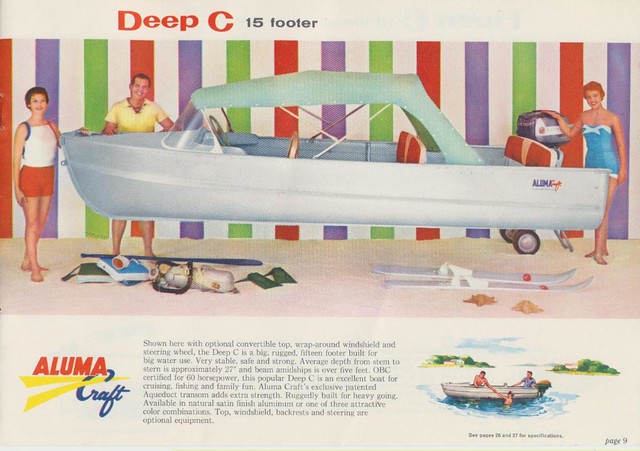
Alumacraftb58009 by Photo 144, on Flickr
I decided I wanted a carpeted rear deck, wide gunwales to mount rod holders/downriggers/beer holders/speakers, and nice moveable pedestal seats. Also, I live in the middle of BFE so I needed to get most of my basic supplies from a local hardware store, or the occasional trip to Menards in the big city.
So, this spring rolled around and I dragged Old Gold out of the snowbank and got to work. That was four weeks ago.
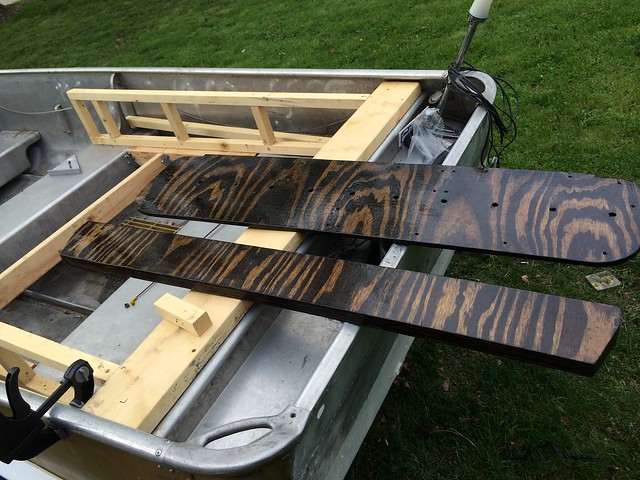
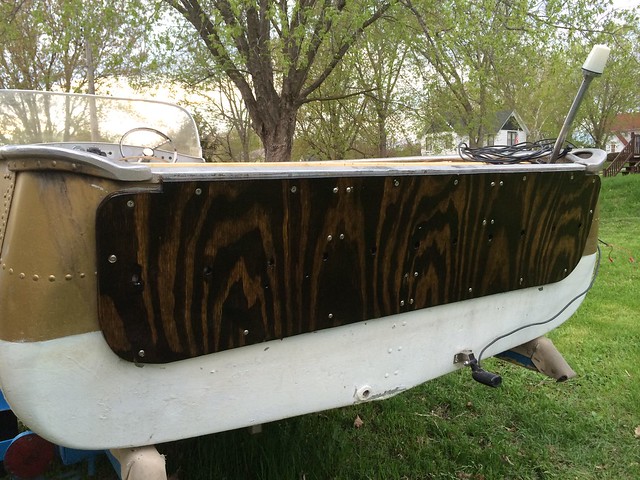
First step was cleaning it out, removing the motor and replacing the transom. The transom wood was rotten inside and out, so I replaced it. I used standard exterior plywood (non-treated, of course) I got BC grade (one side sanded with no large knots), it was a little more pricey, but I didn't want a bunch of knot holes to fill, and wanted a halfway decent appearance.
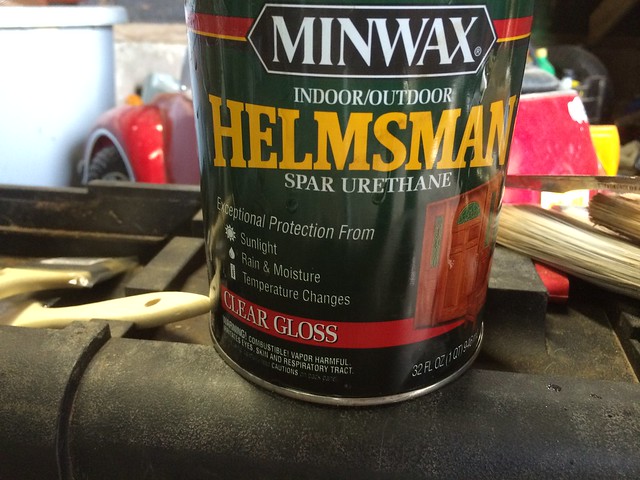
For the external part of the transom, I used 1/2", cut to size and for the inside part I used 1 piece of 3/4" and one piece of 1/2" wood glued together. Both got stained and 6 coats of spar varnish. Then attached with stainless steel hardware, silicone on all the holes.
2014-05-04 11.59.17 by Photo 144, on Flickr

2014-05-04 14.05.43 by Photo 144, on Flickr

2014-04-13 17.37.45 by Photo 144, on Flickr
2014-05-08 10.39.17 by Photo 144, on Flickr
2014-05-15 17.15.15 by Photo 144, on Flickr
2014-05-15 19.35.42 by Photo 144, on Flickr
2014-05-15 19.35.48 by Photo 144, on Flickr
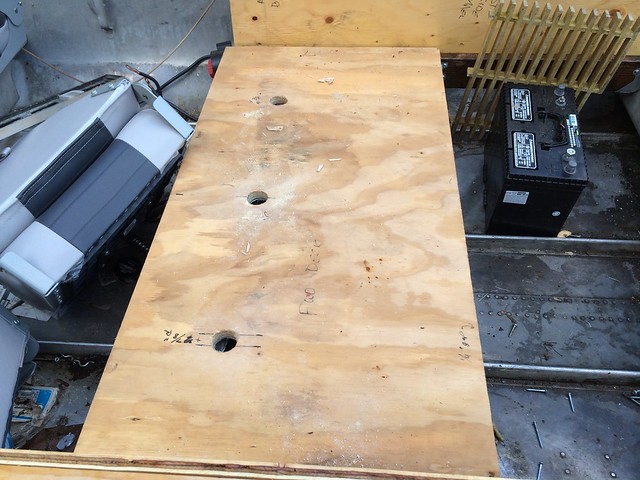
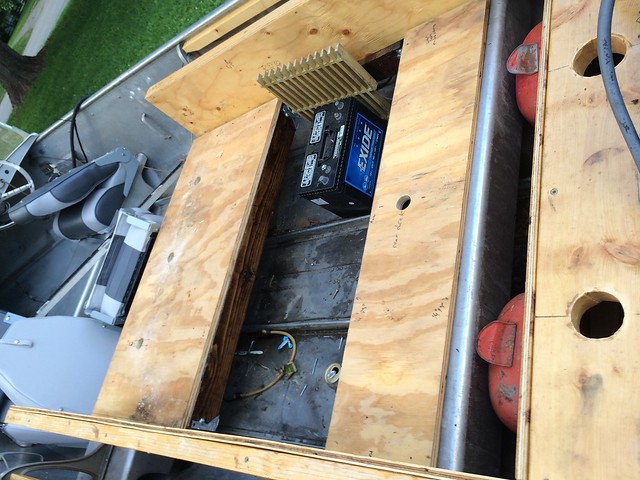
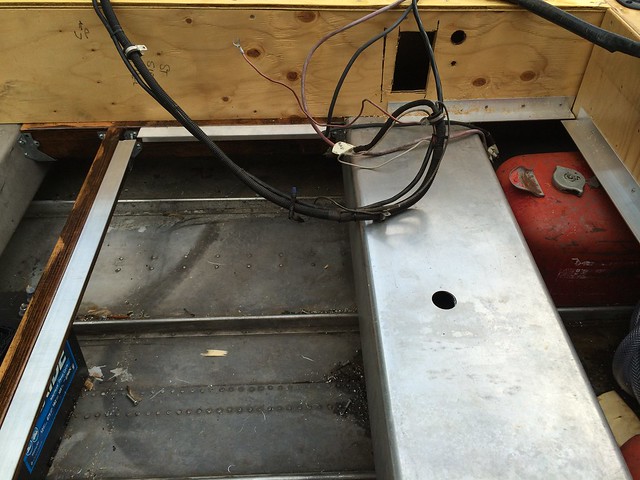
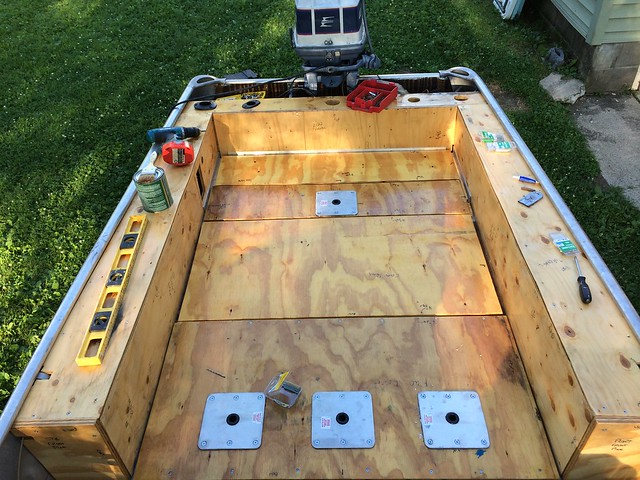
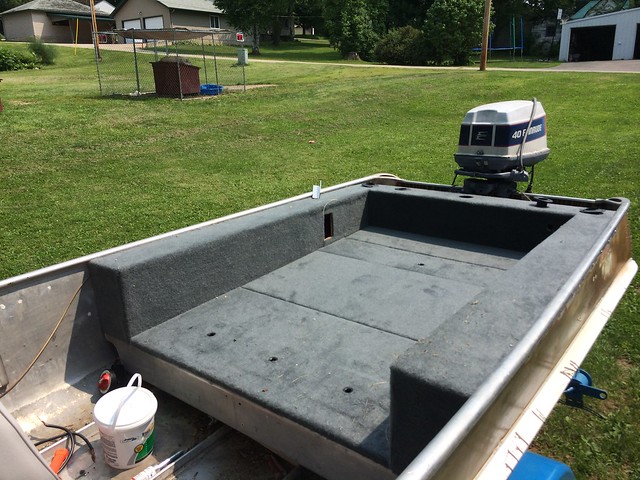
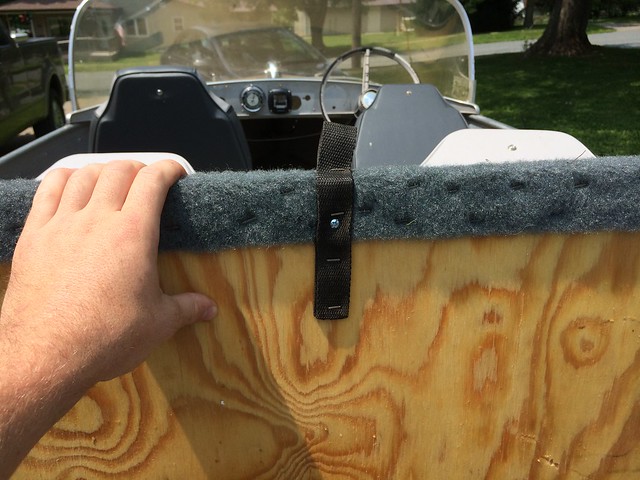
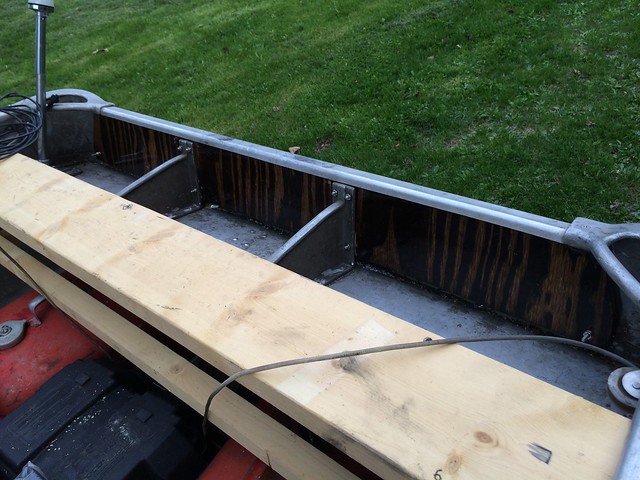
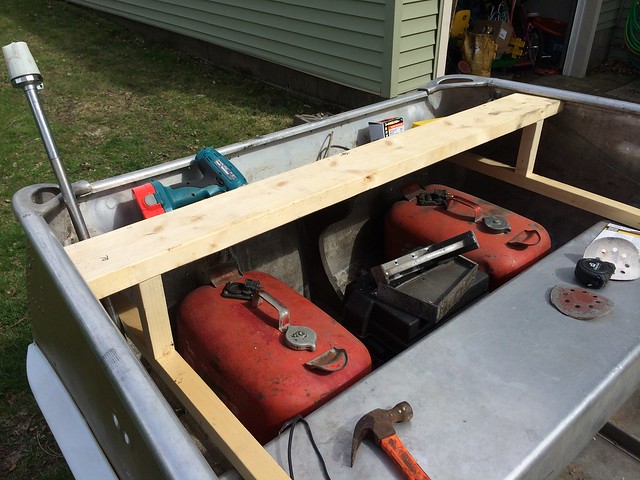
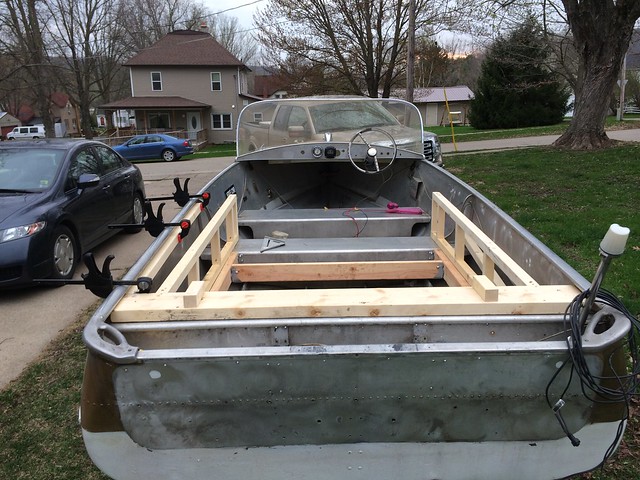
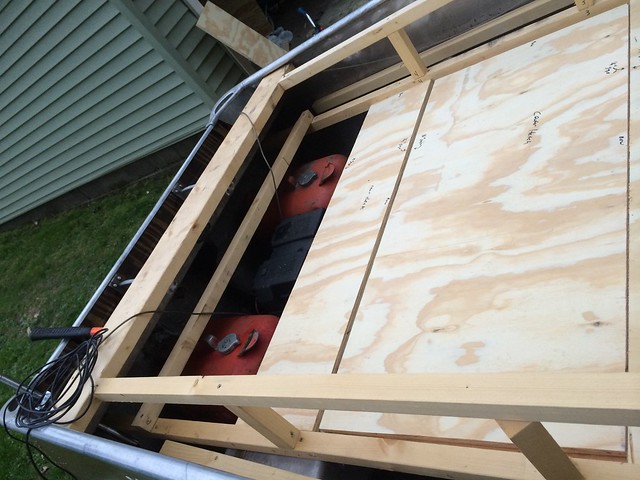
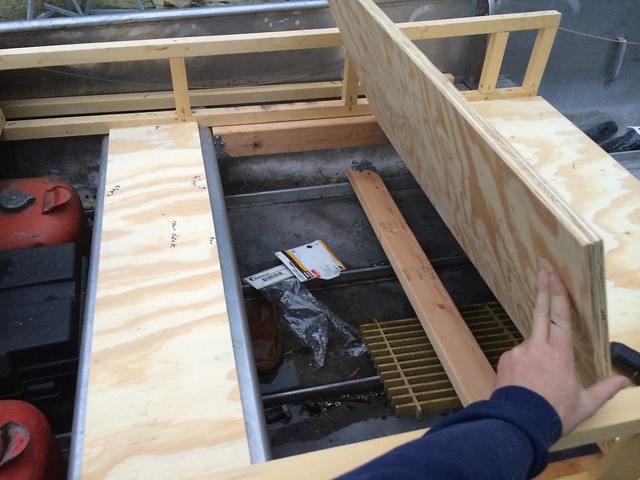
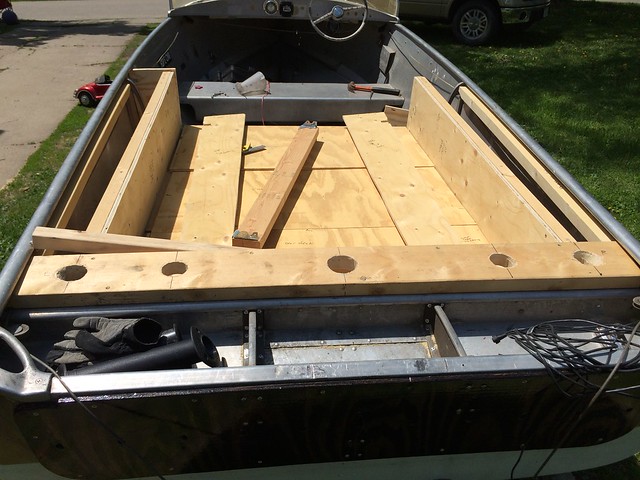
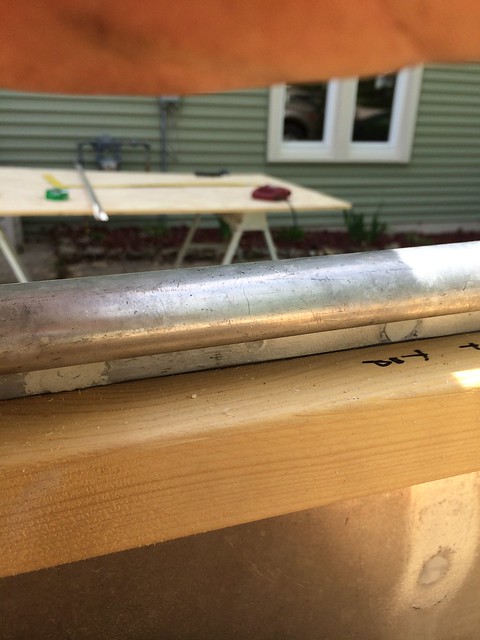
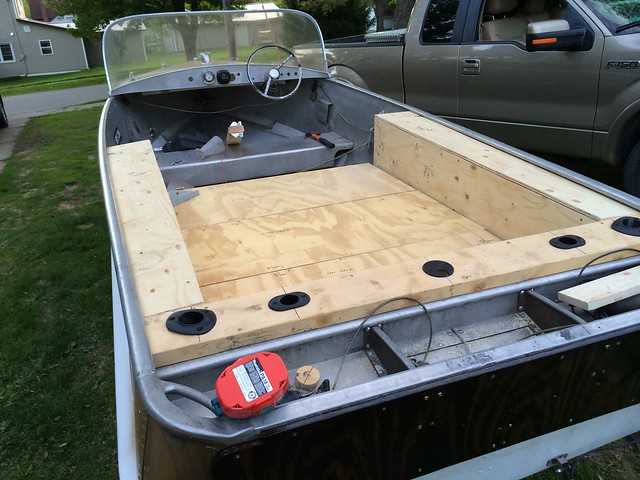
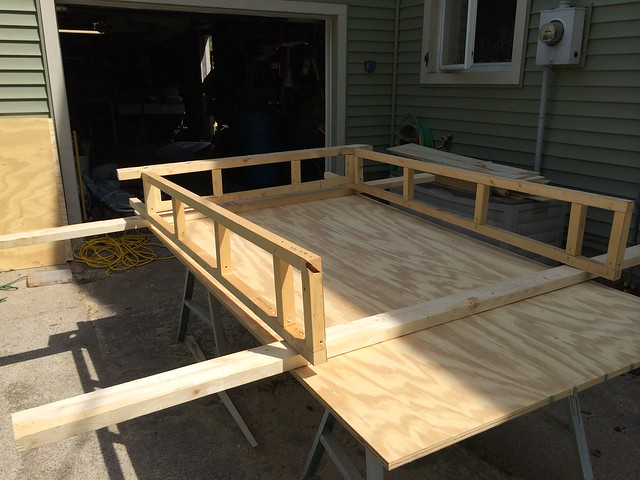
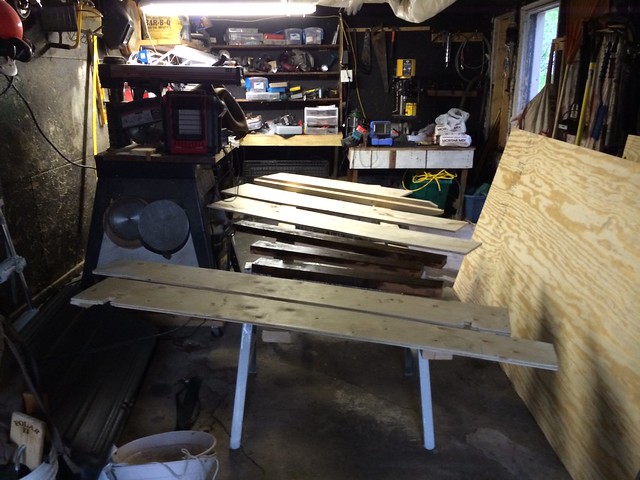
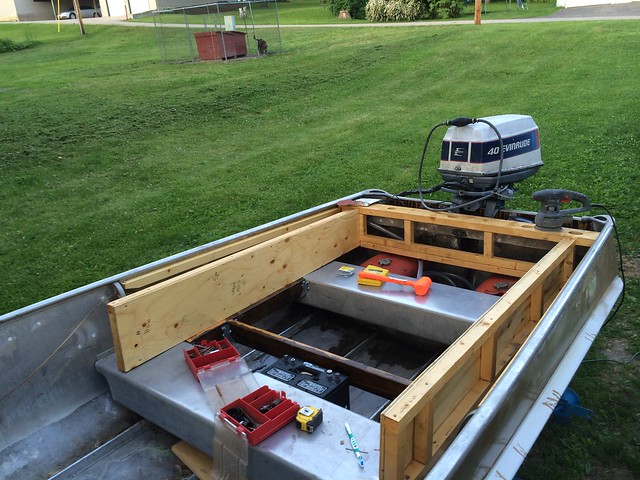
As you can tell from those pics, I started framing in my deck/gunwales while waiting for the varnish coats to dry (which takes forever in Wisconsin in the spring). I used 2x2 framing for the gunwales, 2x4 supports for the midship deck that were attached with joist hangers to the benches. Also did some fitting to make sure my tanks would fit in the back. Then cut and fit the 3/4" plywood for the deck, and 1/2" plywood for covering the sides and top of the gunwales. I also have a 2x6 across the stern for mounting rod holders.
2014-05-08 16.01.31 by Photo 144, on Flickr

2014-05-08 16.25.19 by Photo 144, on Flickr
2014-05-08 19.01.02 by Photo 144, on Flickr
2014-05-19 20.02.36 by Photo 144, on Flickr
2014-05-19 20.02.54 by Photo 144, on Flickr
2014-05-25 13.58.53 by Photo 144, on Flickr
2014-05-24 11.33.32 by Photo 144, on Flickr
2014-05-23 16.55.34 by Photo 144, on Flickr
2014-05-23 20.09.54 by Photo 144, on Flickr
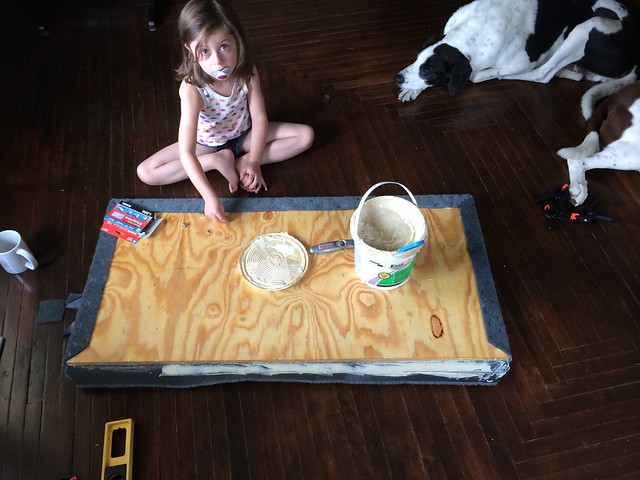
Once it was mostly fit up, I pulled it all out to get varnished (4 coats). I did the 2x2 frame first and the 1/2" ply for the gunwales and sides. Haven't finished the floor yet, because I still need to cut and fit for my pedestal bases.
2014-05-25 14.50.52 by Photo 144, on Flickr
2014-05-25 19.38.19 by Photo 144, on Flickr
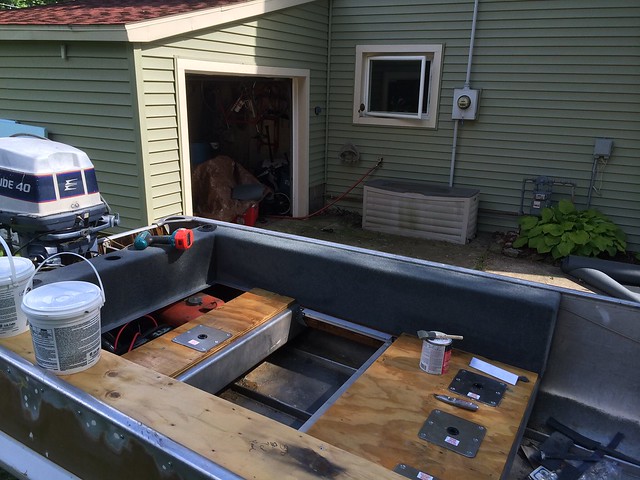
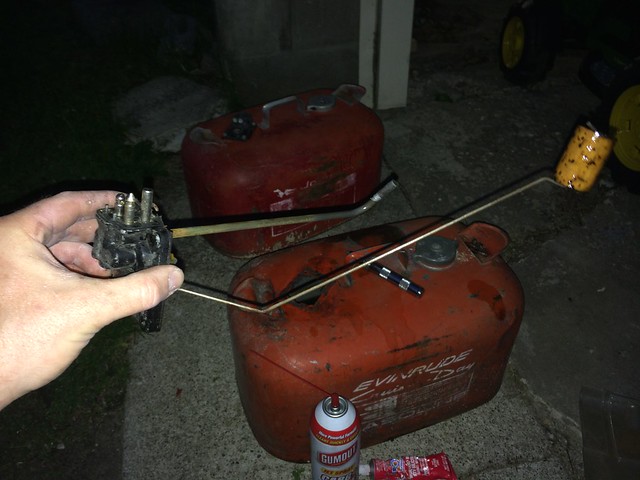
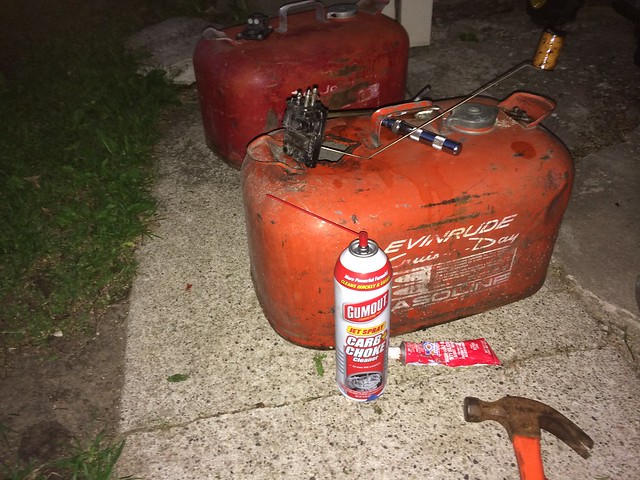
While that was drying, I pulled the fuel tanks apart and gave them a good cleaning, and a new seal under the pickup mechanism. Also, found a fawn...irrelevant, I know, but the tank was in the picture, so that's my excuse.
2014-05-28 20.57.01 by Photo 144, on Flickr
2014-05-28 20.56.49 by Photo 144, on Flickr

2014-06-03 20.13.02 by Photo 144, on Flickr
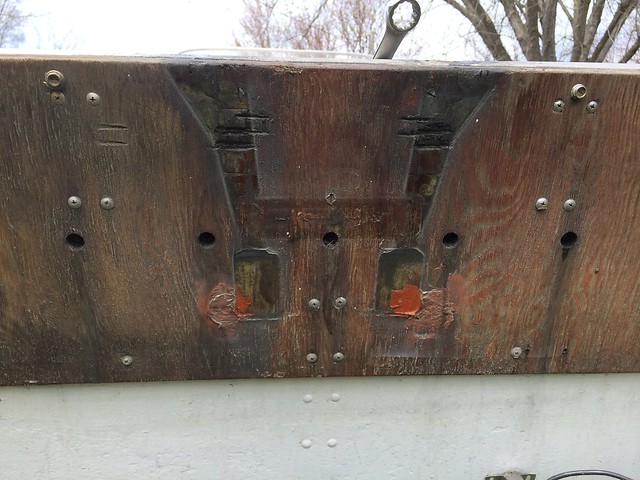
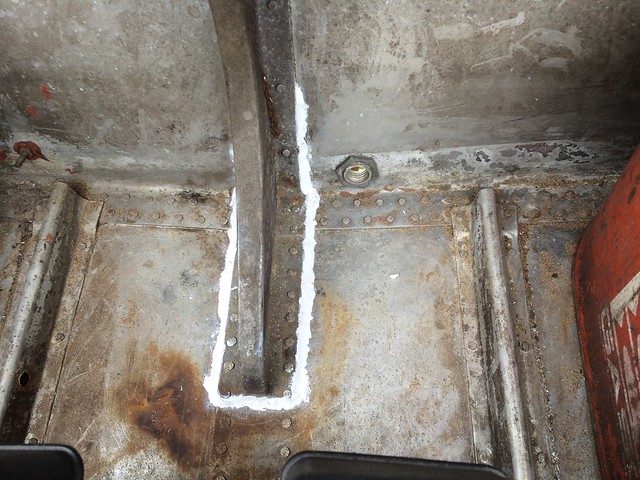
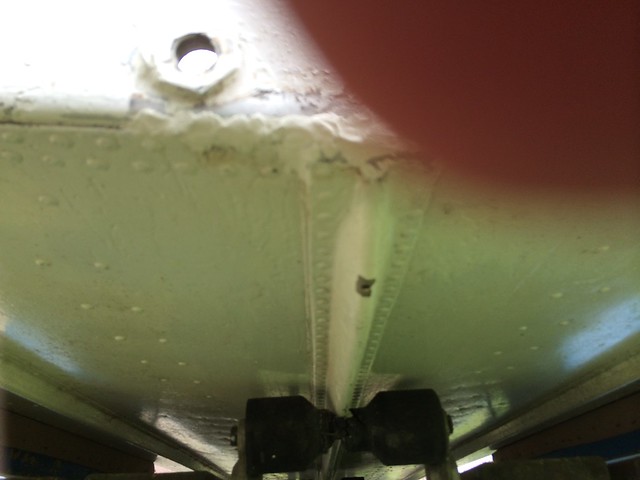
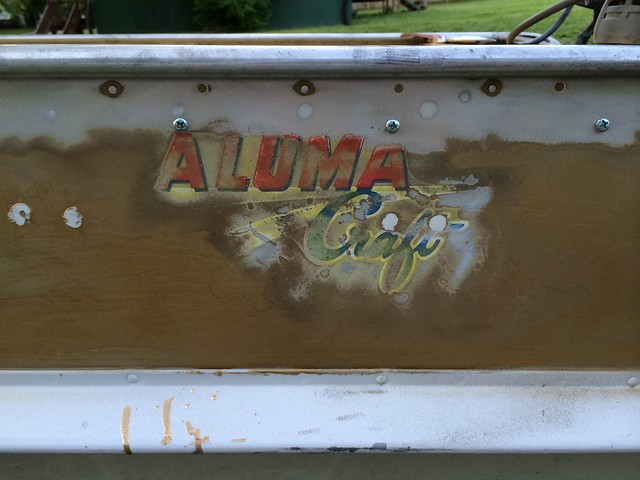
Like most tin that's been around 56 years, it has had plenty of PO's that have mounted all kinds of crap and have holes drilled everywhere, so I've been spending a lot of quality time with a DA sander (80 grit pads) and JB Marine-Weld putty to get things straightened out. I'm still not done with this, but it's getting better. The PO had silicone all over around this bracket on the stern also, so I got all of that out of there and JB'ed that on the inside, and also the seam on the outside. It didn't leak all summer, but I thought it couldn't hurt. Also, while sanding on the last two awful paint jobs, I found the original decals, I probably won't replace them, but still was a fun find.
2014-05-08 12.05.13 by Photo 144, on Flickr
2014-05-08 12.05.19 by Photo 144, on Flickr
2014-06-06 20.05.32 by Photo 144, on Flickr
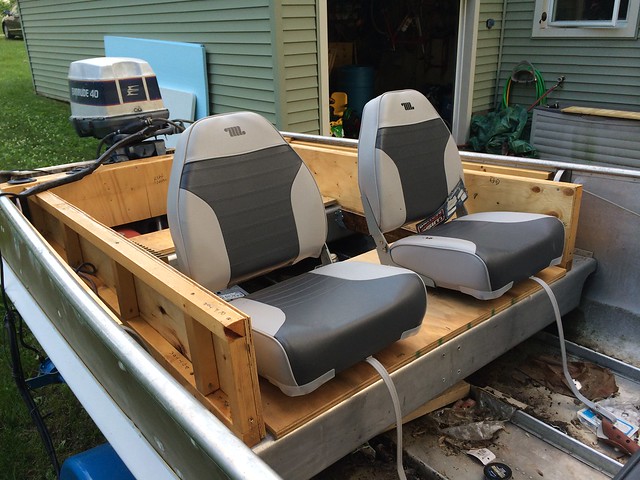
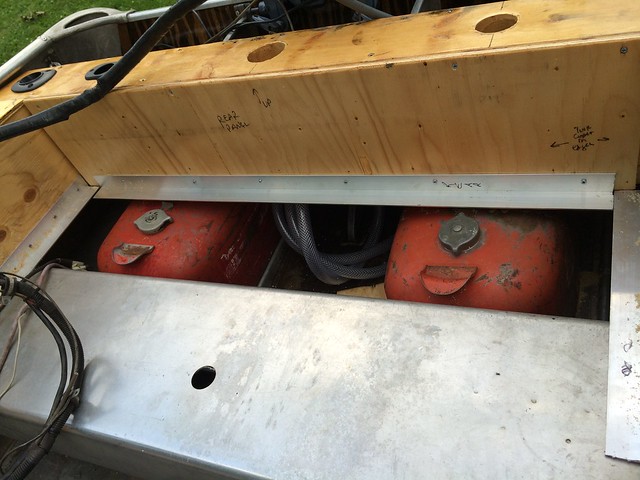
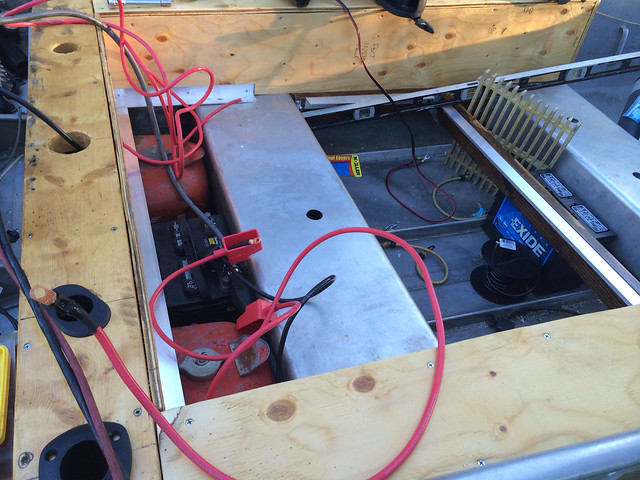
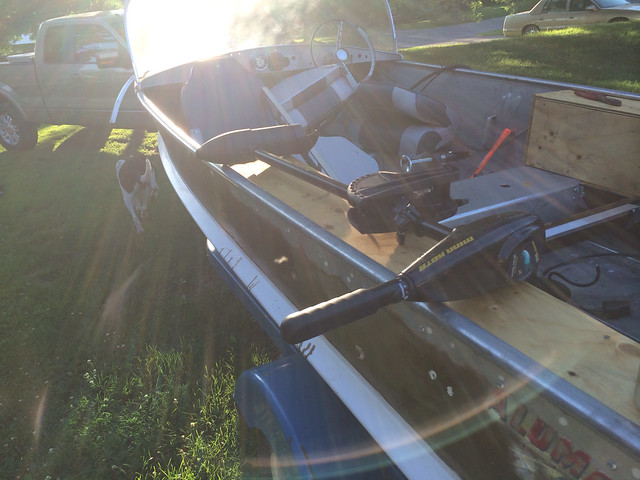
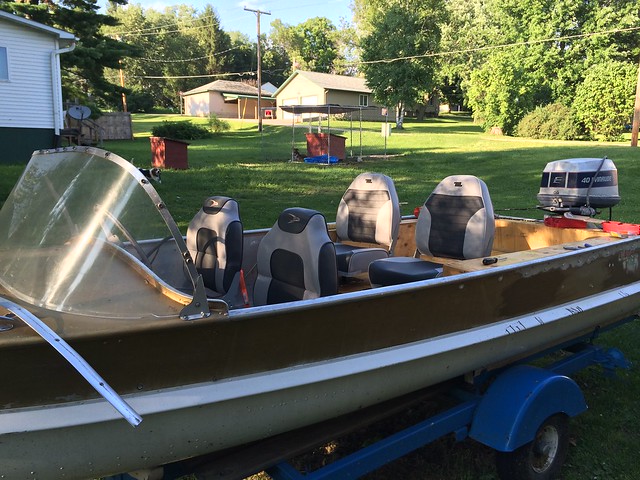
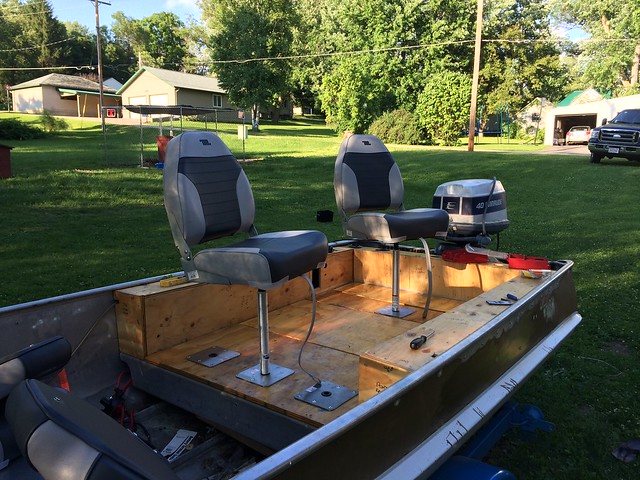
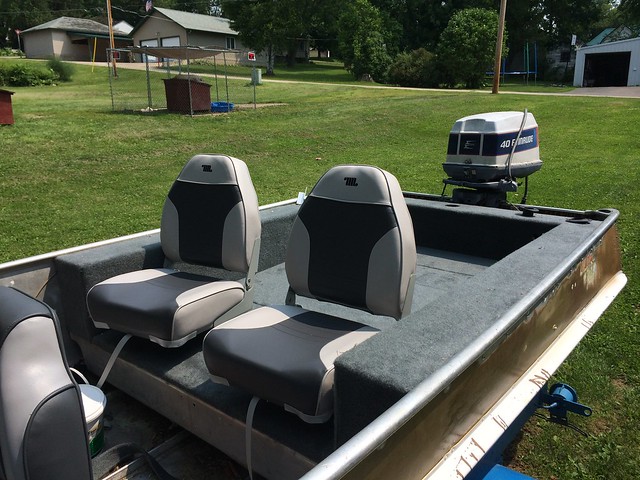
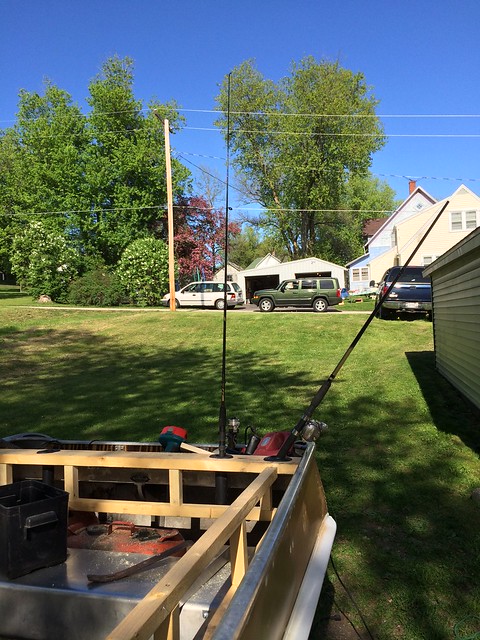
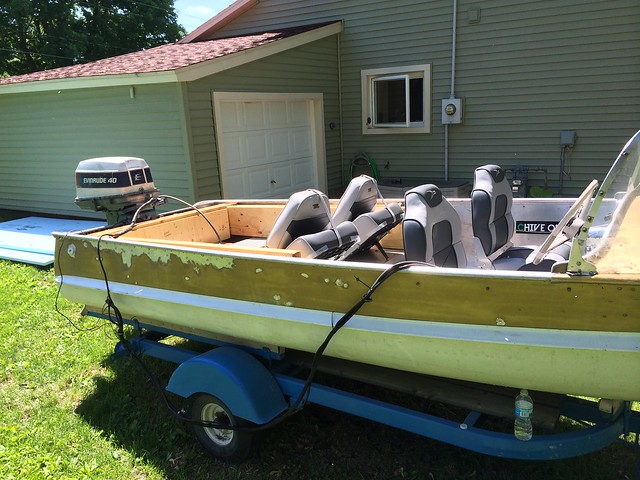
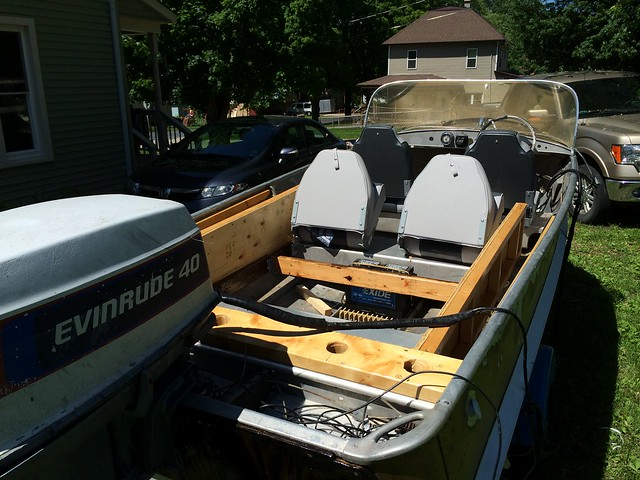
So, getting up to the present, I started putting the varnished pieces back in, cleaned up the motor, and ordered a ridiculous amount of stuff from Cabelas/Gander Mtn/Bass Pro Shops. I couldn't resist setting my seats in to see what it might look like. Also notice I cut the handles off my tanks to get clearance in the stern. I'm sure someone is cringing about cutting up the old tanks, but you gotta work with what you have, ya know.
2014-06-06 20.05.44 by Photo 144, on Flickr
2014-06-08 11.12.01 by Photo 144, on Flickr
2014-06-08 11.12.14 by Photo 144, on Flickr
So I have to go out of town for work for the rest of the week/weekend, but hope to get crankin on it more next week.
My goal with this is to have a nice boat for not too much cash, and also to get it done quickly. So, disclaimer, my methods probably aren't 100% the best possible thing to do in every scenario, but I didn't want to learn any new skills (fiberglass), spend too much cash (marine ply), or have to look all over the world for specialty things (marine ply, again). Also, I don't have much access to metalworking equipment, or aluminum scraps for that matter. So, although I really would like this all to be Aluminum, that will have to wait for the next time around. Overall I think it's going to last pretty well, and it's a fun project. So, if I have to do it again in 5 years, I'm ok with that. But, I think it will last longer than that with proper care.
Stay tuned, I'll be installing the seat bases, doing a buttload of electrical work, and painting this rig soon. Hoping to have this baby on the water in another 3 weeks looking decent.
Welp, that was one helluva first post, eh?
If you have any questions or suggestions, I'd love to hear them. This forum will keep me going while I'm working all week away from my project.
Marty
New guy here, I've been reading this forum for about a year now, but never posted. I love the projects you all have going on here, and if you've built anything on here, I've probably read it. So, I thought it's about time to contribute.
It all started last spring when I was at a boat ramp on the Mississippi River and saw this awesome piece of tin pull up to the dock:
2013-05-25 10.36.12 by Photo 144, on Flickr
I knew right then I needed to find one. So I scoured craigslist for a month or two and found one that looked appealing, it was about 2 hours from home, but I went there immediately. It looked in decent shape. I heard it run, hooked it up and pulled it home for $1200. The PO was a shadetree mechanic type, so everything worked fine, but the looks left something to be desired. As I was pulling out I got the "Oh I think I have the windshield in a brush pile in the back 40"....and he did.
Specs:
1958 Alumacraft Deep C - 15'
1976 Evinrude 40hp long shaft Model 40655A
This is the day I brought it home:
2013-06-10 08.37.34 by Photo 144, on Flickr
2013-06-11 18.39.05 by Photo 144, on Flickr
I started doing some research on it, and that's when I found tinboats. I decided to run it as-is last summer just to decide how I liked it, and what sort of amenities I wanted. I love fishing, but the wife said if I wanted her to come along, she needed a place to sun tan on the boat. So, I'm trying to get a best case scenario for the two. I dug through pretty much every build on here to get the basic newbie questions sorted out (used the 'search' function a lot, and didn't post a "hey I'm new, tell me what I should do" topic....that drives me nuts).
Here's the original brochure, just for fun:
Alumacraftb58009 by Photo 144, on Flickr
I decided I wanted a carpeted rear deck, wide gunwales to mount rod holders/downriggers/beer holders/speakers, and nice moveable pedestal seats. Also, I live in the middle of BFE so I needed to get most of my basic supplies from a local hardware store, or the occasional trip to Menards in the big city.
So, this spring rolled around and I dragged Old Gold out of the snowbank and got to work. That was four weeks ago.
First step was cleaning it out, removing the motor and replacing the transom. The transom wood was rotten inside and out, so I replaced it. I used standard exterior plywood (non-treated, of course) I got BC grade (one side sanded with no large knots), it was a little more pricey, but I didn't want a bunch of knot holes to fill, and wanted a halfway decent appearance.
For the external part of the transom, I used 1/2", cut to size and for the inside part I used 1 piece of 3/4" and one piece of 1/2" wood glued together. Both got stained and 6 coats of spar varnish. Then attached with stainless steel hardware, silicone on all the holes.
2014-05-04 11.59.17 by Photo 144, on Flickr
2014-05-04 14.05.43 by Photo 144, on Flickr
2014-04-13 17.37.45 by Photo 144, on Flickr
2014-05-08 10.39.17 by Photo 144, on Flickr
2014-05-15 17.15.15 by Photo 144, on Flickr
2014-05-15 19.35.42 by Photo 144, on Flickr
2014-05-15 19.35.48 by Photo 144, on Flickr
As you can tell from those pics, I started framing in my deck/gunwales while waiting for the varnish coats to dry (which takes forever in Wisconsin in the spring). I used 2x2 framing for the gunwales, 2x4 supports for the midship deck that were attached with joist hangers to the benches. Also did some fitting to make sure my tanks would fit in the back. Then cut and fit the 3/4" plywood for the deck, and 1/2" plywood for covering the sides and top of the gunwales. I also have a 2x6 across the stern for mounting rod holders.
2014-05-08 16.01.31 by Photo 144, on Flickr
2014-05-08 16.25.19 by Photo 144, on Flickr
2014-05-08 19.01.02 by Photo 144, on Flickr
2014-05-19 20.02.36 by Photo 144, on Flickr
2014-05-19 20.02.54 by Photo 144, on Flickr
2014-05-25 13.58.53 by Photo 144, on Flickr
2014-05-24 11.33.32 by Photo 144, on Flickr
2014-05-23 16.55.34 by Photo 144, on Flickr
2014-05-23 20.09.54 by Photo 144, on Flickr
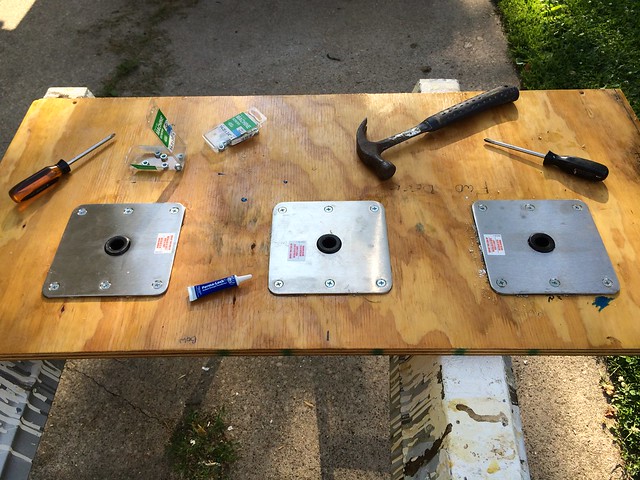
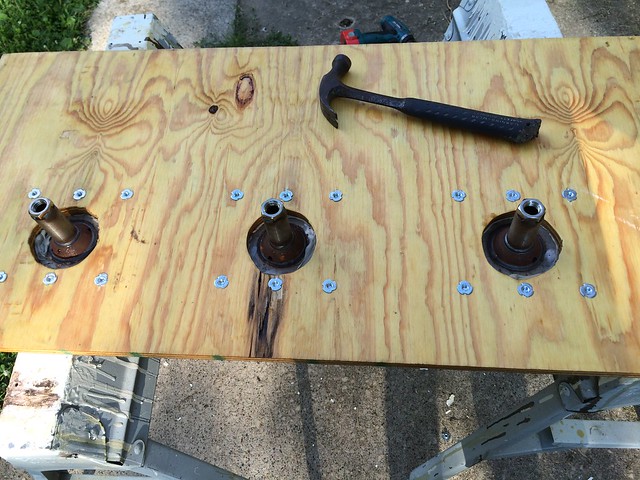
Once it was mostly fit up, I pulled it all out to get varnished (4 coats). I did the 2x2 frame first and the 1/2" ply for the gunwales and sides. Haven't finished the floor yet, because I still need to cut and fit for my pedestal bases.
2014-05-25 14.50.52 by Photo 144, on Flickr
2014-05-25 19.38.19 by Photo 144, on Flickr
While that was drying, I pulled the fuel tanks apart and gave them a good cleaning, and a new seal under the pickup mechanism. Also, found a fawn...irrelevant, I know, but the tank was in the picture, so that's my excuse.
2014-05-28 20.57.01 by Photo 144, on Flickr
2014-05-28 20.56.49 by Photo 144, on Flickr
2014-06-03 20.13.02 by Photo 144, on Flickr
Like most tin that's been around 56 years, it has had plenty of PO's that have mounted all kinds of crap and have holes drilled everywhere, so I've been spending a lot of quality time with a DA sander (80 grit pads) and JB Marine-Weld putty to get things straightened out. I'm still not done with this, but it's getting better. The PO had silicone all over around this bracket on the stern also, so I got all of that out of there and JB'ed that on the inside, and also the seam on the outside. It didn't leak all summer, but I thought it couldn't hurt. Also, while sanding on the last two awful paint jobs, I found the original decals, I probably won't replace them, but still was a fun find.
2014-05-08 12.05.13 by Photo 144, on Flickr
2014-05-08 12.05.19 by Photo 144, on Flickr
2014-06-06 20.05.32 by Photo 144, on Flickr
So, getting up to the present, I started putting the varnished pieces back in, cleaned up the motor, and ordered a ridiculous amount of stuff from Cabelas/Gander Mtn/Bass Pro Shops. I couldn't resist setting my seats in to see what it might look like. Also notice I cut the handles off my tanks to get clearance in the stern. I'm sure someone is cringing about cutting up the old tanks, but you gotta work with what you have, ya know.
2014-06-06 20.05.44 by Photo 144, on Flickr
2014-06-08 11.12.01 by Photo 144, on Flickr
2014-06-08 11.12.14 by Photo 144, on Flickr
So I have to go out of town for work for the rest of the week/weekend, but hope to get crankin on it more next week.
My goal with this is to have a nice boat for not too much cash, and also to get it done quickly. So, disclaimer, my methods probably aren't 100% the best possible thing to do in every scenario, but I didn't want to learn any new skills (fiberglass), spend too much cash (marine ply), or have to look all over the world for specialty things (marine ply, again). Also, I don't have much access to metalworking equipment, or aluminum scraps for that matter. So, although I really would like this all to be Aluminum, that will have to wait for the next time around. Overall I think it's going to last pretty well, and it's a fun project. So, if I have to do it again in 5 years, I'm ok with that. But, I think it will last longer than that with proper care.
Stay tuned, I'll be installing the seat bases, doing a buttload of electrical work, and painting this rig soon. Hoping to have this baby on the water in another 3 weeks looking decent.
Welp, that was one helluva first post, eh?
If you have any questions or suggestions, I'd love to hear them. This forum will keep me going while I'm working all week away from my project.
Marty