1973 16’ Monark repair/rebuild

TinBoats.net

Help Support TinBoats.net:

This site may earn a commission from merchant affiliate links, including eBay, Amazon, and others.

Bantou

Well-known member
Joined
Sep 4, 2024
Messages
154
Reaction score
141
LOCATION
Central Texas
Figured I’d compile all of this into one thread. I’m replacing the transom and doing a tune up on an ‘88 15hp Johnson. Boat is in pretty rough shape overall but has some good bones and is water tight except for a slow leak from the drain hole. I’m not entirely sure that the leak wasn’t caused by a bad plug as much or more than the abused drain hole.

There is a stress crack on the top of the transom that I’m debating how to fix. So far, the consensus is that I need to pull the existing rotten wood before figuring out if/how to address the stress crack.

Motor is getting a carb rebuild, new plugs, and new impeller. Based on a video I posted, the group is leaning towards it also missing on one cylinder. I won’t be able to trouble shoot that until I get the carb rebuilt and the fuel tank gets here though.

Once the big issues are fixed, I’ll work on some “quality of experience” upgrades like a Bimini, more comfortable seats, etc.
 

Attachments

  • IMG_8605.jpeg
    IMG_8605.jpeg
    357.3 KB
  • IMG_8604.jpeg
    IMG_8604.jpeg
    392.3 KB
  • IMG_8603.jpeg
    IMG_8603.jpeg
    433.2 KB
  • IMG_8602.jpeg
    IMG_8602.jpeg
    436.4 KB
  • IMG_8601.jpeg
    IMG_8601.jpeg
    225.6 KB
  • E7947215-70AE-4938-90A5-D586BAA3282B.mp4
    10.1 MB
Pulled the transom wood this morning… it was worse than I thought. The piece of the original transom next to the aluminum had totally rotted away and 2nd piece was about 1/3 gone. Instead of replacing the transom wood, the previous owner just slapped another piece of plywood on and left a void behind the wood.

I used an angle grinder and punch to pull the rivets on one of the brackets. I’ll probably wind up pulling the other bracket before putting wood back in it.

I cracked the transom further while removing the wood. It is definitely going to need a welder now.
 

Attachments

  • IMG_8654.jpeg
    IMG_8654.jpeg
    233.2 KB
  • IMG_8657.jpeg
    IMG_8657.jpeg
    145.5 KB
  • IMG_8659.jpeg
    IMG_8659.jpeg
    101 KB
  • IMG_8660.jpeg
    IMG_8660.jpeg
    255.7 KB
  • IMG_8664.jpeg
    IMG_8664.jpeg
    236.2 KB
  • IMG_8663.jpeg
    IMG_8663.jpeg
    357.6 KB
Last edited:
“Come together” is kind of a loose term for this project. I’m doing this so I have a boat that I can put in the stumps without worrying about scrapes, dings, etc. She is very much going to be a “Bertha” not a “Betty”
 
That explains why the ply edge was proud of the transom cap in the original pic. Anyway, you are on the road to getting it fixed now. I look forward to watching how it all comes together.
 
After talking with an old river rat, I'm considering doing either a 1/8" or 3/16" aluminum patch instead of having it welded. He raised a good point that the patch would provide a lot more support than rewelding it ever could.

My big concerns with the patch are the cost of aluminum and the top cap. I'd either have to have the aluminum broke to match the top cap, do it as two pieces, or have the top cap welded and then patch. If I'm having the top cap welded, I might as well have the rest done while it is in the shop and just forget about the patch since I'm only putting a 15hp on it.
 
I thought I had deleted the above comment instead of posting it.... I reasoned out my answer while typing and did not intend to post it. Leaving it in though so I have a record of what I was thinking at the time lol
 
Finally got the transom built. One coat of fiberglass epoxy on the flats and two on the edges so far. I’m debating whether to put a second coat on the flats or just go ahead and paint it.

I’m leaning towards just painting it at this point. The edges are well sealed, it sits about 2” off the bottom, and it’s going to be painted where it shouldn’t see much water.

Had to notch the top out because it looks like it was designed for a 1” transom instead of a 1 1/2”. Probably going to have to move the side braces back a little when I re-install them.
 

Attachments

  • IMG_9217.jpeg
    IMG_9217.jpeg
    206.6 KB
  • IMG_9218.jpeg
    IMG_9218.jpeg
    405.7 KB
  • IMG_9102.jpeg
    IMG_9102.jpeg
    186.9 KB
  • IMG_9099.jpeg
    IMG_9099.jpeg
    262.1 KB
Found some additional stress cracks across a couple of the ribs towards the front of the boat and at the corner caps on the transom... (pics to follow later) I would swear that they weren't there when I started this project. Is it possible for stress cracks to occur just sitting on the trailer?
 
Ignore the strapping, it’s a temp solution to hopefully keep it from getting worse until I can get it fixed.
 

Attachments

  • IMG_9223.jpeg
    IMG_9223.jpeg
    94.1 KB
  • IMG_9224.jpeg
    IMG_9224.jpeg
    111 KB
  • IMG_9225.jpeg
    IMG_9225.jpeg
    237 KB
  • IMG_9226.jpeg
    IMG_9226.jpeg
    239.8 KB
  • IMG_9227.jpeg
    IMG_9227.jpeg
    225.3 KB
  • IMG_9228.jpeg
    IMG_9228.jpeg
    202.3 KB
  • IMG_9229.jpeg
    IMG_9229.jpeg
    187.8 KB
I can see an aluminum welder in your future. I think welding it back together would be best. Is it worth the cost? Probably.
Let us know how much this will cost. Good information.
I’m talking with a guy who does TIG now to see what it is going to cost for him to fix it. Hopefully, it won’t be too bad but I won’t know until he gets back to me.
 
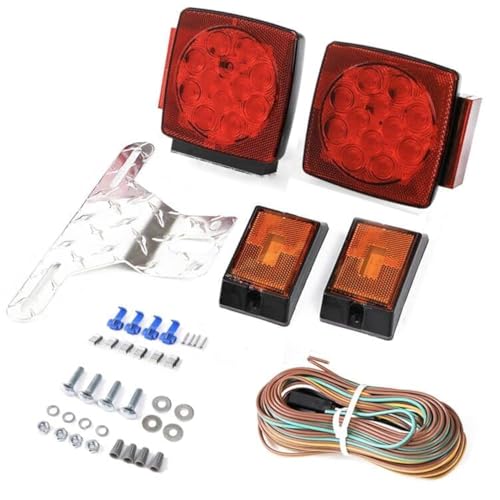
Trailer lights are all installed. Running lights are working but the back up lights still need power. I ran out of wire and heat shrink. Transom is painted and ready to install pending what the welder wants.

Edit to add: I think I figured out what caused the ribs to crack while doing the lights. It’s sitting on a tilt trailer and the retaining pin is locked open. The boat is doing all of the work to keep the trailer from tipping every time I move it.
 

Attachments

  • IMG_9239.jpeg
    IMG_9239.jpeg
    249.7 KB
  • IMG_9238.jpeg
    IMG_9238.jpeg
    208.2 KB
  • IMG_9237.jpeg
    IMG_9237.jpeg
    204.4 KB
  • IMG_9236.jpeg
    IMG_9236.jpeg
    251.7 KB
  • IMG_9235.jpeg
    IMG_9235.jpeg
    253.9 KB
Last edited:
Got the back up lights and boat nav lights hooked today. Back up lights worked great at first but after moving the boat around, all of the trailer lights quit working. Stern light works but I got a defective bow light. I have another one ordered. Hopefully it’s a one off situation.

Back up lights pull a combined 3A (1.5Ax2). The rest of the lights shouldn’t have been enough to blow a fuse unless it had a 5A in it for some reason. Going to dig out the multimeter after work tomorrow and do some troubleshooting. Hopefully it’s just an undersized fuse and I don’t have to go hunting for a bad ground on new wiring.

I don’t remember who came up with the idea for using 1/2” pvc to run the wiring, but whoever it was, you’re a life saver. I started out trying to fish the wires through on their own and then remember reading on here about using the PVC. Good Lord was that a time saver.

1/2” PVC wouldn’t fit in the channel under the ribs, but I had some 1/2” pex that was a perfect fit. I’m a little concerned about how the pex is going to hold up in the sun, but it’s what I had and I’ve already put way more than I had planned into this project.
A "short to ground" will blow a fuse as well. Be sure the wires are protected from abrasion and that there is not a place where water can get to it and short it out, or a bare wire is allowed to contact ground.
The PEX line will be fine in the sun. You're not actually using it for pressured water so you're good to go for years.
Keep at it and the rewards are yours.

There shouldn't be an shorts to ground (though there could be). I was very careful not to drag the wire over any sharp edges and I left slack anywhere that it might bind or rub. With it being brand new wire and only having been moved less than 100 yards, I'd be very surprised if it had already rubbed a bare spot anywhere. I used the trailer frame to conduct the ground though, so a bare spot on the positive side could definitely cause a direct fault.

I remembered last night that I had one of those inline snap splices in the ground wire for the plug. I'm going to change that out for a heat shrink butt splice before digging into the trailer wiring. I'm a big fan of starting with the KISS (Keep It Simple S.....) method of troubleshooting. If it's not the splice, and the fuse is appropriately sized, the I'll start hunting for a fault.
 
It was the splice. I changed it out for butt splices added some more wire to give it more slack, and they work like a charm.

I got all of the main wiring fished in today and mocked up the lights. I think I’m going to be ok with just one of the 4”x4” spots on the bow and I’m going to have to do something different with the green lights that I was planning on running down the sides. Both are much brighter than I anticipated.

I’ll probably rig up something like outriggers for the green lights that will fit in the oar lockers and keep them below the surface. That way I can have them when I want them and remove them when I don’t.
Good job, my man. Thanks for reporting back as well.
Keep at it and make it look like something that you would like to fish out of...
 
Good job, my man. Thanks for reporting back as well.
Keep at it and make it look like something that you would like to fish out of...
My “cheap boat that just needed a little TLC” is quickly turning into a money/time pit. If I didn’t enjoy tinkering with it so much, I’d have abandoned it by this point. My family and I are making memories though, and will make a lot more once it’s on the water.
 

Latest posts

Top