Jay415's Alumacraft MV1648

TinBoats.net

Help Support TinBoats.net:

This site may earn a commission from merchant affiliate links, including eBay, Amazon, and others.
PitFishin' said:
looks great =D> im curious about your fishfinder, was it affordable? the ones ive seen were outragous. not ready to buy one yet but i think those side imaging ff are neat.
depends what you consider affordable! :mrgreen: I paid $1634 shipped to my door, from universalmania.com...That's the cheapest I found it.

Price has gone up since though
https://www.universalmania.com/product.asp?pf_id=407760-1
 
Thanks! I'm in for a lot more $ than I originally thought but very happy with it. And I have the satisfaction of doing it myself!
 
Nice job! The 1648 is a perfect size. Many memories will be built on that jon. I left Oyster Bay many years ago but mostly did salt water fishing
 
Jay415 said:
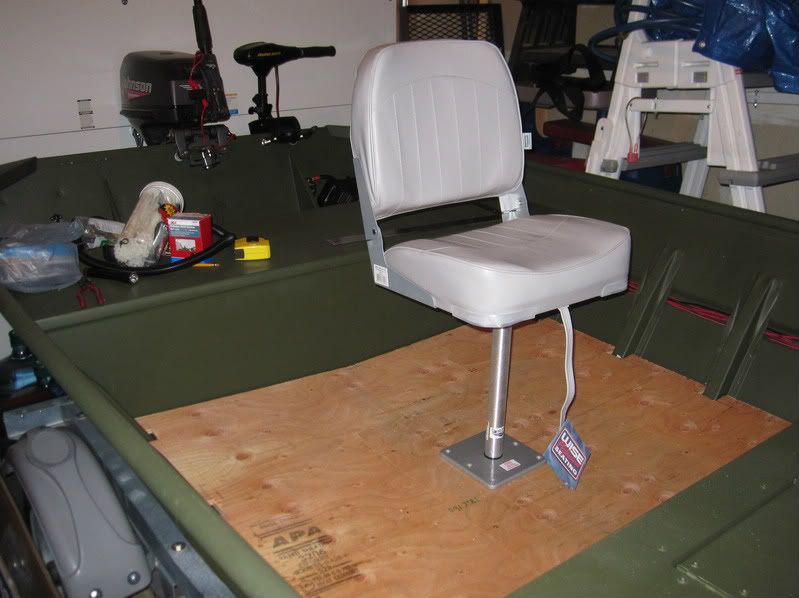
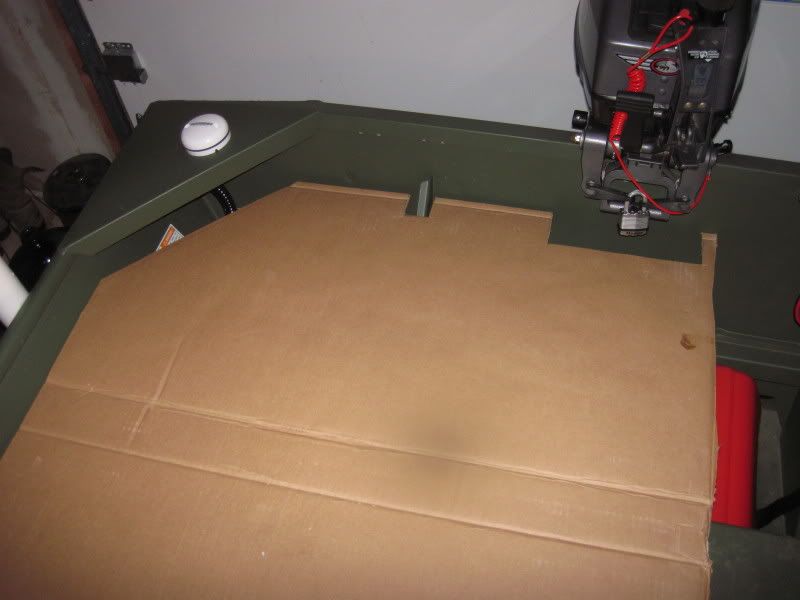
Trimmed up the stern deck and cut the hole for the pedestal seat mount.
IMG_2504.jpg

This just gave me a great solution to my dilemma. I was stressing out on the middle bench seat on my build. I really didn't want to be bolting seats or drilling any holes in the lid of my new livewell for a seat....but after seeing this pic of yours, if I place a pedestal in front of the middle bench on the floor (towards the bow), it solves any issues I could have.
Of course I had to run out to the garage and see if it would fit and the space between my floor decking and the bottom of the boat is barely enough room to make it work. I could add a 3/4" plywood spacer on top of the floor deck too I suppose to give it some extra height..that pipe extends down about 1 1/2" out the bottom of the plate.
so...thanks for the :idea:
 
Jay415 said:
My next challenge is figuring out how to hinge access panel over the batteries because of the triangle supports at the top of the transom where I mounted my GPS puck.
you'll have to do like everyone else and cut the corner out of the decking...it'll just have to be cut at an angle. there is not a lot else one can do....at least yours looks the same elevation as your decking will be...mine is a few inches above so I will have a gap....but water has to drain somewhere I figure, right?
 
KevinWI said:
This just gave me a great solution to my dilemma. I was stressing out on the middle bench seat on my build. I really didn't want to be bolting seats or drilling any holes in the lid of my new livewell for a seat....but after seeing this pic of yours, if I place a pedestal in front of the middle bench on the floor (towards the bow), it solves any issues I could have.
Of course I had to run out to the garage and see if it would fit and the space between my floor decking and the bottom of the boat is barely enough room to make it work. I could add a 3/4" plywood spacer on top of the floor deck too I suppose to give it some extra height..that pipe extends down about 1 1/2" out the bottom of the plate.
so...thanks for the :idea:
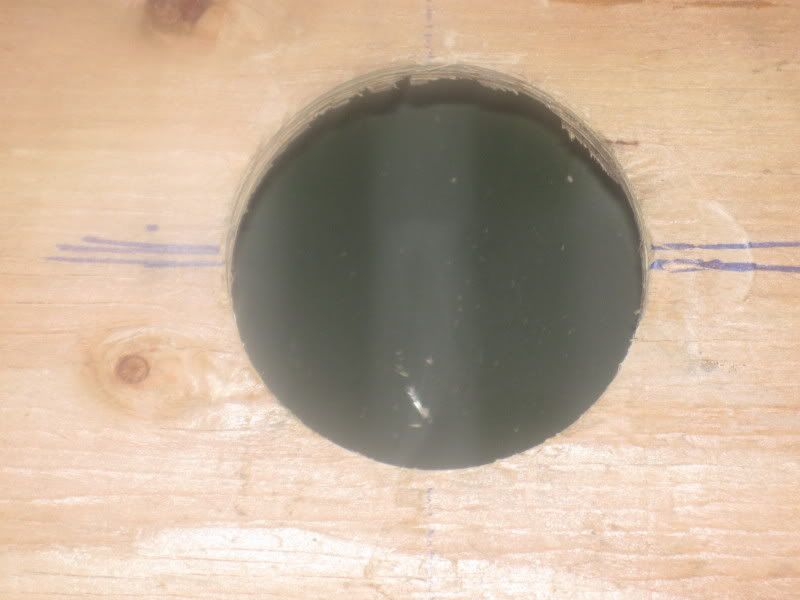
Glad to help! The mount I used needs 2 3/8" depth minus the thickness on the mounting surface. I used 1/2" plywood directly on the ribs and mounted the pedestal mount in the middle of the rail indentation in the hull which is about 2 1/2" deep from the top of the plywood. I will reinforce the underneath with a 2x4 or 2x6 on each side.

IMG_1120.jpg
 
Yeah...you followed the contour of your floor with your decking. My deck is raised to make it a flat floor, so in the middle it sits on a 2x (cut down slightly) and I believe the flooring is 3/4", so I have enough barely...but yeah...need to reinforce it too. Smart idea using the middle indentation runner to give a little more space.
2x6 should be wide enough for reinforcement and give all the plate screws something to bite.
 
What clearance on the plywood edge did you use for the carpet? 1/4" on each carpeted edge? I'm trying to figure out how big of gaps to leave.
Have read that on a hatch with 4 carpeted edges on each side you should estimate around 1" to 1 1/4".
 
BinzlBrew said:
Jay, Do those lighted guide post double as brake lights/turn signals?

Thanks

Joe
No just your running lights.

KevinWI said:
What clearance on the plywood edge did you use for the carpet? 1/4" on each carpeted edge? I'm trying to figure out how big of gaps to leave.
Have read that on a hatch with 4 carpeted edges on each side you should estimate around 1" to 1 1/4".

I did about 1/4" on each edge.
 
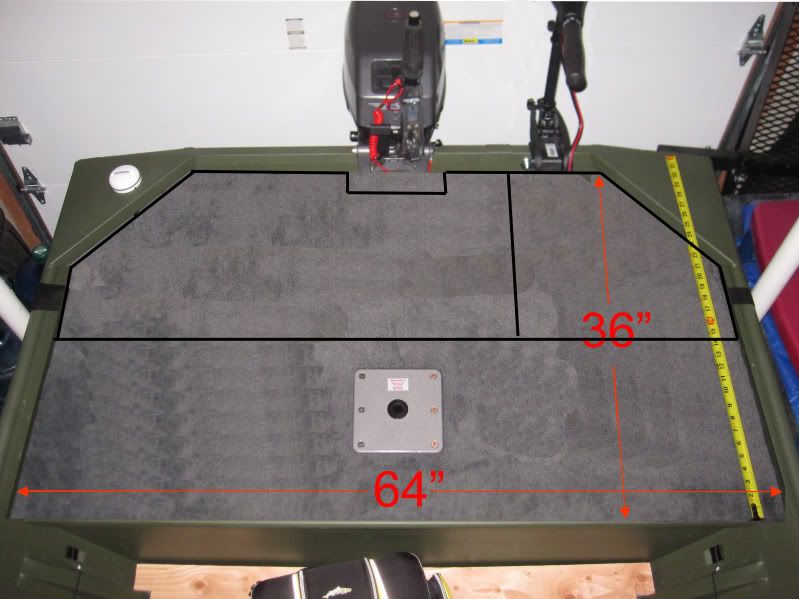
No Prob, I'm starting it later today but this is what I decided to do. Only one centered seat mount for now, but I'll put reinforcement under the areas I want to put the other 2. Just want to make sure that's why I want. When finished it'll be nothing more than drilling a hole and installing mount. Now with the hatches I decided to do a 70/30 split. I don't want to notch for the TM because the mount sticks out much further than the OB. It would be a huge hole to allow the hatch to open. This way I can open the larger side and can access circuit breakers and such mounted under the smaller hatch. The only reason I'd need to open the smaller hatch is to remove the battery, and then I will remove TM which takes 5 min anyway, no big deal. I'm going to use a SS piano hinge that will allow the hatches to open fully 180 deg and sit on the deck. as of now I'm going to leave the 2 triangle in the corners open for venting. But if I don't like the way it looks I'll deck and carpet that area and install vents.
RearDeckhatchlayout.jpg

IMG_1113.jpg
 
I'm doing a very similar mod. I'm putting a small lip (up form the deck) to keep objects from falling/rolling under the deck at the back corners. I'll still have venting space but keep me from having to retrieve things that fall behind.
 
BinzlBrew said:
I'm doing a very similar mod. I'm putting a small lip (up form the deck) to keep objects from falling/rolling under the deck at the back corners. I'll still have venting space but keep me from having to retrieve things that fall behind.
Cool! Any pictures yet? Did you start a thread?
 
your transom appears much higher than mine. Do you have a long shaft outboard? Your back deck hits real low on the transom. The top of the plywood is at the exact height of the top of the transom on my Alumacraft . Admire your use of photoshop program. would make life much easier than drawing it in my head! :D Your layout looks identical to mine. Put pics up on my build yesterday.
 
This may sound stupid, but when you were carpeting the front deck did you do that after the plywood was installed onthe boat and if so was it difficult to get the carpet down around the edges. Love what you've done and hope to steal some of your ideas. Thanksd
 
Top