Love this site! Here is my Lowe 1436

TinBoats.net

Help Support TinBoats.net:

This site may earn a commission from merchant affiliate links, including eBay, Amazon, and others.
I read about the aluminum breaking you were trying to bend. You may know this already ,but if you get a marine type of aluminum,5356, it bends a lot easier without breaking.
 
WhiteMoose said:
Thanks for the reply caveman. I was trying to bend the aluminum to make brackets, but decided the only thing I can do is use steel brackets. I found some nice thick steel angle brackets for about $1.50 that I should be able to bend in the bench vise. They appear to be stainless, but what if they aren't? Can I paint them to prevent rust & any bad interactions w/ the aluminum?


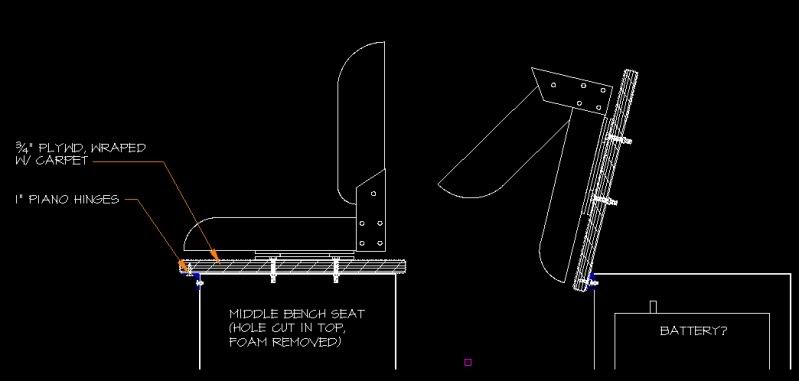
Sorry to hijack my own reply, but does anyone foresee any possible issues with this modified bench seat design? If I cut the top of the bench seat out but leave the sides, is that enough reinforcement to keep the sides of the boat from caving in or the ribs from cracking?
seatidea.jpg


I did that to the center seat in my Little 10 foot Tracker years ago, I left about 2 in. of metal on the Sides and about 6in. on the ends of the top, Framed it with angle, Made a cap for it with 3/4 plywood and 2+2 on the long sides, Just set it on there, Put 2 big Batteries in there, Put carpet on the plywood , Ran a wire to the Back(Its all Electric) and went fishing, I have an onboard Charger in there, Just lift the top off once in a while to check the Batteries, Works good, and puts the weight in Middle of the Boat !! :wink:
 
Thanks for the replys! I'll post updates (and questions I'm sure) when I start working on it again.
Russ's thread will come in handy when I get the the bench seat/battery storage phase of work. 8)
 
This week I got my middle seat tore out and the new framing up (pictures to come). I have all my plywood cut, sanded, and waterproofed, but I ran out of carpet! I used Lowes marine carpet. The kid at the counter said I have to order a minimum of like 30 feet, but I only need 6 more feet, so I'm trying to decide what to do. 30 feet of that carpet will cost around $160, which is more then I've spent on any part of this boat, other than the boat itself. :x
 
Nope :( It is currently covered up and sitting behind the garage.
I'm going to bite the bullet and just order more carpet from Lowes when it warms up enough to start working on it again.
 
WhiteMoose said:
This week I got my middle seat tore out and the new framing up (pictures to come). I have all my plywood cut, sanded, and waterproofed, but I ran out of carpet! I used Lowes marine carpet. The kid at the counter said I have to order a minimum of like 30 feet, but I only need 6 more feet, so I'm trying to decide what to do. 30 feet of that carpet will cost around $160, which is more then I've spent on any part of this boat, other than the boat itself. :x

So by order, do you mean online? Or were they out of stock and they have to order more and bring it in?
 
No, ordered as in ordered from the store. They have it in their samples hanging up, but they don't have it in stock. I've found similar carpet online, but all the samples I've received are just not quite the same.
 
Well its amazing how much I can get done in a weekend when the wife and friends are all out of town.
I was able to finish almost all my carpeting after having to buy 30' of the stuff from Lowes. Now I have a ton leftover, so I am considering carpeting up the sides as well, but that can wait as the hot crappie bite around here will be starting soon!

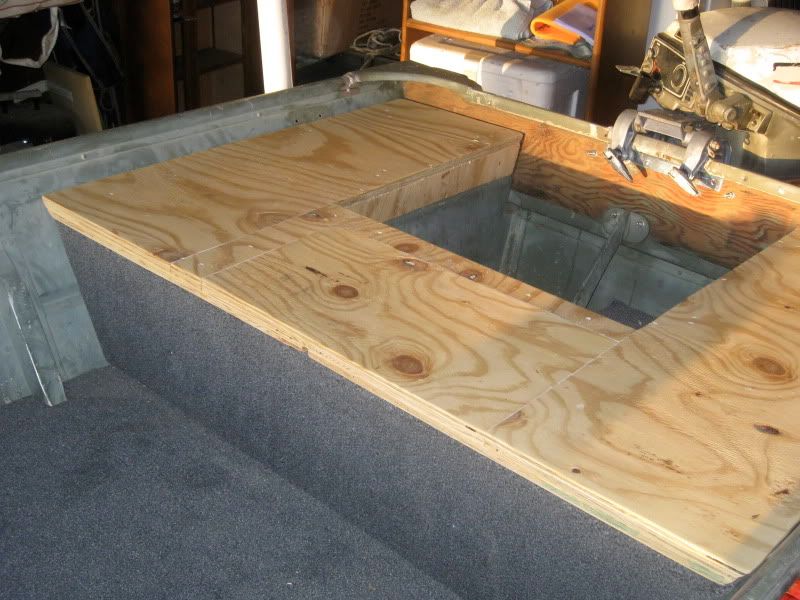
I decided to save money and use up my scrap wood for the back of the boat, rather then buying another whole sheet of plywood. Just had to make it 2 layers thick and use a lot of glue. This piece was really tricky because the seat curves up in the middle, and the 2 back parts are anywhere from 1" to 2" lower then the bench. In order to make it solid and level, I had to add different sized legs under all the corners to support it. I'm not sure how I will attach it yet, but I'll figure that out when I get to it.
IMG_1915.jpg


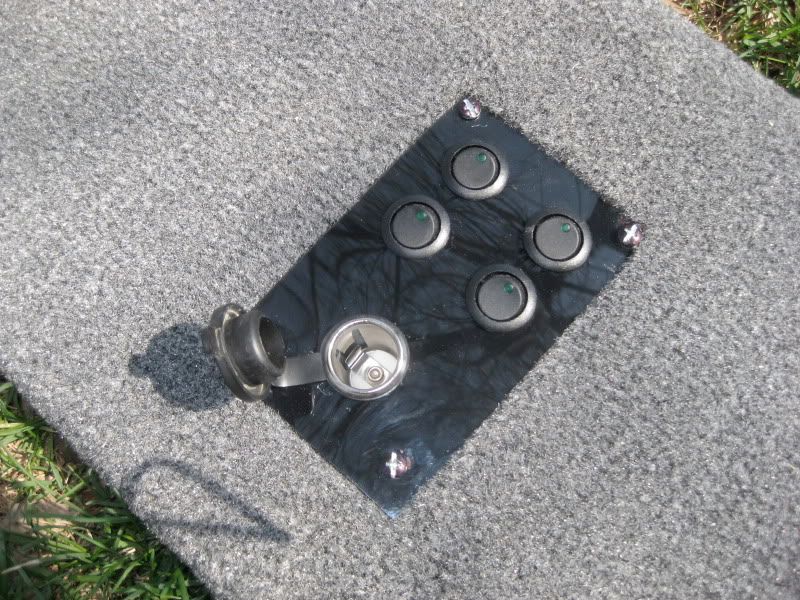
Here is a shot of the switch panel I made out of plexiglass painted black on the back. The lighted rocker switches will be for my nav lights, bilge, and interior or *** lights as I like to call them. :wink: This piece goes on the back of the bench seat so I can reach it from the back, or bend over and reach it from the front if I am running the TM. I know these switches aren't designed to be exposed to weather, so we will see how long they last. I made the middle seat with an overhang of about 4", so they shouldn't take much direct water.
IMG_1923.jpg
 
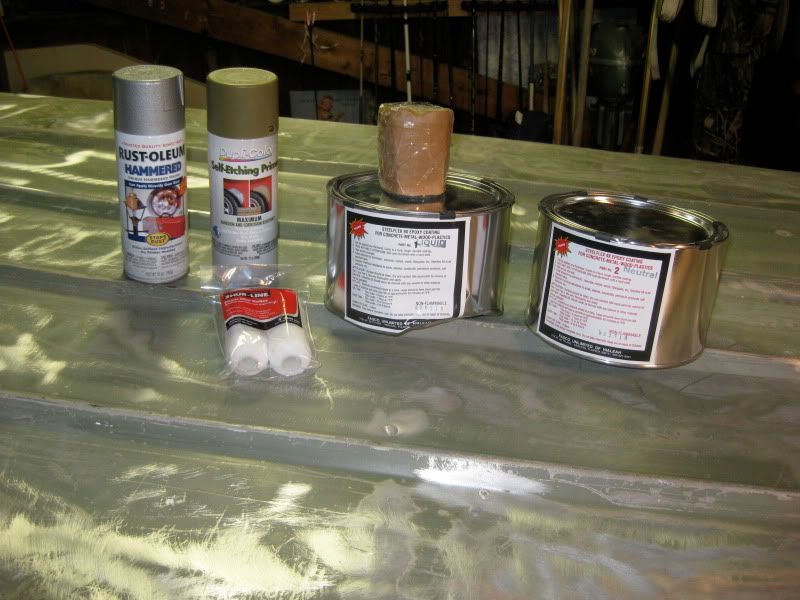
Steelflex time, baby!!!
One of the cans came pretty dented. I'm surprised it didn't get punctured, but all is good I guess.
Jerry @ fasco recommended NOT using steelflex on the inside because it would be too hard to spread it around the ribs, etc, so I will be using a rustoleum silver color with a "hammered" finish to hide the dents.


IMG_1917.jpg
 
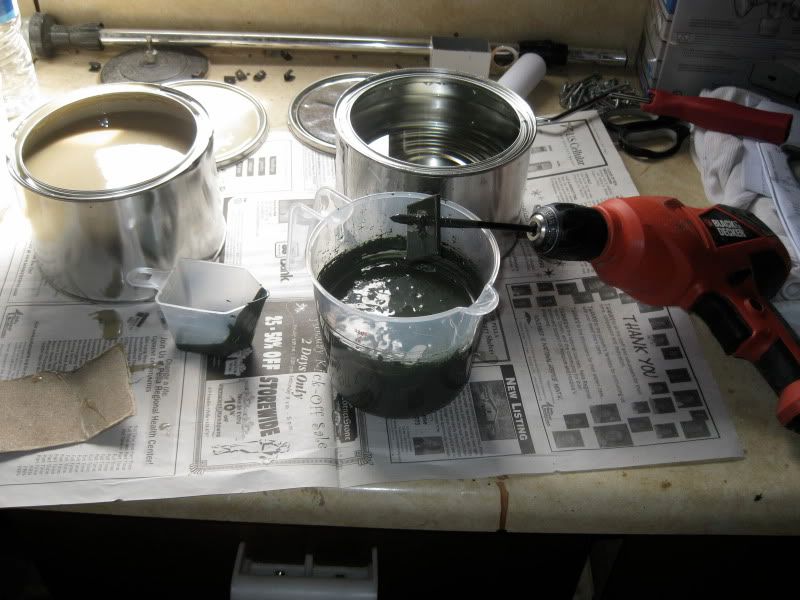
Here is my mixing station, with my homemade paint mixer that I thought worked pretty very well.
IMG_1920.jpg

This stuff takes a long time to mix, and I can't even describe how thick it is. Frozen honey, maybe? I did 2 cups at a time (1 cup each) plus 1/2 oz of the color pigment. The epoxies are fairly easy to pour and measure, but the pigment was a bear. It didn't really pour, so you have to scoop it out which makes measuring it impossible. The best I could do was guess.
The temperature outside only got to about 65, but after running a couple electric heaters in the garage all morning, I was able to get it up to a toasty 80 degrees by noon.

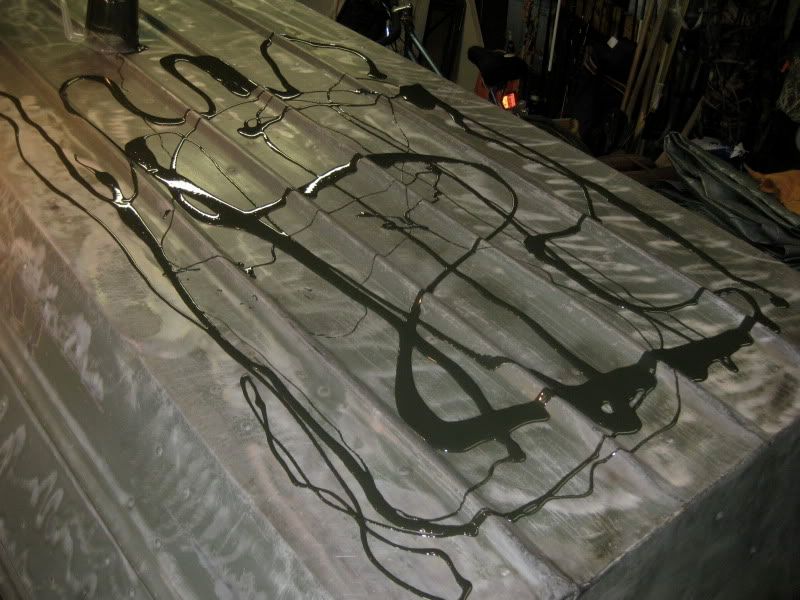
Here is a picture of how not to do your first drizzling.
IMG_1921.jpg

I quickly discovered that this was too much as it was running all over the place. After I spread it all out over the back half and it was still running, I cussed, chugged a quick beer, and decided to use a little trowel to scoop it up and move it around to other areas, then roll over it all again. Then the problem was that it was starting to set up and and becoming really hard to roll. It ended up looking pretty tough, but I wasn't too worried since it was only the first coat. When drizzling, try to avoid spread out puddles like I had. Pour very thin lines of it, spaced about 3" or so.

Rollers! I bought an 8 pack of the 4" foam rollers, and this barely made it through the first coat. As soon as they start to tear, you have to get a new one, otherwise it leaves chunks behind. Between coats, I had to make a 40 mile Walmart run and came home with a dozen more, AND rubber gloves, which I stupidly didn't use the first time. I would also recommend getting some popsicle sticks for scraping the stuff off the side of the containers. And of course measuring cups. I cleaned 3 different dollar stores out of their $1 measuring cups.
 
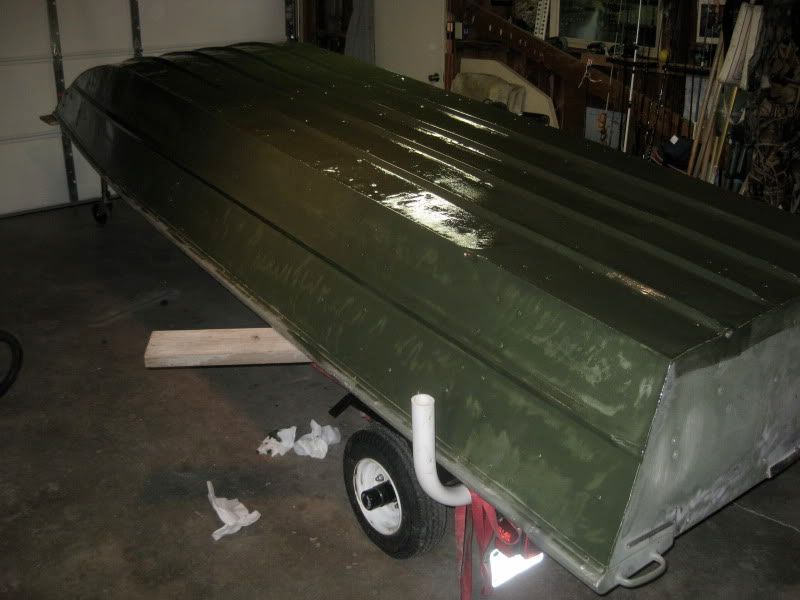
I got much better at drizzling the 2nd time, and was able to get in a pretty good rhythm. Here is a shot of the first coat done (minus the transom which I did later).
IMG_1922.jpg


I waited about 3 hours between coats for the steelflex to cure enough that it felt like masking tape. The 2nd coat (not pictured) went on much easier, and you can put it on a lot thicker because the 1st coat holds it in place and keeps it from running. I'll pull it out in the sun later today to help it cure and take another picture. I am very happy with how it turned out.
 
i had a mask on at first, but there really aren't any fumes to it.
At minute 19 after you mix it its fine, but at minute 21, your screwed :)
 
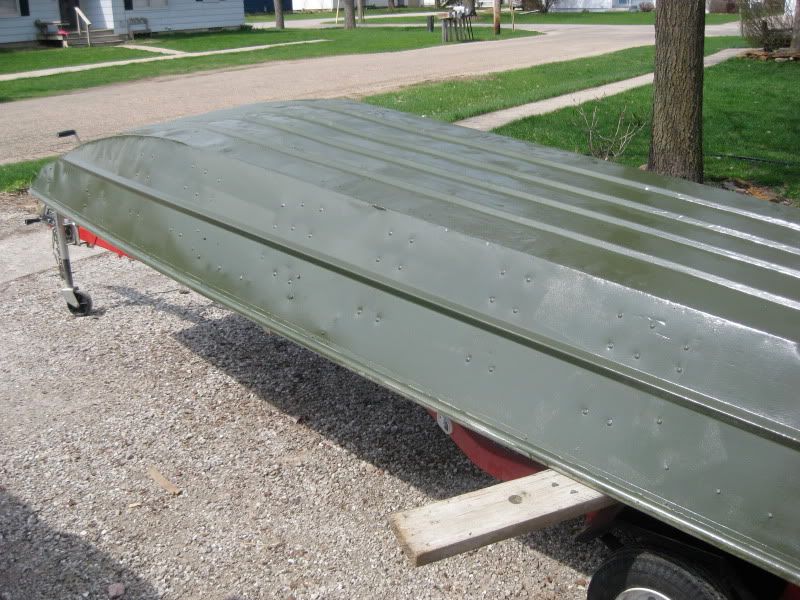
Finished product
IMG_1926.jpg


After I pulled it out in the sun, I see it didn't do as good of a job hiding the dents and gouges as I thought it did, but I am still really happy with the stuff. She is a leaky little boat no more.
I have about 1/4 of it left, which I might use to go over the gunwales after I flip it over.
 
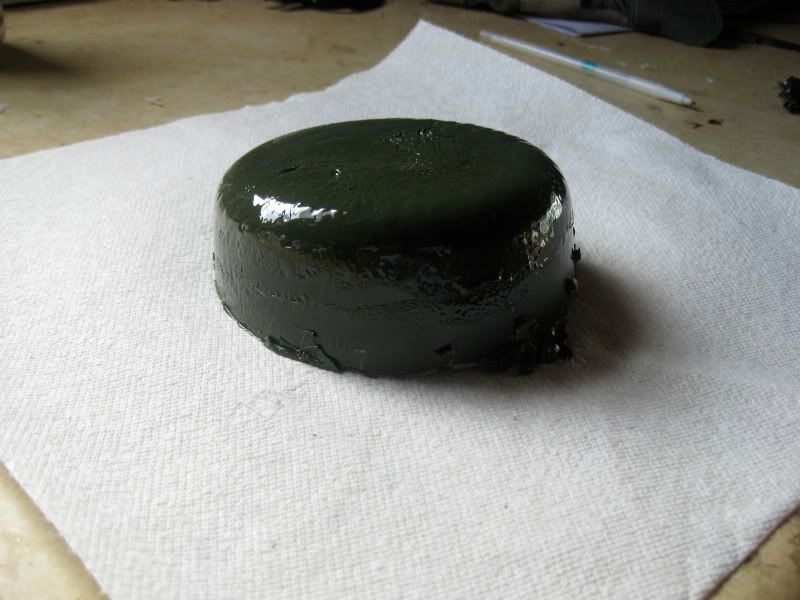
I pried this unused portion out of the measuring cup. It's only been sitting for about 3 hours and is hard enough to play hockey with, but the coat over my boat is still tacky.
IMG_1927.jpg
 
Your boat is lookin good. I'm looking forward to your progress, I have the same Lowe 1436 that I'm gonna start on as soon as my trailer project is complete. I'm thinking of only Steelflexing the bottom though so the sides wont be glossy. What did you do about a fuel tank location? I want to put mine in the little cubby hole by the transom but that darn transom support bracket is in the way.
 
Have you tried the hammered spray paint yet? I'm curious to see how it holds up. I've had crappy results with that stuff because it seems to create a dry layer on top of whatever you're painting, instead of adhering to the surface. I'd really suggest spraying it on super thin the first time around to make sure you don't have a brittle surface. Hopefully it'll give you better results.


Boat is looking good by the way!
 

Latest posts

Top