Problems with 82 Johnson 15 HP (miaden voyage faliure...)

TinBoats.net

Help Support TinBoats.net:

This site may earn a commission from merchant affiliate links, including eBay, Amazon, and others.

CMOS

Well-known member
Joined
Nov 12, 2014
Messages
372
Reaction score
5
Location
Magnolia, TX
Howdy All,

I've been working on this motor for a few months and finally got her fired up in the driveway last weekend. This weekend (Labor Day) was supposed to be its maiden voyage. Lady Luck was not having any of that however. We never got away from the dock. Hoping for some help with a few things I will need to to.

Problem #1 at the boat ramp: When priming the bulb I saw fuel pouring out of the rear part of the lower cowling (float issue I'm betting). I did do a full carb kit in this carb myself, so the leaking fuel was a surprise.

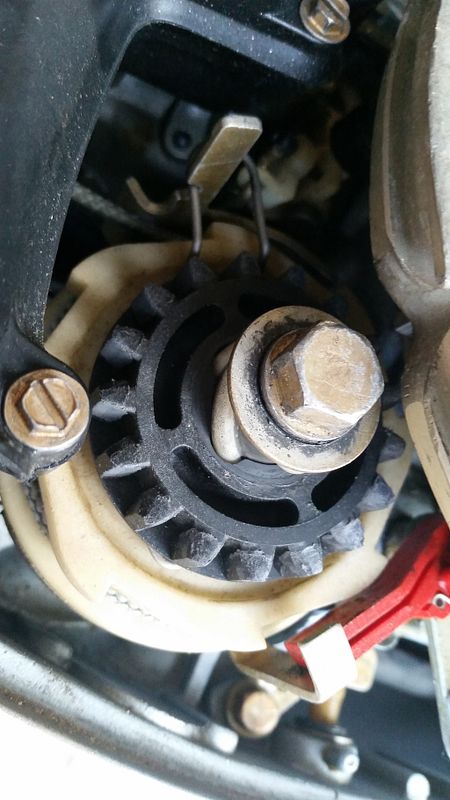
Problem #2: I was able to get it started but the idle never did get up to an RPM that was sustainable without me having to slightly advance the throttle. Engine finally died. Could not get it to restart again. However, a secondary and more pressing issue is that I'm having problems with the recoil starter in that there is a red colored "arm" that keeps engaging the starter gear that stops the pull cord from coming out. I now have a sprained wrist due to this. When I try to pull the cord (yes, in NEUTRAL) the cord will come out maybe 1/4 or 1/3 of the way then dead STOP and lock. It's the red arm thingy (darned if I could find what this part is called on Boats.net or my service manual.) I also need to replace the recoil spring as the cord does not retract all the way. So - how do I 1) replace the recoil spring and how do I keep that red arm thingy from engaging the starter gear? See attached pic.

I tried to restart the motor in the driveway after the failure at the lake. I could not reproduce the leaking fuel at this time, however I still plan to pull and check the carb after I get the starter issue resolved.

Thanks for any guidance on this.

CMOS
 

Attachments

  • DSCN6219.JPG
    DSCN6219.JPG
    57 KB
That little red arm is a lockout to prevent you from starting the motor in gear. If you look closely, you'll see a small bump on the timing plate that turns with the throttle. If the lockout is engaging, reduce the throttle a bit.

That should stop the lockout from engaging.

The recoil should be easy to fix. Pull the rope out as far as you can. Then open a pair of pliers and stick them under the sprocket that engages the flywheel. Now you should be able to release the pull cord without it rewinding. Now remove the starter handle, (may need to cut the rope to remove it). Wrap the rope around the pulley one or two more turns. Feed the rope back through the cowling and retie it to the handle. Should rewind nicely now.

Good luck!
 
At this point you are going to need to invest in a manual.
There is a specific length of starter cord for the starter. There is a specific way to do the recoil spring as well.
As far as the idle RPM goes, once again the manual can be used to teach you how to properly sync and link that engine. "Linkage set-up"
That engine was never one to have too many RPMs at idle even when properly set up but it has plenty to give a good warm up.


This YouTube video should help you along with the starter repair.

https://www.youtube.com/watch?v=RmCm4PD_E9Y


Pappy - I have the manuals already. Is the adjustment you mentioned in the Carb Overhaul section.

Another note: when I had this motor running in the driveway a week ago it ran just fine. Had a good rock-solid stable idle. I remembered last night that when I tried to get it running this past Sunday I forgot to open the fuel tank vent knob. Not sure if this would have the idle implications I saw or not.

I'll start to work on the recoil starter as soon as I get some parts. Question: is the "Rewind Starter Spring" (0323653) the only thing I should replace when i tear it apart?


CAJUN: looks like a great video. Thank you.


Thanks for any help.

CMOS
 
k,

I want to be able to advance the throttle, if needed, when starting in neutral. So what do I need to do to keep that lockout arm from engaging the recoil gears?

CMOS


kofkorn said:
That little red arm is a lockout to prevent you from starting the motor in gear. If you look closely, you'll see a small bump on the timing plate that turns with the throttle. If the lockout is engaging, reduce the throttle a bit.

That should stop the lockout from engaging.

The recoil should be easy to fix. Pull the rope out as far as you can. Then open a pair of pliers and stick them under the sprocket that engages the flywheel. Now you should be able to release the pull cord without it rewinding. Now remove the starter handle, (may need to cut the rope to remove it). Wrap the rope around the pulley one or two more turns. Feed the rope back through the cowling and retie it to the handle. Should rewind nicely now.

Good luck!
 
The lockout arm is directly engaged by the timing plate. The timing plate is what increases the initial throttle (until the butterfly starts opening). There really isn't any adjustment. It doesn't prevent you from increasing the throttle when it's started, but just prevents starting it with the timing advanced too far.

Not recommended, but you could shorten the small arm that rides on the timing plate. The only other option is to remove the lockout arm completely. Just make sure that you don't try to accidentally start the motor in gear with the throttle elevated.

Good luck!

bitmap.png
 
I would not alter the safety mechanism, it is there for a reason. Once you have your manual starter apart, make sure all the parts are there. You never know what the previous owner has done, so don't assume anything. I may have the breakdown procedure for the starter.

The video I posted does a pretty good job of explaining.
 
One other item that I just noticed: It looks like the spring to keep the lockout in the correct position is either broken or mis-positioned.

There should be one arm on the back side of the aluminum "C". If that spring isn't positioned properly, the lockout will simply flop around, sometimes causing it to inadvertently engage.

The end of the spring should have a little loop on it. Make sure the loop rests on the outside of the "C"

path8826.png
 
In the manual look for synchronization and linkage adjustments, otherwise known as sync and link. Usually section 2 in an OEM manual.
Did they put it in the same section as the carb and fuel system? NO....that would have made way too much sense!
Read and absorb this sentence -> Once you have done the sync and link PROPERLY you should have plenty of neutral RPM at idle to play with.
Word to the wise. When you do the recoil starter for the first time.....wear safety glasses and a pair of work gloves just to be safe.
Those springs can come out of there like an Anaconda on steroids looking for something to bite.
 
Great info guys. Thanks.

BTW - where can I find that lockout assembly on the on-line parts diagrams (Boats.net, etc.)?

I looked through every section and couldn't find it. Might need some parts for that assembly...

CMOS
 
Part #13 under the Exhaust Housing group:

https://www.marineengine.com/parts/johnson-evinrude-parts.php?year=1982&hp=15&model=J15RCNC&manufacturer=Johnson&section=Exhaust+Housing
 
Kofkorn, good eye on the lock spring. I did not see that originally.

Pappy is so right about the safety when messing with the starter and spring.


Here are a couple of pictures of a 1984 Evinrude 15hp manual starter setup for reference.


Great pics Cajun.

I can now check that paw spring to see if it is in the right place and shape.

I kinda think my spring might be broken . . .

CMOS
 
Yep, pawl spring is broken. I will order some parts and hope to work on this the weekend of 9-19.

I'll keep y'all posted....

CMOS
 
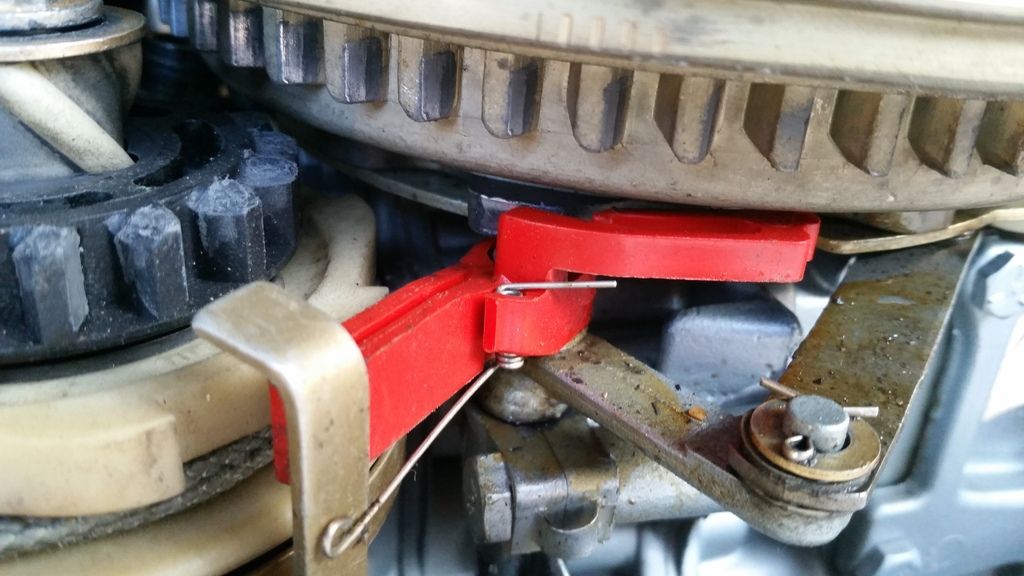
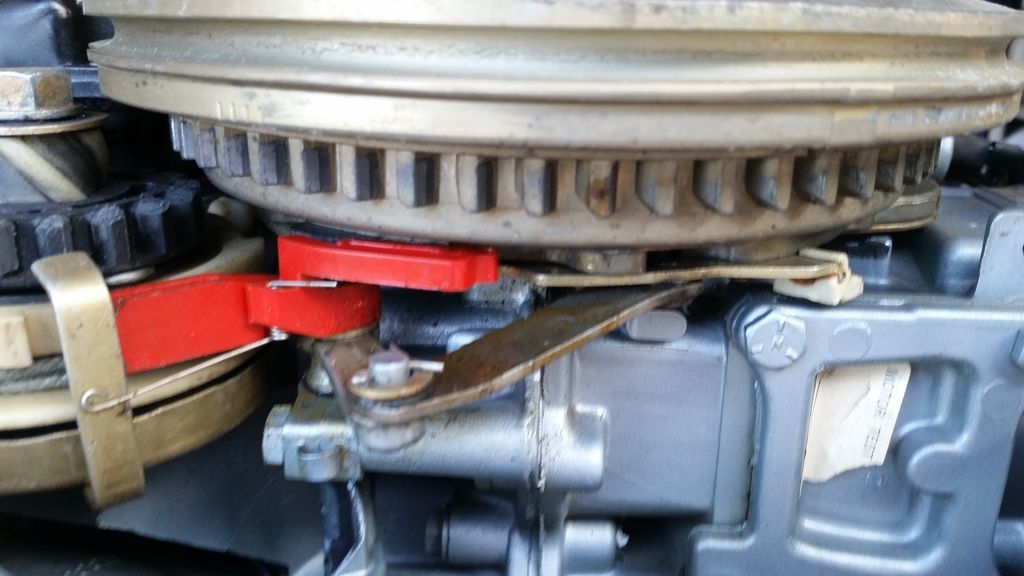
Okay, I have parts now. How do I get access to the screw that holds in the red pawl? See pic:


CMOS
 

Attachments

  • DSCN6227.JPG
    DSCN6227.JPG
    57.7 KB
CMOS said:
Okay, I have parts now. How do I get access to the screw that holds in the red pawl? See pic:


CMOS


If it were me I would see if the cutout on the timing plate will line up with the screw. If not, remove cotter pin to further rotate timing plate cutout over the screw.
 
SF,

Sadly that cutout nearby does not line up. The timing plate will not rotate that far.

Which cotter pin? The small one in the foreground of the pic?

CMOS
 

Latest posts

Top