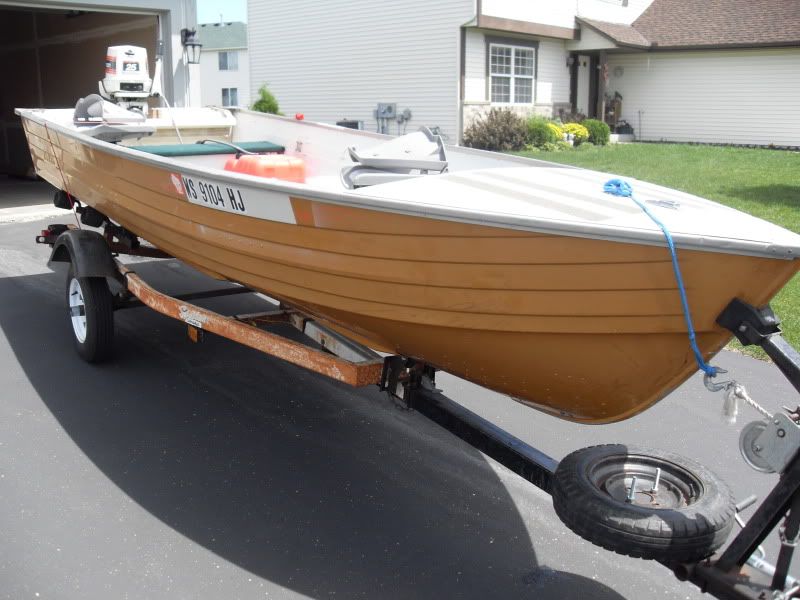
1980 16' Sea Nymph Traveler-Rebirth of Tin 2

TinBoats.net

Help Support TinBoats.net:

This site may earn a commission from merchant affiliate links, including eBay, Amazon, and others.
Well I went to Metal Supermarket and got some aluminum today. It may not be the cheapest place to get stuff, but they cut it to my exact dimensions and price it by the sq ft, so you don't have any waste. It was all cut to size in a couple hours. The aluminum sheet is .063 and was $5/sq ft. I'm not sure if that's good or bad, but it was convenient.

Here's what I'm doing with it.

I don't have a bow mount trolling motor for this boat, but it did come with a transom mount motor. I figured i could simply get a piece of of aluminum angle to mount it to the bow. It's 3"x4"x 1/4". Seams like it will work really well.... and it only cost $5.
TM Bracket.JPG

With the sheet aluminum I want to fill in the open space behind the seats as well as level out between the seat. I'll get lips bent on it on Thursday and paint it up so I can install it next week.
Sheet Metal work.JPG

I also got a couple pieces for around the splash well that I believe had wood previously. I went with aluminum for theses little 1'x1' areas because it will then be flush with the deck instead of raised up 3/4".
 
Nick Jones said:
Heck of a job! You keep me inspired to finish mine. Wonder who will get their third boat first. lol
Hell, I just want to get the 2nd one finished at this point!!! :LOL2:
 
Hey, Nussy.
That's a pretty good idea on the TM bow bracket. I have a transom
mount TM as well and would like to have the option to bow mount it.
I was thinking of doing the same, but my bow cover seems
a little flimsy, but I do see screw holes where a previous owner
mounted a TM.
Maybe I worry too much, but its just a thin sheet of
aluminum riveted to the boat, and my TM weighs about 40 lbs.
Does your bow cover feel pretty solid?
jasper

edit: Hopefully, this pic of my rig will give you a better idea what I'm talking about. The bow is meant to be stepped on, so should I be concerned?


SDC12191.jpg
 
My bow has a wood backing under it. Maybe 1/2-3/4" plywood. My plan is to put 4 bolts through it with big washers to give it some extra support. If I were you, I'd just do the same, Cut a piece of wood 2-3 times bigger than the bolt pattern to spread out the load.
 
Nussy said:
My bow has a wood backing under it. Maybe 1/2-3/4" plywood. My plan is to put 4 bolts through it with big washers to give it some extra support. If I were you, I'd just do the same, Cut a piece of wood 2-3 times bigger than the bolt pattern to spread out the load.

The extra support sounds like a good idea. My problem though is my bow cover is kinda bowed shaped (i.e. not a flat surface). So maybe replacing aluminum bow cover with plywood is be a better solution. I don't want to get in over my head though. I will think on it some. Sorry, I didn't mean to high-jack your thread. Thanks. jasper
 
jasper60103 said:
Nussy said:
My bow has a wood backing under it. Maybe 1/2-3/4" plywood. My plan is to put 4 bolts through it with big washers to give it some extra support. If I were you, I'd just do the same, Cut a piece of wood 2-3 times bigger than the bolt pattern to spread out the load.

The extra support sounds like a good idea. My problem though is my bow cover is kinda bowed shaped (i.e. not a flat surface). So maybe replacing aluminum bow cover with plywood is be a better solution. I don't want to get in over my head though. I will think on it some. Sorry, I didn't mean to high-jack your thread. Thanks. jasper

I still think you'd be ok doing it. Just don't use as big of a backing or use aluminum to back that might be a little more flexible. Hell, you could probably just get by with washers. I wouldn't hesitate looking at your boat to do it.
 
Nussy said:
jasper60103 said:
Nussy said:
My bow has a wood backing under it. Maybe 1/2-3/4" plywood. My plan is to put 4 bolts through it with big washers to give it some extra support. If I were you, I'd just do the same, Cut a piece of wood 2-3 times bigger than the bolt pattern to spread out the load.

The extra support sounds like a good idea. My problem though is my bow cover is kinda bowed shaped (i.e. not a flat surface). So maybe replacing aluminum bow cover with plywood is be a better solution. I don't want to get in over my head though. I will think on it some. Sorry, I didn't mean to high-jack your thread. Thanks. jasper

I still think you'd be ok doing it. Just don't use as big of a backing or use aluminum to back that might be a little more flexible. Hell, you could probably just get by with washers. I wouldn't hesitate looking at your boat to do it.

Oh, I understand what you're saying now. You are suggesting a piece of plywood backing underneath the TM mount, just slightly larger. That makes sense. Yea, that may work and a whole lot easier to do. Thanks for clarifying. -jasper
 
Got the Trolling Motor Mount and Motor Installed and Wired. The bracket seams really stable. I guess we'll see how it works.
Motor Mount.JPG
Trolling Motor.JPG
Trolling Motor Stowed.JPG

The original boat had a regular 3 prong plug on it. I decided to rewire it with 8 gauge and use it for a TM plug. Seams to work pretty well and didn't cost me a dime.
Trolling Motor Plug.JPG


I also got all my wiring done, and wired into the panel. Forgot pics of the panel but I'll get some for next post. I decided to heat shrink each wire and the put another head shrink over the combined cable. Seamed to work good.....and I got to test out my new $10 heat gun(boy Harbor Freight gets addicting) :LOL2:

heat Shrink 1.JPG
heat Shrink 2.JPG

I also wired the trailer lights in. Thanks to those that had the ideas of running the wires through the tongue of the trailer. I was able to fish everyting through. It sure beats the tire wraps they previous owner had on it.

I also was able to bend up the new sheet metal to close in some areas that were open previously behind the seat, next the motor and raise up the area between the seats.

sheet metal 2.JPG
sheet metal 3.JPG

Should be getting pretty closed to finished in the next couple weeks. Perfect timing as that should be when the ice goes out!!!!
 
Was able to get the tin all installed and finish up the switch panel. All I really have left is the rear deck, seats, and front storage hatches. Should hopefully get it finished in the next week.

Here's a few pics.
Before
Sheet Metal work.JPG

After
Sheet Metal 4.JPG

Sheet Metal 6.JPG

Sheet Metal 5.JPG

Switch Panel--From Cabelas
Switch Panel.JPG
 
Really nice work... She's comin along nicely... I like your TM mount, looks clean(better than wood)...

If I were u, I would take a file to those sharp corners on the TM mount, I'd hate to see you or the kid cut opent there arm or something like that...
I would also mark that plug for the TM motor(12V only) or 24V, whatever power your running through it. You wouldn't want one of your guests plugging in a cell phone or laptop or coffe maker and causing a fire from shorting it out.... I know u know what it is, but, others may not. Especially since you said you were gonna sell it when complete.....

Just my opinion, but it REALLY does look great. GREAT JOB so far....
=D> =D> =D>
 
eezerz said:
Really nice work... She's comin along nicely... I like your TM mount, looks clean(better than wood)...

If I were u, I would take a file to those sharp corners on the TM mount, I'd hate to see you or the kid cut opent there arm or something like that...
I would also mark that plug for the TM motor(12V only) or 24V, whatever power your running through it. You wouldn't want one of your guests plugging in a cell phone or laptop or coffe maker and causing a fire from shorting it out.... I know u know what it is, but, others may not. Especially since you said you were gonna sell it when complete.....

Just my opinion, but it REALLY does look great. GREAT JOB so far....
=D> =D> =D>

Thanks for both good ideas. I will definitely do both.
 
Looks great man. Your doing a great job.

The one thing I would worry about is the TM slipping off the mount. Being that thin and slick. TRUST ME.

When I starting fishing with my buddy back home, He had a small flat bottom with a 15 hp motor. I made a bracket like that and we mounted the new TM. One day while fishing, we came out of a cove protected from the wind, wide open and hit some rough chop. I saw a black and red flash go past my face. Asked my buddy what the heck was that. He pointed up front and the new TM was gone. Yep, now it rests on the bottom of Sardis Lake. We're lucky it didn't hit us in the head. After that, he screwed a piece of 2x4 on the bracket with 2 countersunk holes where the TM screws down into them.
 
That's a good idea. I was actually thinking about using a piece of rubber and glueing it on each side of the bracket, that way it would have some more bite to it.
 
Well finally back at it. Was able to get some work done over the last couple days. I was able to get all the wood cut and and carpeted. Some pieces twice :oops:. One recommendation for everyone out there, make sure all of your carpet is facing the same direction as it will be on the boat. I have a few panels that are next to each other and I put the carpet on 180 Degrees, and you can see the grain is darker in one direction than it is in the other. Also I used Henry Outdoor Carpet Adhesive and that stuff sticks like crazy. I've seen a lot of questions about glue lately so I recommend going that route over contact cement or spray glue, which I used on my last build.

I should have the boat finished tomorrow and I'll post some pics. Just have a couple hinges to install and a seat base to mount, then wash it down and touch up the paint job.
 
Well here she is!!! It's pretty much done, just a couple minor things like screwing some straps to the hatches so they can be opened and repainting the wheels. Have a little bit of touch up work on the boat and trailer.

She's going up for sale this weekend so let me know what you think I should ask. Motor is a 1979 Chrysler 45HP. Everything on this boat is in working condition.
Finished 1.JPG
Finished 2.JPG
Finished 3.JPG
Finished 4.JPG
Finished 5.JPG
Finished 6.JPG
Finished 7.JPG
 
Top