TinBoats.net
The original aluminum boat site!
You are using an out of date browser. It may not display this or other websites correctly.
You should upgrade or use an alternative browser.
You should upgrade or use an alternative browser.
1997 Landau 1648 Jon Boat
- Thread starter meonline06
- Start date


Help Support TinBoats.net:
This site may earn a commission from merchant affiliate
links, including eBay, Amazon, and others.
meonline06
Well-known member
Thank you markc
meonline06
Well-known member
I finished up the rod locker this evening. Right now it can hold 8 rods that are up to a little shy of 8' in length. I used some PVC pipes for tubes that I can slide my rod tips into so they won't get beat up. I had been considering the layout for a long time, so I thought I had figured out the best way to arrange things so that it would be easy to access all of the rods. I didn't want to have to move the rods on top out of the way in order to get to one on the bottom. I came up with a kind of J-shaped pattern for my configuration. It did prove relatively easy to access all of the rods, but unfortunately it made a somewhat bad angle for placing rods into the tubing in the bottom corner. Specifically, it's hard to put my 7'6" heavy action flipping rods there because they're not as bendy as the others. Anyhow, I think it will work out just fine; I'm going to put my shorter rods in the corner and I will see how well it works out this year. I may consider changing the configuration around later down the road. I'm sure I will at least add more tubes so it will hold more rods.
Attachments


meonline06
Well-known member
I took the boat out twice this year before my tow vehicle decided to stop working. I don't think I will be putting it in the water anytime soon; at least not until I come up with the money for a new transmission. However, I can't really say that it has slowed my fishing down any. I just fish from the shore now. I figure I will try to use this as an opportunity to add a few things. The boat is "fishing functional" now, but I want to add some things to make it better.
Largemouth have been my passion in recent years, but my roots are from fishing salt water in the Chesapeake Bay and Rappahannock River with my old man. I've been catching red fish and stripers lately off of my dad's dock on Grace Point and would really like to take the boat over there to go after some bulls. I also love going after the big blue cats on the James River. Anyway, I said all that because I realize that I need to make my boat more functional for a bunch of different types of fishing. My build has been all about bass fishing up until now, but I need to be comfortable whether fishing the Bay's coves and inlets for Reds, fishing the lakes for bass, or the rivers for cats in the dark.
I want to add a livewell for baitfish and shrimp, I need rod holder's for fishing catfish or croaker with the kids, pedestal seats, an onboard battery charger (to make it easier to charge the batteries at the dock), and a new fish finder that at least has down imaging. "Hell Week" starts tomorrow at work (96 hours in 7 days), but after that I hope to get some things rolling.
meonline06 said:I finished up the rod locker this evening. Right now it can hold 8 rods that are up to a little shy of 8' in length. I used some PVC pipes for tubes that I can slide my rod tips into so they won't get beat up. I had been considering the layout for a long time, so I thought I had figured out the best way to arrange things so that it would be easy to access all of the rods. I didn't want to have to move the rods on top out of the way in order to get to one on the bottom. I came up with a kind of J-shaped pattern for my configuration. It did prove relatively easy to access all of the rods, but unfortunately it made a somewhat bad angle for placing rods into the tubing in the bottom corner. Specifically, it's hard to put my 7'6" heavy action flipping rods there because they're not as bendy as the others. Anyhow, I think it will work out just fine; I'm going to put my shorter rods in the corner and I will see how well it works out this year. I may consider changing the configuration around later down the road. I'm sure I will at least add more tubes so it will hold more rods.
How are you holding up the handle end of the rods? I see the half pipe, but how are you holding up the half pipe?
meonline06
Well-known member
The pvc was thick enough for me to drill two small holes in each one. Then I used two small screws coated in glue to secure each one. They ended up pretty secure.


$26.06 ($0.81 / Fl Oz)
$27.99 ($0.87 / Fl Oz)
Rust-Oleum, Navy Blue, 207002 Marine Topside Paint, 1-Quart, 32 Fl Oz (Pack of 1), 11
Vera Tools

$36.68
$41.94
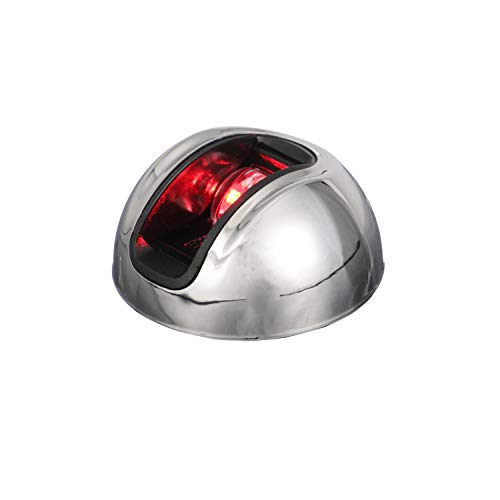
Attwood NV3012SSR-7 LightArmor 2-Mile Vertical Surface Mount Navigation Light, Red LED Lighting, Round Stainless Housing
Amazon.com


$44.88
$49.99
Plano Angled Tackle System with Three 3560 Stowaway Boxes, Fishing Tackle Storage, Premium Tackle Storage
Amazon.com

$61.67
Seachoice Sterling Series Boat Cover, Water Resistant, 14-18 Ft., Fish and Ski Boat
Autoplicity ✅


$224.85
$267.79
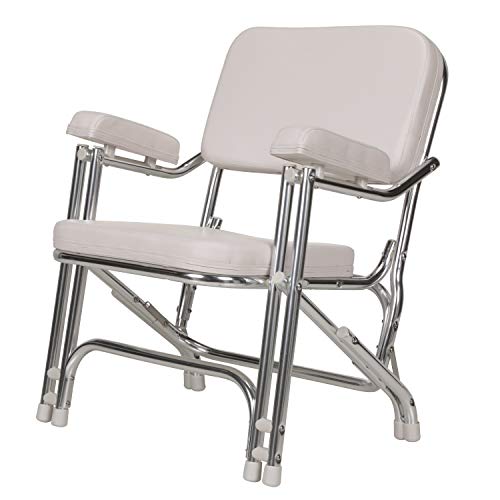
Seachoice Folding Deck Chair, White, Marine Vinyl, Folds For Easy Storage
Amazon.com


$67.82 ($6.17 / Fl Oz)
Rust-Oleum 207013 Marine Boat Bottom Antifouling Paint, 1 Quarts (Pack of 1), Blue, 11 Fl Oz
Vera Tools


$12.88
$18.50
Flambeau Outdoors 4510 Super Half Satchel Soft Bait Organizer 15x8x6.25-Inch
Amazon.com
$29.86 ($4.59 / Ounce)
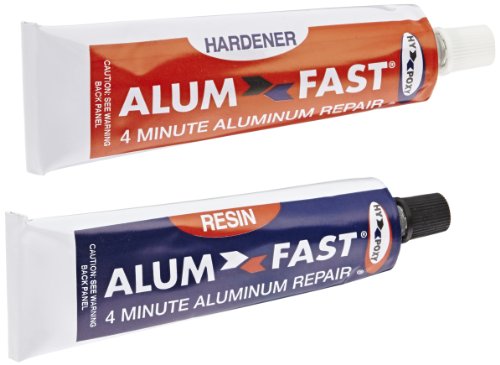
Hy-Poxy H-455 Alumfast 6.5 oz Rapid Cure Aluminum Putty Repair Kit
Amazon.com


$29.39
$34.59
Seachoice Cast Aluminum “S” Dock Cleat, Corrosion Resistant Aluminum, 12 in.
Amazon.com


$104.98 ($104.98 / Count)
Ever-Ready Industries Premium Trauma First Aid Kit for Outdoors, Workplace, and Home - Exceed OSHA Guidelines and ANSI 2009 Standards - 240 Pieces - Includes Bonus Travel Kit
EVER-READY INDUSTRIES

$26.99
$29.99
Calamus Fishing Tackle Bags - Fishing Bags for Saltwater or Freshwater Fishing - Rip-Stop PE - Padded Shoulder Strap - Pliers Storage -Green
Landon Technology


$19.89 ($19.89 / Count)
$26.88 ($26.88 / Count)
First-Aid-Kit-for-Car-Home-Travel-Camping-Businesses, 263pcs Compact Waterproof Hard Case, Public Emergency All Purpose Medical Kit - Perfect for Survival, Vehicles, Boat, Sports, Hiking (PUMIER)
Pumier Medical


$42.78
$47.79
STAR BRITE Telescopic Floating Extend-A-Brush Quick-Connect Handle with Boat Hook Attachment, 3'-6' (040054)
Amazon.com


$45.99 ($0.14 / Count)
$49.99 ($0.15 / Count)
330 Piece First Aid Kit, Premium Waterproof Compact Trauma Medical Kits for Any Emergencies, Ideal for Home, Office, Car, Travel, Outdoor, Camping, Hiking, Boating (Red)
THRIAID

meonline06
Well-known member
Didn't have a lot of time today to work on the boat, but i did manage to get started on the missing corner cap. I have been putting it off because I wanted to have one fab'd up and welded on, but I don't want to pay the money right now and I'm tired of looking at where the cap should be. I sent a friend the dimensions for the cap and he got some aluminum from work and cut it to size for me. With some angle, rivets and a hammer I managed to get it in place. I started by securing one corner and bending and hammering it out a little at a time to fit the contours of the boat. The cap is secured so now I need to get it prepped for paint. I was considering using JB Weld to smooth out all the lines before painting but I think that it would take quite a bit to make it look good. Does anyone know of another compound I could use that would cover more area/be cheaper?
Attachments


meonline06
Well-known member
I finished up the corner cap this morning when I got home from work. All I had left was to use a little bit of JB Weld to help smooth out the corners, sand and paint. After putting fresh paint on the cap I realized how much muck the boat picked up the few times I took it out. I guess my next job will be to give it a wash. Here are a few pictures.
Attachments


meonline06
Well-known member
I went out to the local Bass Pro on Memorial Day and picked up a few things for the boat. I finally got a pedestal seat for the front deck. I've had the base and pedestal for almost a year now but never bought a seat. It looks like it will be comfortable, can't wait to test it out. I also bought some straps to keep my rods from flying off the deck while I'm motoring from spot to spot. When I originally installed my bilge pump I just stuck the hose out over the transom, but no more of that now I have a thru hull fitting that any bilge water will be pumped through. I bought a spare tire trailer mount for I believe $16. I just had the spare thrown in the back of my truck before. And I installed a cleat at the front of the boat for tying off the anchor. Before I was tying off to one of the handles on the outside of the hull which was a pain. And lastly I came up with a fix for the missing gunnel I had right next to the missing corner cap. Still a lot of small things to do like install cup holders and a radio/speakers. I will probably never be officially done, but I feel like I'm getting closer.
Attachments


meonline06
Well-known member
I finished up working on the gunnel today. I used a small piece of pvc with a 1-1/4" exterior diameter then wrapped it in a thin section of aluminum sheet I had laying around the garage. I could have done this without the aluminum but I felt that the pvc was too smooth and that it would stand out because of that. I bought this boat with a lot of nicks and dents, so I "aged" the new aluminum to match the rest of the boat. I used JB Weld to smooth out the transitions and painted with the same Rustoleum that is on the rest of the hull.
Attachments


Buckethead
Well-known member
Did you ever get around to fabbing a livewell out an old bench seat? Just curious. I've got mine mounted and covered for now just to get on the water, as soon as I get my pumps, hoses and a lid fabbed I'll finish.
meonline06
Well-known member
It turned out that my benches weren't quite big enough to work for the livewell I had in mind. I could have used the aluminum from two benches but didn't feel comfortable having that many seems. I plan on picking up some aluminum from a local company on Friday and getting started. A buddy of mine said he would weld it for me so it's still up in the air whether I weld or 5200 it.
meonline06
Well-known member
...so take everything I said in my last post and toss it out the window. Friday morning when I went to start the car I had no juice. After spending my aluminum budget on a new battery and an oil change I had to reconsider my livewell plan.
I'm going to go with my original plan of using the material from the old bench seats to make a livewell. I got started by flattening out one of the benches and marking my cut lines. I got about 12 inches cut before the battery on my cheap jigsaw died and needed to be recharged. So tomorrow I think I am going to have to run by Harbor Freight and find something better for cutting metal.
I'm going to go with my original plan of using the material from the old bench seats to make a livewell. I got started by flattening out one of the benches and marking my cut lines. I got about 12 inches cut before the battery on my cheap jigsaw died and needed to be recharged. So tomorrow I think I am going to have to run by Harbor Freight and find something better for cutting metal.
meonline06
Well-known member
I haven't had much time to work on the boat lately because of work. I got about an hour of build time in on Sunday and I planned on finishing up the livewell tank fabrication yesterday. Unfortunately, I only managed to get an hour in after a storm knocked the power out for most of the evening.
...So the plan is to make a livewell using repurposed aluminum from the original benches/deck. I bought a new jigsaw from the trusty neighborhood Harbor Freight for $20 and got to business. I cut out three separate sheets that will form the five walls of the tank. The longest sheet was bent using a homemade metal brake thrown together using scrap wood and hinges laying around my garage.
 This piece will end up forming the bottom and two smaller side walls. By the way I ended up making the brake because it%20was too hard to get crisp bends and flat walls without it. The three different sheets will be held together android sealed using 1" aluminum angle and 3M 5200. I had to drive to 3 different Home Depots to find the 5200. Someone had bought all the inventory from two of the stores.I hope to finish with all of the angle tomorrow.

...So the plan is to make a livewell using repurposed aluminum from the original benches/deck.
I bought a new jigsaw from the trusty neighborhood Harbor Freight for $20 and got to business. I cut out three separate sheets that will form the five walls of the tank. The longest sheet was bent using a homemade metal brake thrown together using scrap wood and hinges laying around my garage.
meonline06
Well-known member
Got some work done yesterday. I managed to finish fabbing the tank and sealing it up. I will give it the water test tomorrow. If it holds water I will run over to BPS and pick up a livewell pump, switch/timer, hose and fittings. I am still trying to decide whether to have the water drain from the tank thru a drain hole in the bottom or with a pump that will pump it out.
Attachments


meonline06
Well-known member
I water tested the livewell tank over the last week or so. I honestly never planned on leaving it full of water that long; I was just busy with work and family. The good news is that it didn't leak a single drop that whole time. I went by Bass Pro Shops to look at the livewell plumbing but I feel like they were way overpriced. I think my new plan is to pick up a pump from walmart and get the rest of the plumbing from the local hardware store. I will also check eBay to see if they have any deals. I would like to get a good switch that has an aerator timer as well.
I think I would like to paint it white, but I'm not sure what kind of paint to use.
I think I would like to paint it white, but I'm not sure what kind of paint to use.
nctlspider
Well-known member
Looking good.
Are you worried about the livewell leaking in the future once the boat flexes as it runs? I'm just curious if the 5200 will hold up.....do you plan to rivet or bolt?
Are you worried about the livewell leaking in the future once the boat flexes as it runs? I'm just curious if the 5200 will hold up.....do you plan to rivet or bolt?
meonline06
Well-known member
I feel pretty confident that the 5200 will hold up. The reason why it is so popular with a lot of the builds on this site is because it is so flexible after it cures. For that reason I don't think that the hull flex will be a big deal. I've replaced close to 100 of the old rivets on the hull using the 5200 and haven't had any problems with any of them. I run the boat pretty hard and have had it power sliding many times. I plan to rivet it to the framing that is already in there.
joseph101088
Well-known member
wow its a small world. when i was in japan in march i wanted my wife to look at that boat so i could have one when i get back but when she saw the dent she wouldnt look at it. gotta love craigslist. nice job in a little bit of time. i ended up getting a 1648 mv in the end. what lakes do you fish in the henrico area? i have been to hopewell a few times but thats it.
meonline06
Well-known member
It's definitely a small world. When I first bought it I was a little nervous that I may have bitten off more than I could chew but it ended up ok. I fish the James River in the Dutch Gap/Osborne Landing area a lot. There are some monster catfish in there. Im not great at river bass fishing tho, so I go over to Lake Chesdin a lot for that.
Similar threads
- Replies
- 6
- Views
- 516
- Replies
- 3
- Views
- 718