Alumacraft 1448MV - Catfish, Casting & Bowfishing

TinBoats.net

Help Support TinBoats.net:

This site may earn a commission from merchant affiliate links, including eBay, Amazon, and others.
For power trolling or anchor fishing? Might want to consider a pair detent rings (think sawtooth pattern on the rings that will interlock every 15` or so) so you can position the holder and they won't swing around on you as the boat rocks. Might be a pain to make but they should give better / longer service vs. a locking bolt or collar setup.

Jamie
 
Ranchero50 said:
For power trolling or anchor fishing? Might want to consider a pair detent rings (think sawtooth pattern on the rings that will interlock every 15` or so) so you can position the holder and they won't swing around on you as the boat rocks. Might be a pain to make but they should give better / longer service vs. a locking bolt or collar setup.

Jamie

Rod holders will mostly be used for anchor fishing....rarely drift or troll with TM. I was thinking the Spring Button Clips (https://tinyurl.com/2bxp7h8) would do the trick. I thought about the sawtooth but only as a standalone alternative to the button clips. Incorporating it into the design as a supplement is a good idea.
 
Made some good progress on the boat this weekend thanks to my Ol' Man lending me a hand. Installed the female TM plug into the front deck. Got everything taped up, sanded, primed and painted!!! :beer:

I used Dupli-Color self etching primer. Picture of it on a previous post. Took about 9-10 cans. Instead of shooting it, I used Krylon Camouflage Ultra Flat Olive rattle cans. Took about 8-9 cans. Came out a little streaky because of over spray. But I think after it cures for a week, a good wash/scrub job will even it out. Once I get some blood on it, it should look pretty **** good. :D I like the color and it is "ultra flat". I only painted the inside and just over the rail on the outside.

Mocked up my catfishing seats and snapped a few pics.

Prime Time
deckprimer2.jpg

deckprimer.jpg

DSC_0004.jpg


Dad wiping the primer down with a tack cloth
DSC_0001.jpg


Painted
DSC_0005.jpg


Catfishing seats (Wise Big Man Hunting/Fishing Fold-Down Boat Seats in Advantage Max-4 with Arm Rests)
DSC_0007.jpg

DSC_0009.jpg


Me and my fishing partner testing them out.
DSC_0012.jpg

DSC_0024.jpg
 
Made a little progress on the boat over the holiday season (also the opening day of hunting season!!!) Between smoking doves on the wing and a crow I managed to wet sand the boat and add another coat of paint. I think I made a mistake using rattle cans...but the wet sanding between coats is helping. In the end, I'll have spent more money using the rattlers instead of spraying it. Lesson learned.... :(

I've been thinking on my rotating rod holders for about a month now. I've talked them over with my brother and Dad. And together we found one fundamental flaw with them. It is a lever. By design, it is inherently week at the point were the upright attaches to the plate/boat. This can be minimized by using braces which would move the stress point up the upright and thus reduce the leverage....but that would be more fabrication. I think there is a better solution.

Me and dad tried to come up with a sliding type solution back when I starting toying with the rotation solution. We just couldn't come up with a good solid way to do it (the main issue was I do not want a bar that extends the entire width of the boat). I was sitting in the boat this weekend brainstorming on solutions and it hit me....so simple...why didn't I think of this before.....

So, here is the new solution.
No solid bar spanning width of boat - Check
Holders can be moved in the direction of bow for fishing and stern while in transit - Check
Rods can be left in holders while the holders are adjusted - Check
Holders will handle a river hog - Check
sliding_holders.jpg
 
That deck is amazing, I am diggin those hatches, and the seats look amazing I will get a set when I can finally get a jon.
 
Bassman018 said:
That deck is amazing, I am diggin those hatches, and the seats look amazing I will get a set when I can finally get a jon.

Thanks! I put a lot of thought into the layout and design of the deck but my fabrication guy really out did himself. I'm really pleased with the hatches. They're pretty **** stout. The seats are pimp!!! Wanted something big and comfy that I could doze off in on those long nights catfishing.. These were the closest thing to a Lazy Boy.
 
Trolling motor install completed and test run!!! :beer:
Saturday I finished wiring up the trolling motor. I installed the breaker and terminated the wiring. Not much to it. Ring terminals on the leads that connect to the battery with some heat shrink for added strength/protection. Spade connectors on the leads that connect to the breaker.

I was itching to try it out that new deck and trolling motor. So Sunday, I slapped on the bad outboard that came with the boat and threw an extra battery in the rear just to add some weight to the back. Then me and my brother grabbed the fishing bows and hit the water. This was only my second time ever in a 1448. It was unbelievably stable even with both of us standing on the bow of the boat. We didn't have one close call...even when landing fish, moving around on the bow or moving from bow to stern. The mount for the butt seat seems to be in the perfect place. I'm really please with the TM. I like the fact that the Varimax has infinite adjustable speed. With it wide open, I think you could ski behind it.

Non-stop trolled from 10AM to 2:30PM... The battery still had plenty of juice. Optima marine battery combined with this new digital trolling motor technology really works wonders for extended time out on the water.

Oh yea...we shot 4 or 5 gar fish and 1 carp. Got a little blood in the boat; now the paint looks perfect!!!!

Breaker View#1
DSC_0249.jpg


Breaker View#2
DSC_0252.jpg


Front Deck Battery Box
I mounted the bow light inside the box so that it is out of the way. You might also make out a zip lock bag taped to the inside of the box...that's my boater's registration card.
DSC_0250.jpg


Here's a sort of before and after pick...the shadows didn't make for a good picture.
DSC_0257.jpg
 
Second trip out on the boat and whacked a citation carp with the bow! This boat is going to be my new good luck charm...can't wait to finish her. Did some work on the trailer this weekend...ain't gonna talk about it until I have some pics to post.

09/25/2010 Carp 22lbs 35"
22lb_carp.jpg
 
Nice carps you have there.I like your boat to,1448 you say.I has a 1448 to but she has open area in the mittle of the boat.I has a small front deck i build out of treated ply and she already had rear deck made from alimimum.Maybe you see her on my post I make befor?1448s are about the best when it comes to 14 footers
 
That's a nice goldfish :)

I wish they would let folk bow hunt the city park up here. There are some fish in that lake that make that one look small, 3+ footers...

Jamie
 
Did a little piddling on the trailer over the weekend. After seeing the posts from all the users about making trailer guide-ons from ladder wing spans and how satisfied they were with the results (and the costs); I figured I'd give it a whirl.

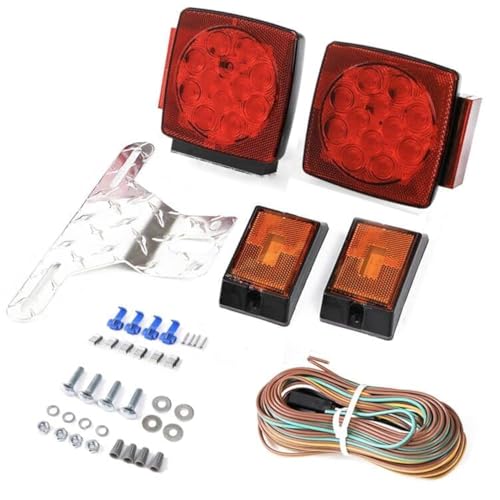
I swung by Home Depot & Tractor Supply and picked up the materials:
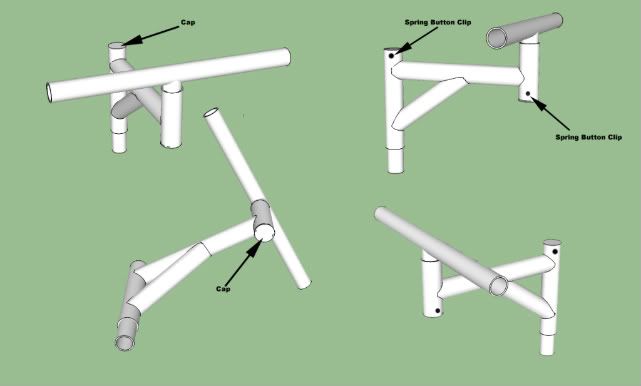
1 ladder wing span (The biggest one they ha...I think it was 46")
2" PVC 10'L (I only needed 6')
2 2" PVC Caps
6 5/16" 3" carriage bolts (nuts and washers)
2 acorn nuts
Reflective tape

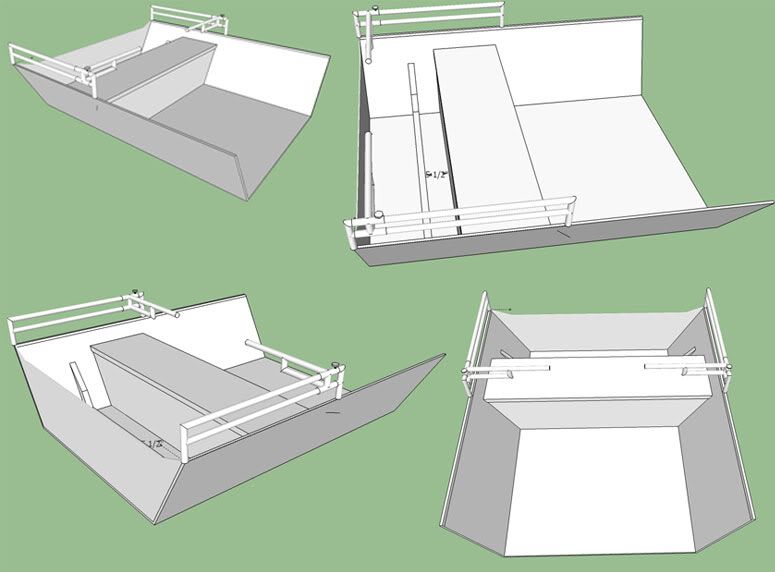
Here are the basic instructions: https://www.widgetsailor.com/owners/greg/guides.html


Like everyone else, I'm really happy with how they turned out. My old guides were real short. Now it's much easier to back the trailer because I can see the guides better and easier to load the boat because I can put the trailer in deeper with the taller guides. They are as sturdy as they need to be.
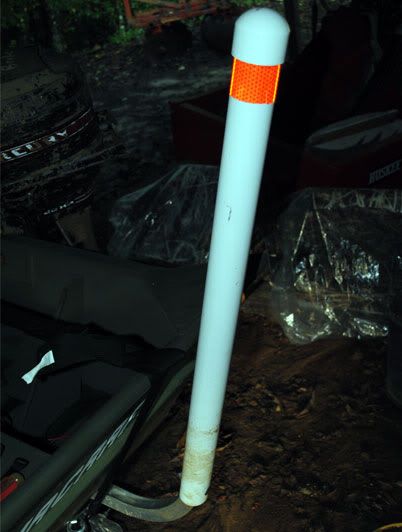
New guide....looks **** good I think. :beer:
DSC_0260.jpg


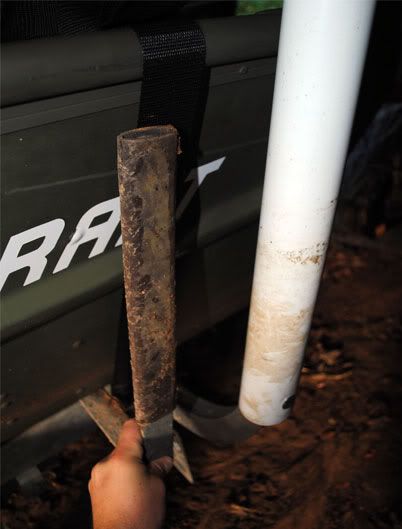
New guide next to the old guide....the old guides sucked.
DSC_0262.jpg


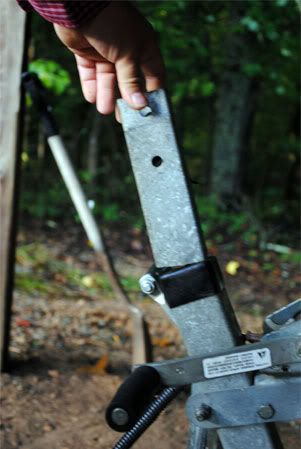
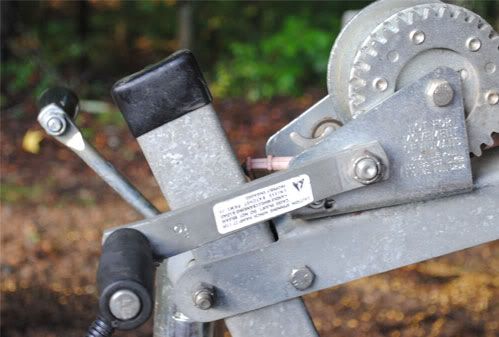
Chopped about 8" off of my winch post. Now it's a lot easier to work the jack, hook up the chains, and step over the tongue.
DSC_0267.jpg

DSC_0263.jpg


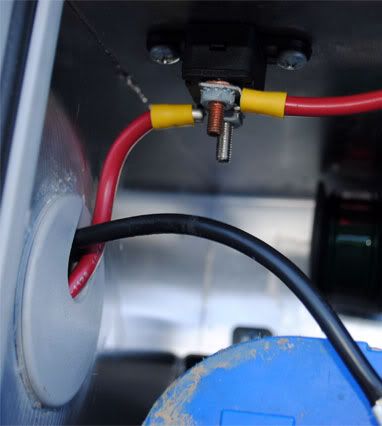
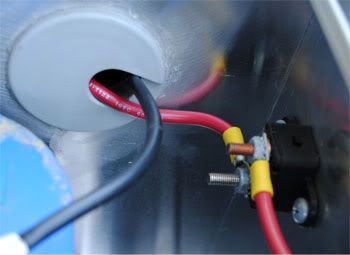
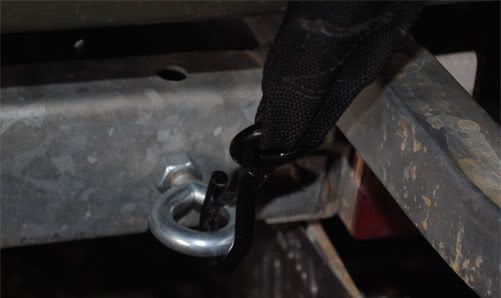
Added an eye bolt for the transom strap. Before I was hooking the strap in the hole that you can see above the eye bolt. This make the strap twist and was a pain in the *** to hook/unhook.
DSC_0261.jpg


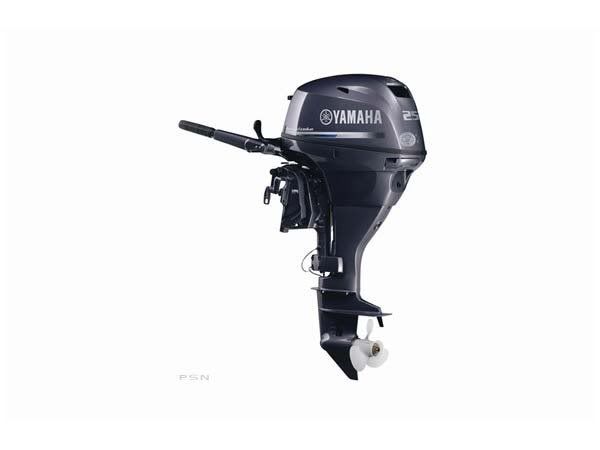
Still squirreling away money for the motor purchase....
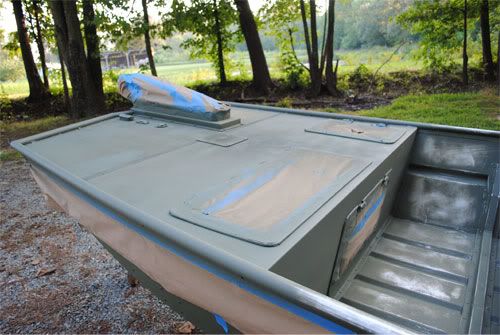
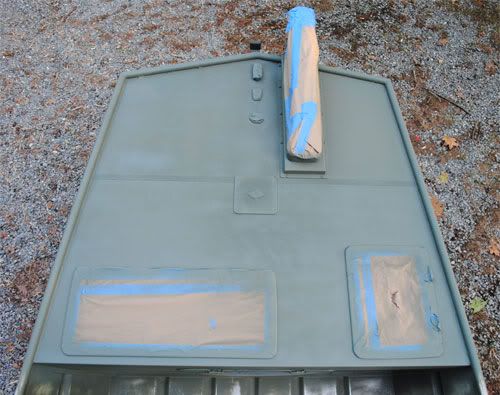
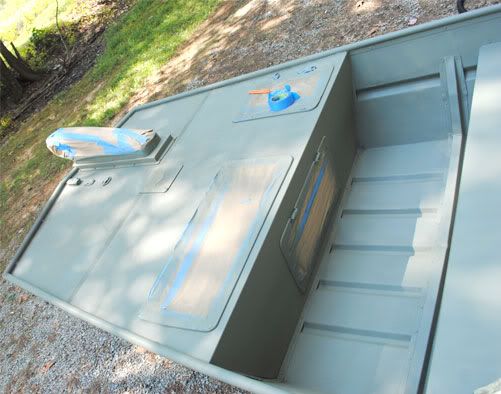
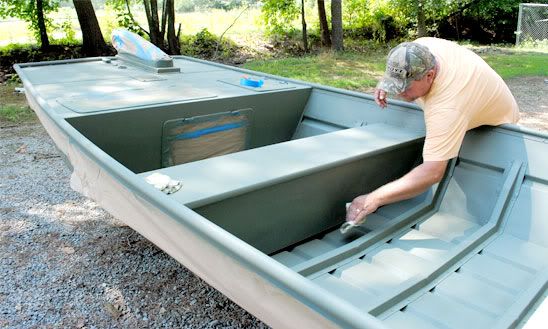
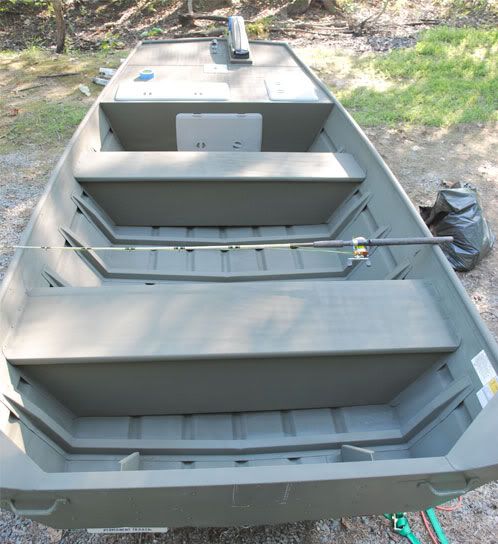
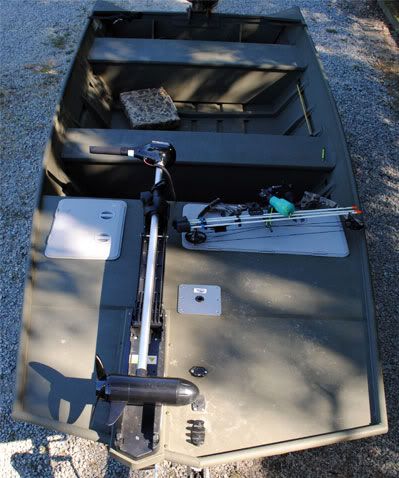
 
River instead of trying to fab some rod holder idea. Just purchase a couple of manufactured ones. For what you are trying to accomplish these would be best IMO.
https://www.driftmaster.com/Other.html

I can see you just mounting the holder across the back of the boat and just leaving it there. i am in the process of mounting a couple of rod holders on my 1432 for spider rigging for crappie. I do not need the beef for gaint cats so I can get away with a smaller set up. The flaw I see in your design is the holders prutude into the seating area of the boat which could become a "this is in the way all the time issue." If you run a solid bar and mount to it in the the rear of the boat right over the outboard it will never be in the way/ Just my 2 cents. great froont deck btw.
 
Hey, red. Thanks for checking out the thread.

I'm not going to fab the actual rod holder, just the bar. If you look closely at the drawing you'll see one drawing shows the bars moved forward towards what should be the middle of the boat and another that shows the bars towards the back. The bar will.slide on the rails and lock into position.

Holders mounted on the stern would mean that the rods would be a long way from where the seats will be mounted and will be hard to get to.

With the split bar I'll have 2' of clearance between when they are deployed forward. That way I can get to the back of the boat. I also like to keep the bars low relative to the floor of the boat. For me, taller bars get in the way of the hook set (I don't fish circle hooks).

Hope all that makes sense. ;-). Thanks for sharing your ideas. Its nice to get different perspective

Take care,
 
Finally slapped an outboard on my tinny! After much debate -- new/used, 15/20/25hp -- I finally went with a 2011 Yamaha 25 SEHA. I know...I know... How fast, how does it plain off, were are the pictures....I know... :D I'm going to do my best to get some this weekend and maybe a video of the whole-shot. This is just a little bump to get my thread back up to the top and maybe spark some interest in it.

Won't know how fast she'll run until I buy a GPS fishfinder.

2011 Yamaha 25 SEHA
Engine Type 4-stroke, 2-cylinder
Horsepower 25 hp
Fuel Induction System Carburetor
Starting System Electric
MEASUREMENTS
Shaft Length 15 in.
Weight 174 lbs.
OPERATIONAL
Steering System Tiller
Propeller Aluminum

25seha.jpg
 
Nice boat man =D> Love the front deck. The new motor looks great, seems very heavy though.
 
Top