Rhyan Craft: Now BRINE CRAFT

TinBoats.net

Help Support TinBoats.net:

This site may earn a commission from merchant affiliate links, including eBay, Amazon, and others.
aeviaanah said:
Ive never seen three trolling motors on one boat...only one per boat before. How come you do like this rather than outboard? Quietness?? Also, what did those decals cost? Id like to get some for my build.

Where I live, there are lots of small lakes that are "electric only" and are used as country drinking reservoirs. No gas engines are permitted on the lakes.

When you say decals.... Do you mean the stickers inside my hatches? I don't think I paid for any of them. They come from giveaways, magazine subscriptions, or simply by asking for one.

I look forward to watching your progress on your build.
 
Brine said:
aeviaanah said:
Ive never seen three trolling motors on one boat...only one per boat before. How come you do like this rather than outboard? Quietness?? Also, what did those decals cost? Id like to get some for my build.

Where I live, there are lots of small lakes that are "electric only" and are used as country drinking reservoirs. No gas engines are permitted on the lakes.

When you say decals.... Do you mean the stickers inside my hatches? I don't think I paid for any of them. They come from giveaways, magazine subscriptions, or simply by asking for one.

I look forward to watching your progress on your build.
The vinyl graphics on the exterior of your boat. Thanks man, looks like you posted a message...headin that way!
 
aeviaanah said:
The vinyl graphics on the exterior of your boat. Thanks man, looks like you posted a message...headin that way!

The registation numbers and name "BRINE CRAFT" were done by a fellow TinBoat member and site sponsor Vinly Images. John (aka bulldog) is the man when it comes to wraps and decals. I just put in another order today!

Send him a PM on here and visit the site at https://www.vinylimagesinc.com/
 
Well now.... this build didn't take as long as I thought. #-o

The last order of business for me was to hook up all the electrical with contura switches and an easy to access fuse panel. After much debate, I decided to let someone with alot more marine electrical experience than me do the job. Our very own bassboy01 with Fish On Fabrication.

This wasn't the first time bassboy had been involved with my rig. Earlier in my build, he fabricated and installed a base for my bow mount trolling motor to mount to as wells as a few other parts and pieces that were welded on my rod lockers, and filled a few screw holes on the gunnel from the old side console.

The boat's electical accessories consist of:
1. Nav Lights
2. LED hatch lights
3. LED Deck lights
4. 2 LCD finders
5. 3 Trolling motors
6. Bilge
7. Fill pump to livewell
8. Aerator for livewell


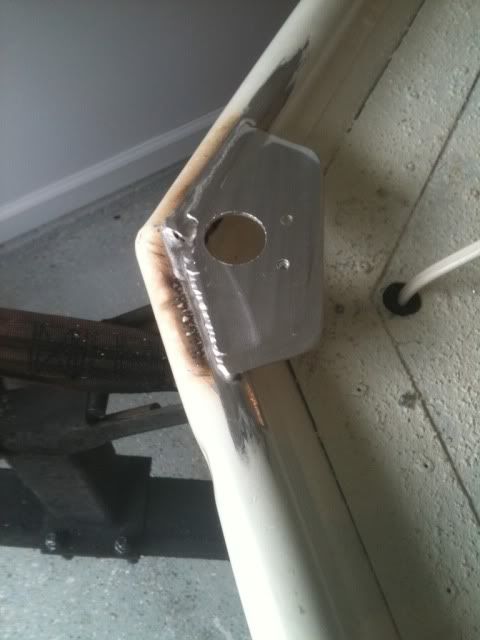
Before mounting the bow light, I needed a little platform built to mount it to. Enter bassboy's custom design.
d781e45b.jpg


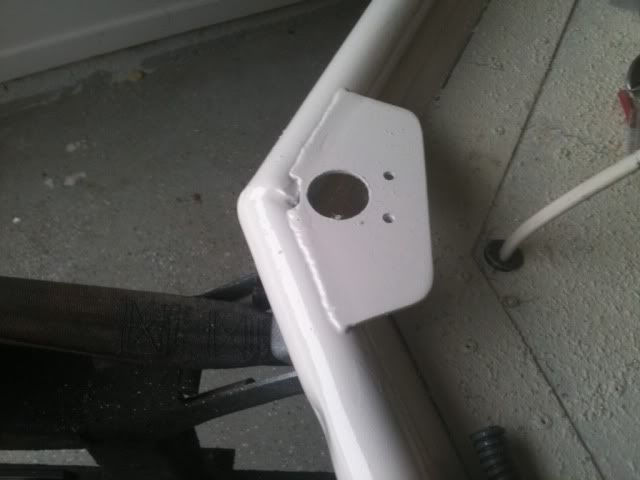
Shot with self etching primer and paint
11b34f0e.jpg


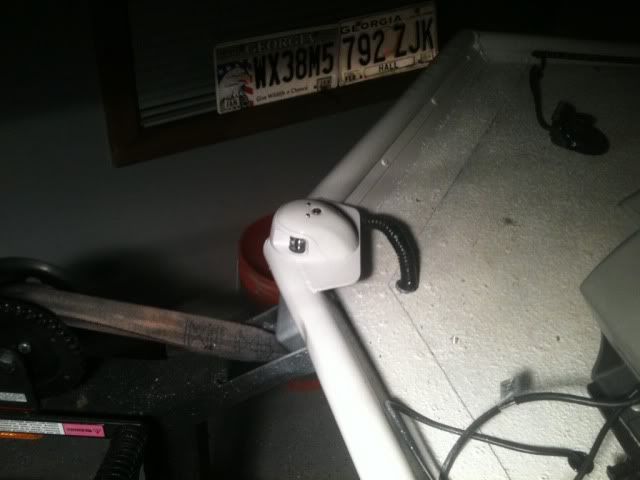
And a white bow light to match the decks 8) You'll also notice a bigfoot switch in this picture to operate the 2 rear trolling motors.
3071ed65.jpg


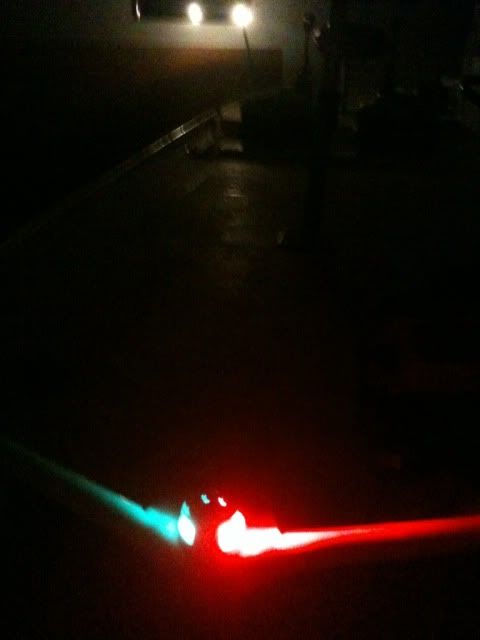
He also installed the anchor light base which you can see working in the background
fadad61d.jpg


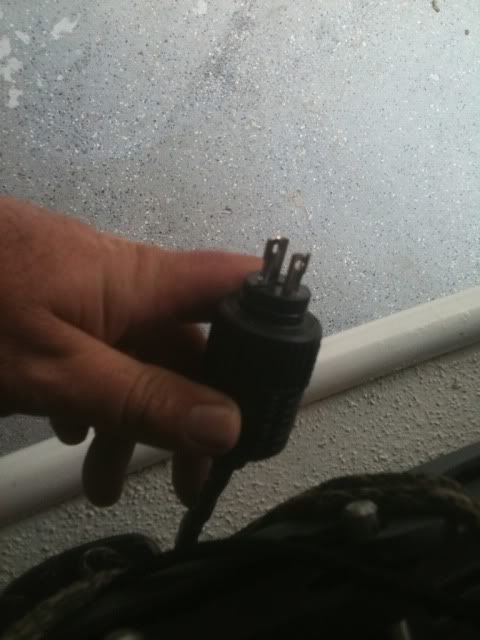
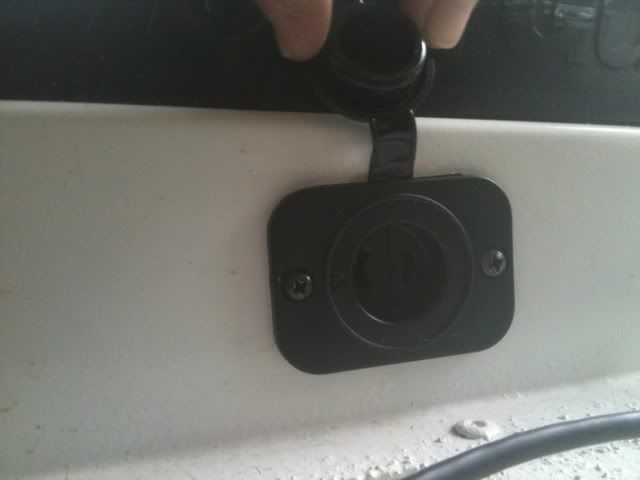
The trolling motor plug I had originally installed wasn't up to snuff, so I had him change it out for one of the twist and lock kind
17029bf3.jpg

2549b5df.jpg


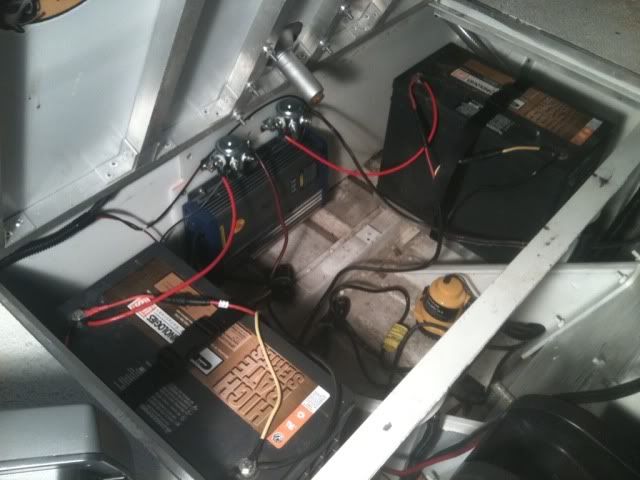
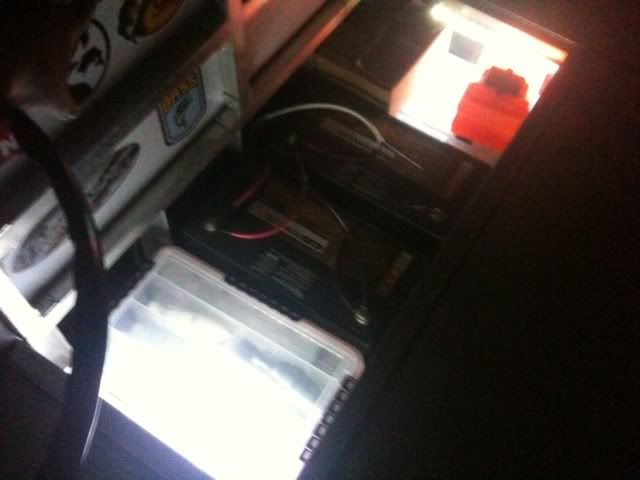
At the transom, bassboy made 2 aluminum battery trays to house the agm's in the back and locked them down with nylon straps. A 3 bank charger was installed here against cutting board material to charge all 4 batteries (front 2 are run parallel) and above the charger you'll see 2 relays which allow the bigfoot switch to operate the back 2 motors from the front deck.
8cfab41c.jpg


I wanted to keep all the switches out of sight, so I had him install them here next to the livewell and an easy reach from inside or outside of the boat.
145ec95b.jpg


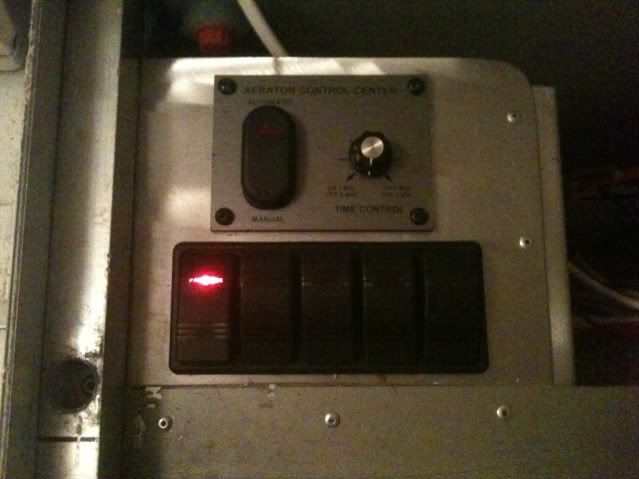
after another fab job... bassboy created this panel that runs all the electrical on the boat
337cedc0.jpg


The switch up top is for the aerator and has a timer control if desired, or it will run continuous. On the right side of the panel (not pictured) is a 12V cigarette lighter for charging the cell phone. This same hatch also has the fuse panel.

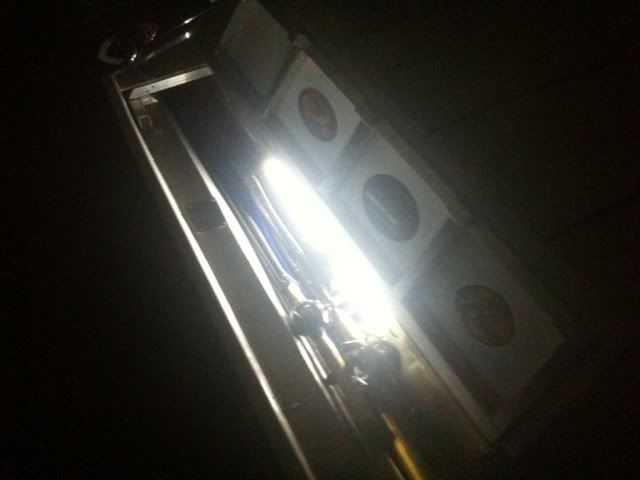
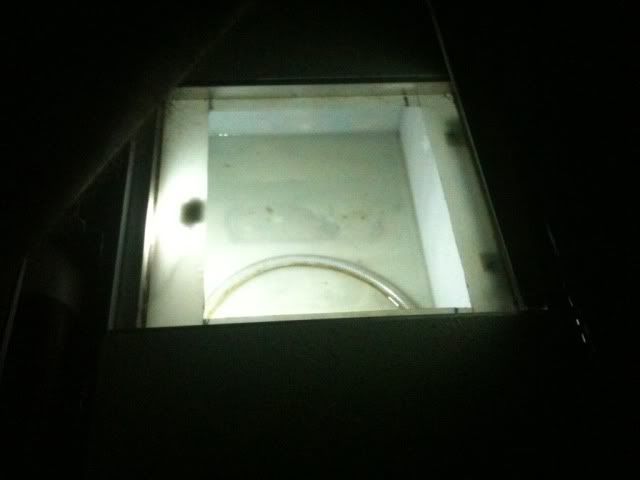
There are a total of 7 hatches that have white interior LED strips mounted including both rod lockers, all the tackle storage, the transom area and the livewell.

Tackle storage
93cfd3e9.jpg


Rod Locker
774b90d1.jpg


Livewell
5186a35f.jpg


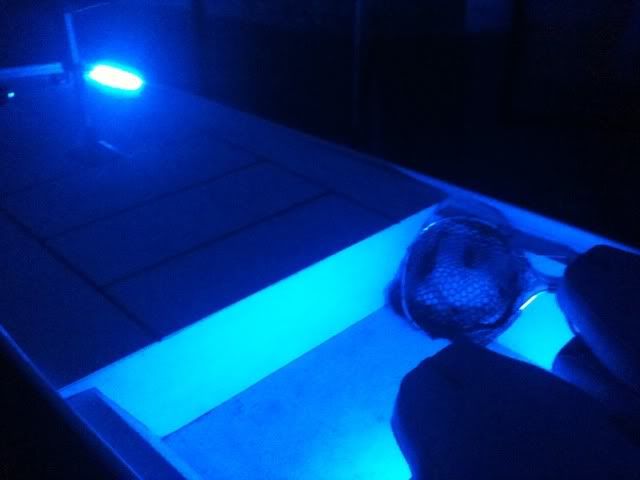
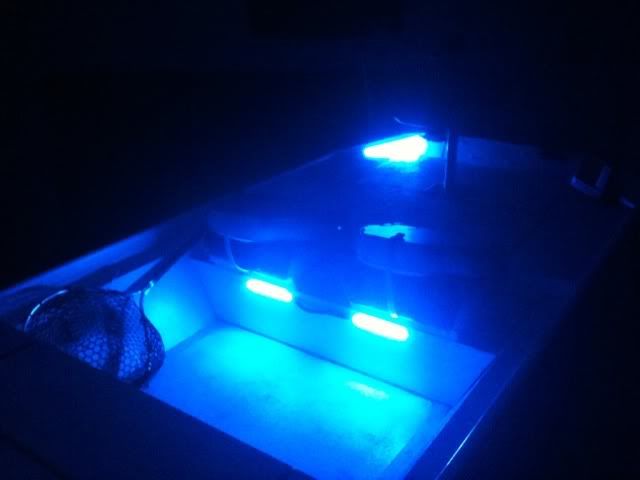
Lastly, are the deck lights which I chose to use blue. The pics don't do it justice. It really shines off the white decks.
864c13aa.jpg

4dc3da62.jpg


In the process, bassboy did a great job hiding and concealing all of the wiring on this job. I hadn't run any wire during my build, and if you remember my frame job..... you can probably envivision what kind of work he put into doing a job like this. All of the wire is marine grade, heat shrink connectors, zip tied, loomed, and concealed masterfully. Thanks again for the great work bassboy =D>

With that, I think I can call this build done. Mabye a few minor details left, but aren't there always?

Thanks go out to everyone who helped out along the way. Hope to do it again someday. (just not soon) :LOL2: :LOL2: :LOL2:
 
and almost sunk it today.... #-o

Fishing was good, but we had 30mph winds today and I had to do the whole.... mad dash to the bank thingy. Next on the to-do list is a bilge float :!:
 
Brine said:
and almost sunk it today.... #-o

Fishing was good, but we had 30mph winds today and I had to do the whole.... mad dash to the bank thingy. Next on the to-do list is a bilge float :!:

:shock: :shock: :shock: Glad you and your boat made it out okay! Wind can wreak havoc on shallower boats.
 
This build made my mouth drop. From the paint job, to the ridiculosuly clean lines, to the awesome finish of the floor. Makes me smack myself for planning my build out of carpet and wood lol. I will be looking for a better option for my livewell, because i also bought a cooler I was going to use. Looks like im returning it :)
 
WOW, just went front to back on your build. Awesome work. Attention to detail is amazing.
 
Thanks guys... So far so good on the boat. Going out again tomorrow =D>
 
Bugpac said:
You on vacation?

I took the day off yesterday to take the kids out. Back to work today. I'll clock back in after I post this. :---)
 
Im new here and I love your boat! I would like to do something similar with those stencils but can't seem to find them, what demensions are they and what are they called?
 
badboymonk said:
Im new here and I love your boat! I would like to do something similar with those stencils but can't seem to find them, what demensions are they and what are they called?

I found the stencils after seeing a video they were mentioned in. They came from a place called Kustom Shops (I think). I posted a video in my build of "Urban Camo" at some point during the paint process. Watch the video and listen out for where the stencils came from. Each sheet is about 14 x 20 ish.... I wish I remembered more, but I've tried to block it out from my memory. :mrgreen:

Thanks for the compliment, and I look forward to seeing your project.
 
Thanks, i called them and its discontinued.. Oh well. Ill just find another one :cry: . I might be taking a few of your ideas since
I love your boat so much!
 
OK, I've been lurking on this site, drooling over the builds I have seen. This one, well WOW...This is pretty much exactly what I want to do for a project build. I want a super shallow aluminum just like this. I have a 1965 Carolina Skiff that I rebuilt, so I'm not shy about a build but MAN this is cool.

Please forgive me as I could not find what make of boat this started out as...might you tell me? Thanks

Paul...here in Atlanta.
 

Latest posts

Top