TinBoats.net
The original aluminum boat site!
You are using an out of date browser. It may not display this or other websites correctly.
You should upgrade or use an alternative browser.
You should upgrade or use an alternative browser.
Found my project boat - 16' Sea Nymph
- Thread starter Tin Yachtsman
- Start date


Help Support TinBoats.net:
This site may earn a commission from merchant affiliate
links, including eBay, Amazon, and others.
Tin Yachtsman
Well-known member
- Joined
- Jun 20, 2010
- Messages
- 82
- Reaction score
- 0
427 said:Spray it really good with penetrating oil. Then it should just pull right out. Or may have to take something and stick through other end a tap it out.
The entire rod should come all the way through, right? Thanks.
Tin Yachtsman
Well-known member
- Joined
- Jun 20, 2010
- Messages
- 82
- Reaction score
- 0
Well, I'm a bit embarrassed by the fact that I haven't updated my project in seven months, and by how little work I've done on it in that time. I hope those of you with wives, kids, and full-time jobs can understand. I have been tinkering with it here and there, but there was never a full day to dedicate to it. A work buddy of mine gave me some of that aluminum alloy welding stuff that fixes tin cans and told me to give it a try. I was able to fix a hole in a Coke can with no problem....the two larger holes in my boat took many tries to get a decent seal. I had to take the trolling motor to a shop. The repair tab was expensive, $250, but still much less than replacing it. I have primed and painted the hull. I used self etching primer in spray cans and rolled on Parker's duck boat paint in the "Dead Grass" color. My wife affectionately refers to it as "Poo Poo Brown." I told her she doesn't have to ride in the boat if she can't fix her attitude! This week, I finally got some time off from work and have made some progress. I have cut out the plywood decks and floor and sealed them with spar urethane. I painted the floor and mixed some play sand in from my kid's sandbox reserve supply. I mocked it up and mounted the seat bases and trolling motor as motivation to myself to keep on the project. So now, from certain angles, she's starting to look like a boat again. I am off of work next week too, so I plan on getting much more done. A few current pictures:


And, as usual, I want to ask a question on something. The more I think about it, the more I think I am going to take out the live well. The fish I catch either go back in the water immediately or go in the ice chest. The live well was positioned across the boat under the driver's seat. I guess I could use it as a bait box or storage, but the idea of leaving it out and replacing it with pedestal seats seems the way to go. I don't have to wire it back up, I get more floor space, and if I need a bait bucket I can use a 5 gallon model from Wally World. Anybody care to tell me why that's a bad idea? One thing I would need to do is cap off the holes in the transom that used to go to the live well. Thanks for the advice.
And, as usual, I want to ask a question on something. The more I think about it, the more I think I am going to take out the live well. The fish I catch either go back in the water immediately or go in the ice chest. The live well was positioned across the boat under the driver's seat. I guess I could use it as a bait box or storage, but the idea of leaving it out and replacing it with pedestal seats seems the way to go. I don't have to wire it back up, I get more floor space, and if I need a bait bucket I can use a 5 gallon model from Wally World. Anybody care to tell me why that's a bad idea? One thing I would need to do is cap off the holes in the transom that used to go to the live well. Thanks for the advice.
mmf
Well-known member
Hello and a good find! I was looking at your pix of the motor and noticed the badly corroded exaust cover stretching out to the block, I have seen this many times before as I am a marine mechanic and it is the product of electrolosis enhanced by someone running the motor in salt water and NOT running the motor in salt remover like "salt away" as should be done any time a motor is run in salt. The problem is small deposits will creep into the wee areas in the exaust cover cooling plate and baffle area and the cooling cover on the head and they are almost impossible to get out without removal of the covers/baffle. You need to tend to this corrosion immediately! It will completely destroy the aluminum and it will start to crumble apart. The bolts that hold the cover on are well known for breaking off too when trying to remove them, they MUST be heated with a small map torch to release them from the corroded threads.
Good luck with your project!")
Good luck with your project!
Tin Yachtsman
Well-known member
- Joined
- Jun 20, 2010
- Messages
- 82
- Reaction score
- 0
Thanks for the post, MMF. Not the kind of thing I want to hear, but I appreciate you pointing it out to me. What method of repair do you suggest? You can PM me if you prefer.
P.S. I'm a big fan of your build.
P.S. I'm a big fan of your build.
mmf
Well-known member
thanks Tin Yachtsman, other than removing the covers for inspection and replacing the gaskets, the outside needs to be cleaned/brushed good and then etched with some Jasco metal prep, it will get rid of the exterior corrosion, after it dries (overnight) rinse it off and let it dry completely then get some OMC self etching primer and prime the area with several coats followed by motor enamel.Tin Yachtsman said:Thanks for the post, MMF. Not the kind of thing I want to hear, but I appreciate you pointing it out to me. What method of repair do you suggest? You can PM me if you prefer.
P.S. I'm a big fan of your build.
As a note.......bolts sometime break off on the covers when trying to remove them then there is much trouble! Good luck!

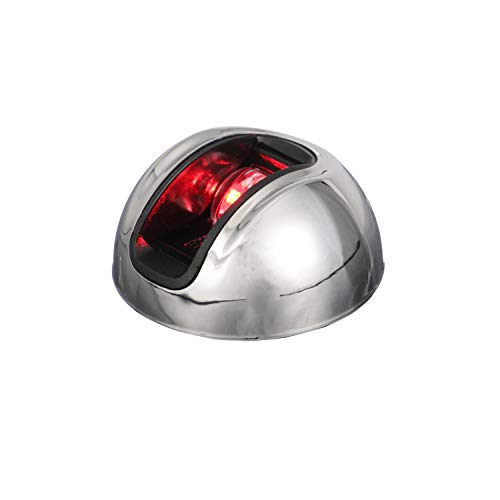
$36.68
$41.94
Attwood NV3012SSR-7 LightArmor 2-Mile Vertical Surface Mount Navigation Light, Red LED Lighting, Round Stainless Housing
Amazon.com

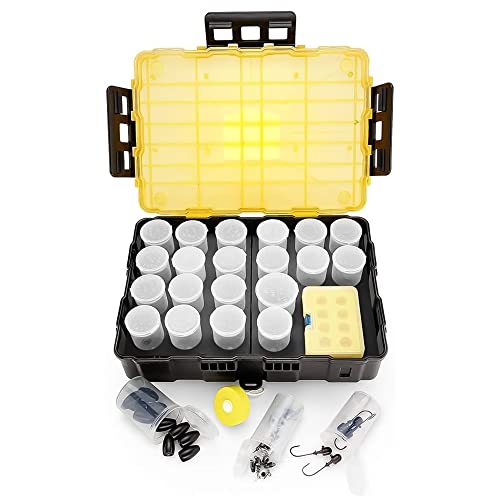
$44.88
$49.99
Plano Angled Tackle System with Three 3560 Stowaway Boxes, Fishing Tackle Storage, Premium Tackle Storage
Amazon.com


$22.49 ($0.70 / Fl Oz)
$24.17 ($0.76 / Fl Oz)
STAR BRITE Instant Hull Cleaner - 32 Oz Gel Spray - Easily Remove Stains, Scum Lines & Grime on Boat Hulls, Fiberglass, Plastic & Painted Surfaces - Easy to Use Formula (096132)
Amazon.com


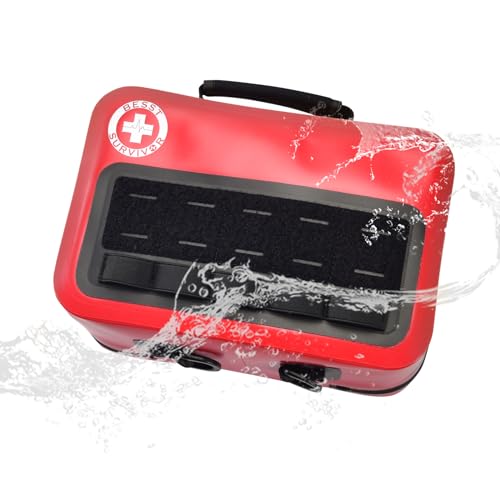
$46.95 ($46.95 / Count)
$65.98 ($65.98 / Count)
Poygik Premium 420 Piece Large First Aid Kit for Home, Car, Travel, Camping, Truck, Hiking, Sports, Office, Vehicle & Outdoor Emergencies - Emergency Medical Kits, Businesses & Home Medical Supplies
POYGIK


$21.89 ($21.89 / Count)
$26.88 ($26.88 / Count)
First-Aid-Kit-for-Car-Home-Travel-Camping-Businesses, 263pcs Compact Waterproof Hard Case, Public Emergency All Purpose Medical Kits - Perfect for Survival, Vehicles, Boat, Sports, Hiking (PUMIER)
Pumier Medical


$29.39
$34.59
Seachoice Cast Aluminum “S” Dock Cleat, Corrosion Resistant Aluminum, 12 in.
Amazon.com


$45.99 ($0.14 / Count)
$49.99 ($0.15 / Count)
330 Piece First Aid Kit, Premium Waterproof Compact Trauma Medical Kits for Any Emergencies, Ideal for Home, Office, Car, Travel, Outdoor, Camping, Hiking, Boating (Red)
THRIAID


$104.98 ($104.98 / Count)
Ever-Ready Industries Premium Trauma First Aid Kit for Outdoors, Workplace, and Home - Exceed OSHA Guidelines and ANSI 2009 Standards - 240 Pieces - Includes Bonus Travel Kit
EVER-READY INDUSTRIES


Tin Yachtsman
Well-known member
- Joined
- Jun 20, 2010
- Messages
- 82
- Reaction score
- 0
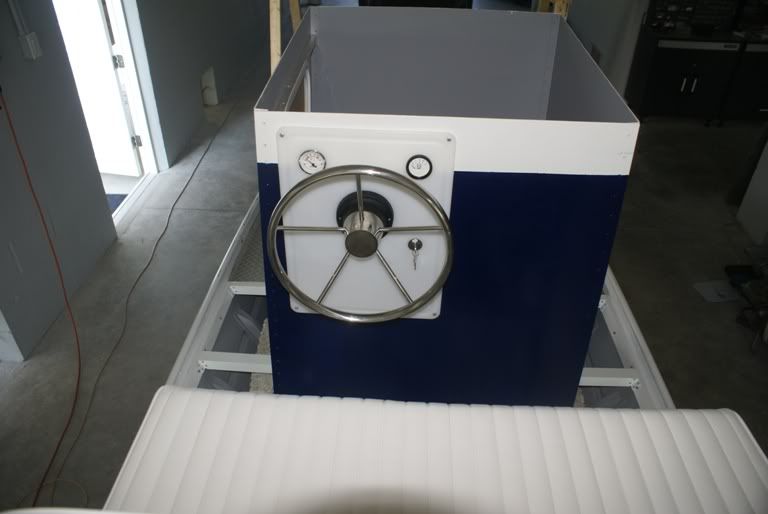
Today was supposed to be "Carpet the Decking Day", but after a trip to Lowe's and Home Depot, I realized that the only carpet they had with "marine backing" was charcoal gray and green. Neither color was what I had in mind, so I think I will order online. Bad planning on my part, I know. But the Teleflex steering cable arrived yesterday, so today became "Install the Steering Cable Day" instead. That only took 15 minutes, so I turned my attention to the rest of the steering, gauges, and dash dismantling.


I got everything disassembled from the dash except the tach. It looks like I have to open the OMC control box to disconnect the wiring for that. Is that right?
I have three options that I can see for a new dash. I have plenty of 3/4" plywood left, and I could cut a new dash out of that and put some kind of trim around it. I also have some scrap 3/16" aluminum, but I am worried about it not being thick enough. My final option would be to find a nice piece of wood and stain it. Any suggestions?
Jonboat Jerry
Well-known member
I used a cutting board (available from Wally World) for my dash. Non conducting, cheap, and easy to cut.Tin Yachtsman said:I have three options that I can see for a new dash. I have plenty of 3/4" plywood left, and I could cut a new dash out of that and put some kind of trim around it. I also have some scrap 3/16" aluminum, but I am worried about it not being thick enough. My final option would be to find a nice piece of wood and stain it. Any suggestions?
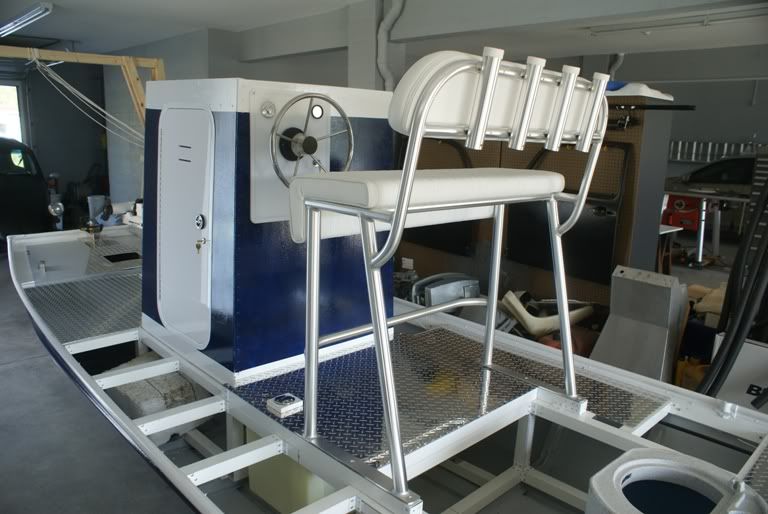
Nother view
That's very good work on your rig T.Y. looks like it won't be long before you will be fishing it!
Tin Yachtsman
Well-known member
- Joined
- Jun 20, 2010
- Messages
- 82
- Reaction score
- 0
You might be on to something there, Jerry. I think it's worth a try, anyway. I appreciate your optimism on the progress of my project. Fishing from it still seems months away to me. The work you've done on your project is outstanding. Thanks!
I know you havent had it on the water yet, but would you say that there is plenty of room on that boat with the side console ? or would you rather have a tiller ? looking great so far. youll get it done soon enough.
Tin Yachtsman
Well-known member
- Joined
- Jun 20, 2010
- Messages
- 82
- Reaction score
- 0
V8_TITAN said:I know you havent had it on the water yet, but would you say that there is plenty of room on that boat with the side console ? or would you rather have a tiller ? looking great so far. youll get it done soon enough.
It's going to be a big step up from the 14' jon I fish from now. With two people and supplies the 14' gets very cramped. The 16' has storage and much more floor space. I haven't measured the width on it, but two people sit side-by-side. I was comfortable with the tiller steering on my 14', but I am looking forward to using the console. I'm hoping that it's such an improvement that I won't soon get the itch to upgrade again!
mmf
Well-known member
I remember your post now, you had the salt water corrosion. You are going to find alot of GROUNDING problems on that motor due to the electrolosis.
You need to do a spark test first with the plugs removed (easier on the starter and motor will spin faster), the ignition should at least jump a 3/8" gap and preferrably 1/2" gap. Make sure you have a good ground connection on your spark tester first where the negative battery cable connects to the block. If you have no spark on any cylinder, then you need to start at the beginning where the voltage for the powerpack is developed.....the stator.
PM or post your serial number.............
Tin Yachtsman
Well-known member
- Joined
- Jun 20, 2010
- Messages
- 82
- Reaction score
- 0
mmf said:I remember your post now, you had the salt water corrosion. You are going to find alot of GROUNDING problems on that motor due to the electrolosis.
Hey mmf, thanks for the links and advice. I actually got the motor going today! Either I got lucky, or there was just a loose connection somewhere, because all I really did was basic stuff like replacing the plugs and checking wires. I had the muffs on the motor while it ran, and I just let it idle for about 30 seconds until I shut it off. I know you said I need to remove the exhaust cover and do some work on it, but I am not mentally prepared for possibly snapping off any bolts, so I am saving that for later. I moved directly to dropping the lower unit and replacing the impeller. I've been stuck before due to a bad impeller and I'm not going through that again. Even though it looks good, I'm replacing it. I took a few shots of my progress today. None of them are pretty...and I didn't even take a picture of the wasp nest that had been built inside the motor....but each picture shows progress being made.

This is the second time I've removed a lower unit, and it was still a PITA, but it went much smoother than the first time.

The impeller looks good, but it's going to be replaced anyway.

A little dry and rusted, but okay otherwise.

The wiring for the trolling motor is ready and waiting for me to stop screwing around and get this boat on the water. Thanks to the people who recommended genuinedealz.com as the place to go for wiring. They were great to deal with. I also have a "dash" which is a custom cut cutting board from https://www.cuttingboardcompany.com. No pictures of that right now, but I think it's going to be nice. And I guess while I am at it, I will mention that I purchased a switch panel from Gander Mountain. All kinds of things still to do on this project, and the holidays are coming up fast.
Similar threads
- Replies
- 27
- Views
- 2K
- Replies
- 25
- Views
- 4K
Boat For Sale
Project Boat (1986 StarCraft SS160)
- Replies
- 0
- Views
- 583