86BassTrackerV17 1st fishing trip w/son 10/11/13 vids p15

TinBoats.net

Help Support TinBoats.net:

This site may earn a commission from merchant affiliate links, including eBay, Amazon, and others.
Dang Dave.... I was hoping I had found a good solution. One thing I noticed about the video after watching it again, is I hear him say "Goof Off" and "Goo Gone". Not sure if they are one in the same, or different formulations.

Looks like you're making progress, and that bandsaw should come in real handy once you get the pulleys and blade.
 
Brine said:
Dang Dave.... I was hoping I had found a good solution. One thing I noticed about the video after watching it again, is I hear him say "Goof Off" and "Goo Gone". Not sure if they are one in the same, or different formulations.

Looks like you're making progress, and that bandsaw should come in real handy once you get the pulleys and blade.

I think the Goof Off is a different formulation. Wish I had heard it clearly. This Goo Gone is citrusy stuff. Smells nice, but not effective. I still have lots of deck panels and detail work to do, so I'll pick up some Goof Off and try it today. Home Depot has both brands in the same area. I tried finding it at my local Walmart, but never found any in the larger size.

I'm making progress, but I swear it seems like every time I move forward, something stalls me. I'm planning on finishing the large bulk of the cleanup stuff inside the boat today, get the compression check done and remove the motor this week. Things should speed up a bit.

BTW, where did you buy most of your structural aluminum? I can't find a good source in my area for the framing and would like to buy a couple tubes of the 1".
 
I've been buying the framing from Metal Supermarkets @ Pleasantdale Rd and I-85 in Norcross. Don't know that they are the cheapest in the area, but they are a 5 minute drive for me.
 
I also have a 1986 tracker boat do you know where a can find storage compartments for it my opening is 13"x 15" 9 3/4 d? Bass pro was no help at all
 
You are doing a great job on that Tracker. I like those boats and would love to get my hands on one. Maybe one day.

Bufford
 
ron said:
I also have a 1986 tracker boat do you know where a can find storage compartments for it my opening is 13"x 15" 9 3/4 d? Bass pro was no help at all

I plan on making mine out of aluminum framing and aluminum sheet, then building a lid either with wood or aluminum.
 
RBuffordTJ said:
You are doing a great job on that Tracker. I like those boats and would love to get my hands on one. Maybe one day.

Bufford

Bufford,

Thank you for the encouragement, I need all that I can get. Sometimes it seems like I'm going backwards. I'm posting some progress I made today below.
 
I made a bit of progress today in spite of making a trip over to the nearby town of Gainesville to pick up some additional link belt and a couple new bearings for my bandsaw to set it up for aluminum cutting. The new blades are coming in Friday, so I should have the bandsaw ready to cut aluminum soon.

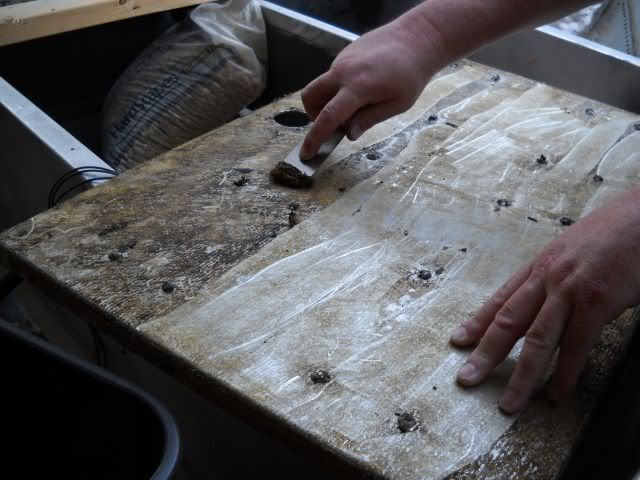
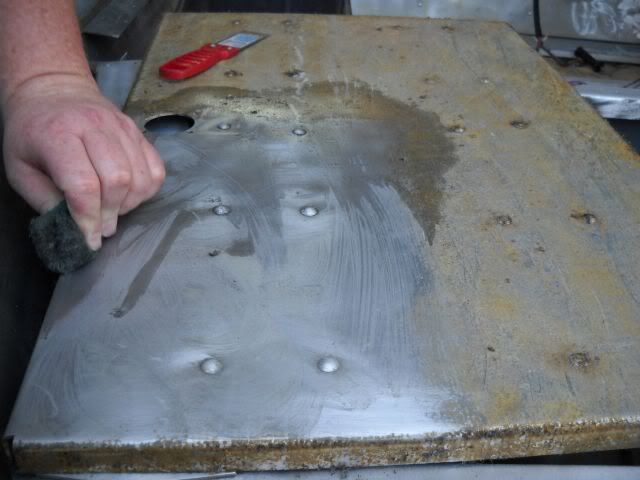
Some more pics, this time of cleaning carpet glue and carpet residue off of hatches with both Goof OFF and a home brew I came up with. I tried out a small bottle of Goof Off and while it worked okay, it was expensive. I noticed the can said it contained acetone and xylene, two items I just happen to have about a half gallon of each on the shelf in my garage. I mixed a 50/50 mixture of acetone and xylene up in a spray bottle and tried it out. Same results as the higher priced Goof Off, but a good bit cheaper. Here's some pics of the process:

DSCN0868.jpg


With both the Goof Off and the home brew mix, I soaked the area I wanted to work with and let it work for a few seconds. Unlike the guy in the video, this stuff dried pretty quickly and things returned to "hard to remove" if I waited too long. Might be better with carpet or newer glue, but the 24 year old stuff I had was long since dried hard.

So once soaked in, I scraped the big portion of the stuff off.

DSCN0875.jpg


Next, I used a green scrubbie pad to finish cleaning the carpet glue off the hatches. Each small area had to be soaked and then scrubbed off. I think steel wool would have been a better choice, because the scrubbie pads very quickly lost their cutting ability with the action of the home brew on them, but I had these as leftovers from bedlining my truck and wanted to get all the use out of them. I just kept turning them over until there was no useable edge. Worked pretty well and left a blackish residue that I would have to rinse off.

DSCN0877.jpg


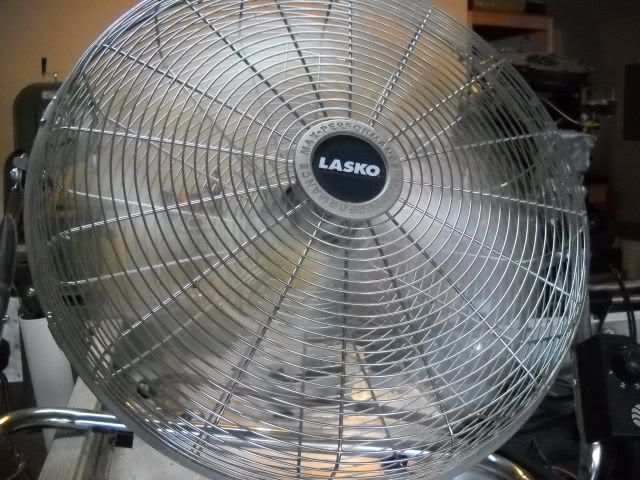
The fumes from this kinda stuff are NOT good for you. I was working outside my garage and used a fan to blow the fumes away. A good mask is also adviseable, but I couldn't find mine.

DSCN0879.jpg


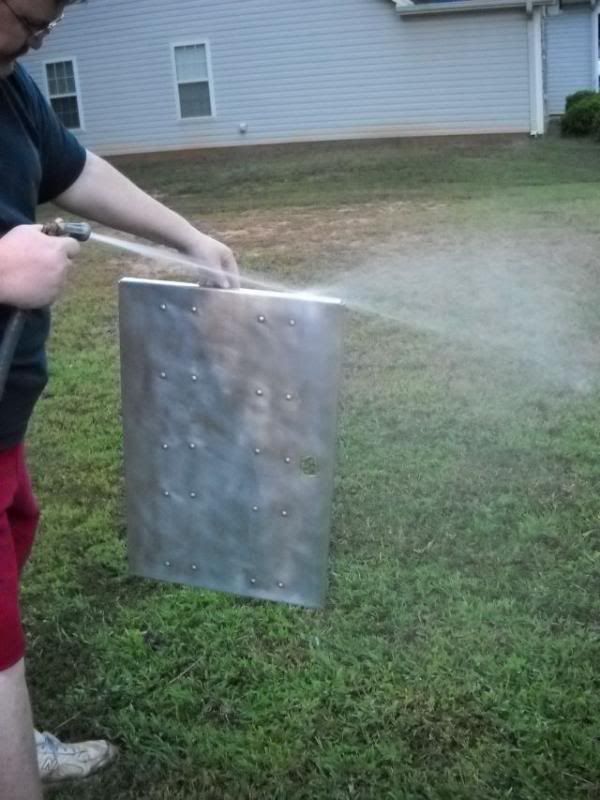
After everything was scrubbed off, I rinsed off the residue with the water hose. I think it might be better to use soap and water, but I wasn't feeling that energetic for something I'm likely going to goop back up with carpet glue.

DSCN0881.jpg


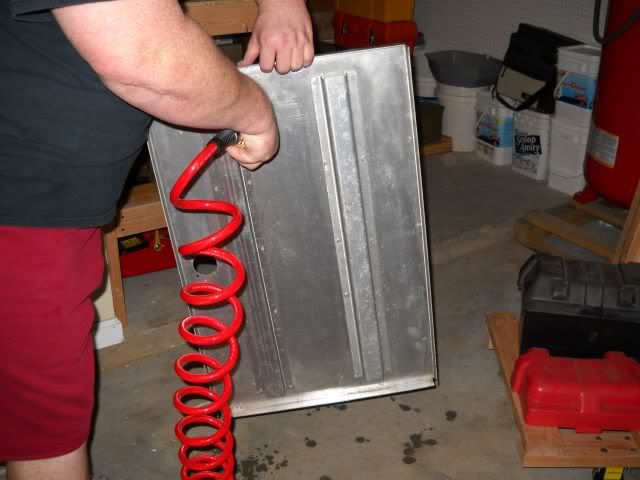
Blowing the water off with an air compressor. I coulda used a towel, but again, I'm lazy.

DSCN0885.jpg


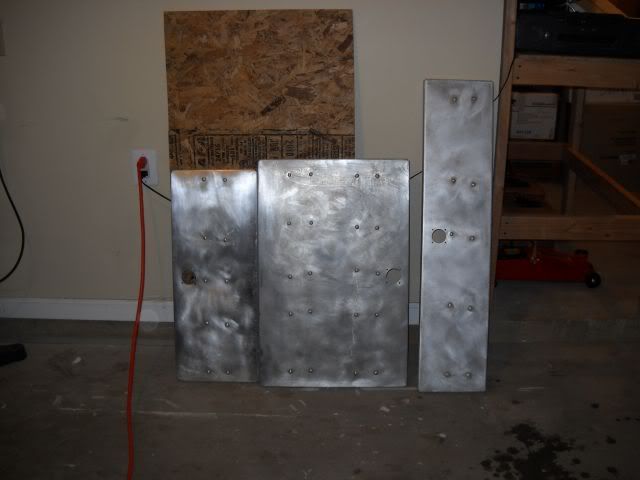
End results. The one on the left is the panel cleaned using Goof Off and the above pictured methods. The one in the middle was cleaned using Acetone/Xylene 50/50 home brew and the above pictured methods. The one on the right was cleaned using a 60 grit Norton 3X hook and loop on my palm sander. Notice the area close to the rivets that still have glue. Any area where the sander pad didn't reach well had the same problem.

Notes:

1. The Acetone/Xylene 50/50 home brew in a spray bottle was just as effective as Goof Off and cheaper.
2. The amount of effort using the scraper and scrubbie pad method was about the same amount of effort as the palm sander, was a bit more controllable and a bit slower.
3. The nod goes to the chemical method as being the most effective at removing most of the glue.
 
Thanks Brine,

No picture worthy progress made since the last post, but I did make some progress:

Got some link belt, metal blades and new support bearings for the HF bandsaw, so I was able to get it set up and running. Reinstalled the original pulley system I had pulled off and replaced to get 3000RPM for woodcutting. Set up the bandsaw for 600RPM and installed the new blade. Tried a test cut and the saw cut aluminum angle like butter. I think I'm set for my straight cuts. I should have ordered a 1/8" blade, but only ordered a 1/2" blade, so I'll have to make any curved cuts using a jig saw. I may rethink this and order a 1/8" blade as well.

Got a battery and was able to complete a compression check on my motor. I definately got lucky with this boat. Compression measurements are as follows:

Cylinder 1. 155 psi
Cylinder 2. 150 psi
Cylinder 3. 150 psi
Cylinder 4. 150 psi

That's a variance of between 3 and 4 percent tops. I had some variance I think due to how tight I screwed the compression tester into the cylinders. I suspect that may account for the 5 psi difference on Cylinder 1. In any case, it's well within the 10% and the over all compression seems to be real good. I'm happy.

Now to remove the cables/controls and remove the motor from the boat so I can repair the transom.
 
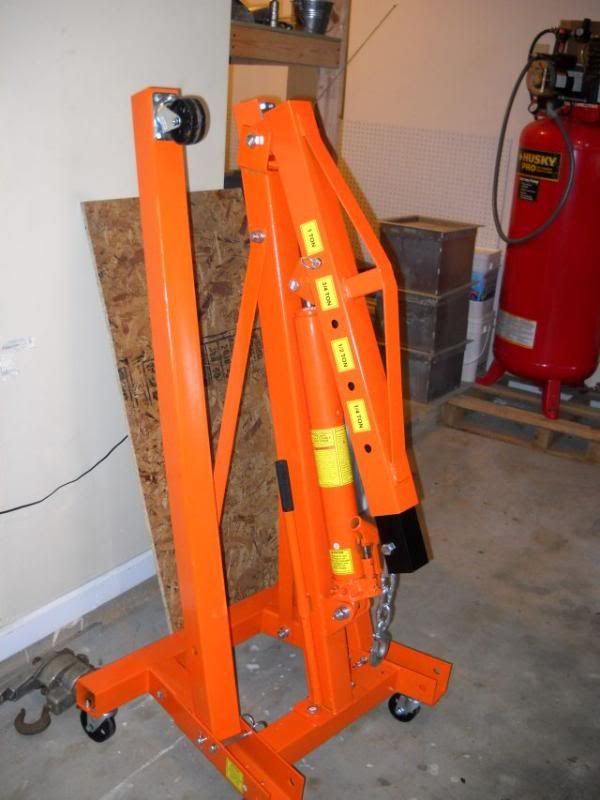
Buddy of mine loaned me an "old school" swing set style cherry picker, but the swing set legs didn't fit underneath the boat in such as way as to fully support the motor. So I went to plan B and picked up a Harbor Freight 1 Ton fold-able/store-able cherry picker. Got the "on sale" price and used a 20% coupon to reduce the cost.

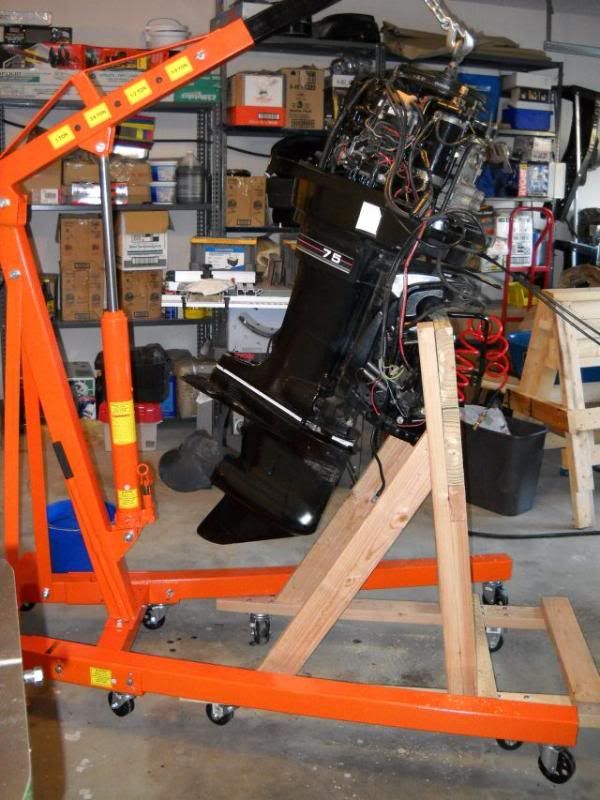
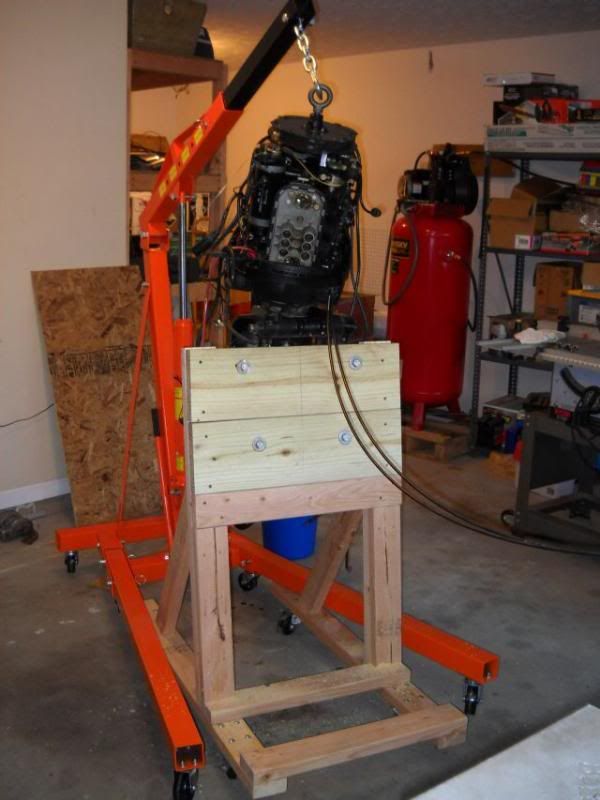
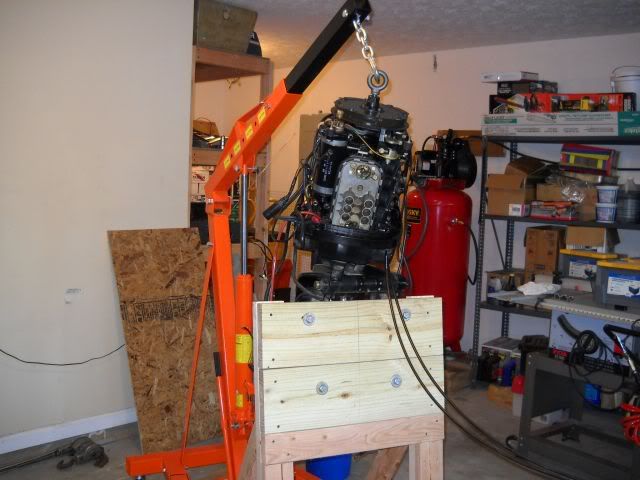
Assembled it last night when I got it home and had it ready today. Used a special tool for Mercury motors I ordered online with the extra "O-ring" to help with motor lifting. Glad I bought this tool, made the motor removal much easier to deal with. Some pics:

DSCN0886.jpg


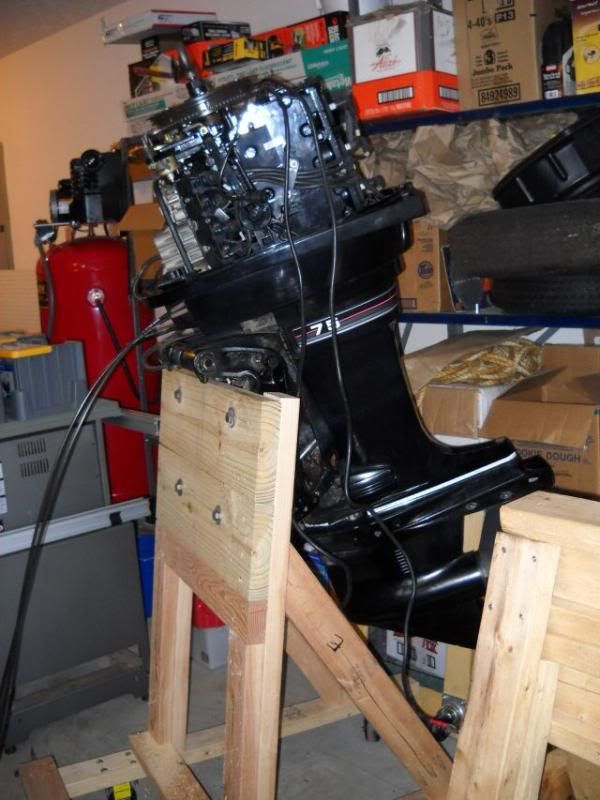
The motor being placed on the wooden stand I built after being removed from the boat. This tool made removing it from the boat much easier, because the original owner had used a transom saver and had it too long and age had made the rubber stick, making removing the motor tougher than I would have thought. The cherry picker made this a much more controllable operation. Totally worth it for a larger 300 lb motor.

DSCN0887.jpg


Front view where you can see the bolts I used to fasten the motor to the wooden stand. These were the original boat bolts, but I'll have to replace the brass nuts, because they're those self locking nuts with the plastic ring. I hope I can buy some as nice as those.

DSCN0888.jpg


Close up view and you can better see the special tool I used to remove the motor with. If you have a big Merc., these are worth it.

DSCN0889.jpg


The HF cherry picker folded up and put out of the way. Gotta love it folds up when done. The orange color keeps you aware you're handling a heavy object, so I'm glad it was painted orange. Kinda like hunting gear, keeps you safety aware.

DSCN0891.jpg


The motor moved out of the way. The straight wheels were kinda difficult and I now wish I'd gotten four of the swing type wheels instead of just two. I'll remove the cables tomorrow and reassemble the assorted brackets back on the motor until I finish working on the boat and get back to the motor.

DSCN0892.jpg


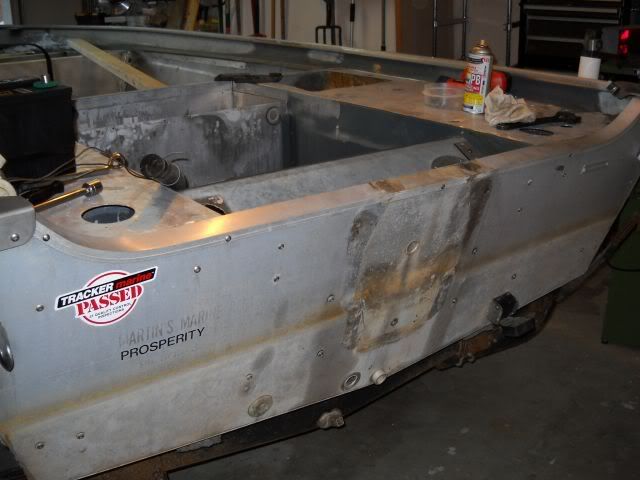
The transom sans motor. I've got some work ahead of me.

DSCN0896.jpg


The transom with the cap removed. The manufacturer used 3/4" and 1/2" pieces of plywood glued together to form the transom. Total thickness was 1 1/4". This may be difficult to duplicate until I can find some plywood with those measurements. I may end up having to buy marine plywood unless I can find the proper measurements. Another good alternative is to build up the transom thickness using fiberglass mat. Good, but not something I like doing or am good at. Going to have to think about this one.

Another difficulty will be removing and replacing the upper drain. A fella posted earlier I'd likely have to remove the back decks to get to the transom and it appears he's right about that. This is going to be the biggest project on the boat I think. Once I get this done, everything else will be downhill.

I'm going to remove the decks and get that old transom wood removed tomorrow I hope.
 
I highly doubt you'd need a narrower blade than the 1/2 inch for most anything on a boat. I use 1/2 inch blades almost exclusively, and you would be surprise how tight a radius can be cut with one (at least a quality bi-metal blade - if you are still using conventional blades, then all bets are off). You shouldn't need an 1/8 inch blade unless you are doing some weird decorative scrollwork or something.

I'm surprised after 3 years, you still have the crosscut sled for that saw. I don't know who ever thought a crosscut sled on a bandsaw was a good idea, but there was either a great lapse in judgment, or marketing genius involved.
 
bassboy1 said:
I highly doubt you'd need a narrower blade than the 1/2 inch for most anything on a boat. I use 1/2 inch blades almost exclusively, and you would be surprise how tight a radius can be cut with one (at least a quality bi-metal blade - if you are still using conventional blades, then all bets are off). You shouldn't need an 1/8 inch blade unless you are doing some weird decorative scrollwork or something.

I'm surprised after 3 years, you still have the crosscut sled for that saw. I don't know who ever thought a crosscut sled on a bandsaw was a good idea, but there was either a great lapse in judgment, or marketing genius involved.

Thanks for the information on the bandsaw blade width. I'm using Timberwolf brand bimetal blades, about as good a bandsaw blade as I've found. I have done quite a bit of decorative scrollwork in the past, but only with wood and I'm not used to cutting metal at all, this is a first.

I actually used that bandsaw cross cut sled for cutting some trim once, but I didn't use it on the bandsaw, used it on a router table. Worked pretty well. Got a good laugh when you mentioned it. You're right, they're really not needed, but I just have trouble throwing a tool away unless it's worn out or broken and not worth repair.
 
DaveInGA said:
bassboy1 said:
I highly doubt you'd need a narrower blade than the 1/2 inch for most anything on a boat. I use 1/2 inch blades almost exclusively, and you would be surprise how tight a radius can be cut with one (at least a quality bi-metal blade - if you are still using conventional blades, then all bets are off). You shouldn't need an 1/8 inch blade unless you are doing some weird decorative scrollwork or something.

I'm surprised after 3 years, you still have the crosscut sled for that saw. I don't know who ever thought a crosscut sled on a bandsaw was a good idea, but there was either a great lapse in judgment, or marketing genius involved.

Thanks for the information on the bandsaw blade width. I'm using Timberwolf brand bimetal blades, about as good a bandsaw blade as I've found. I have done quite a bit of decorative scrollwork in the past, but only with wood and I'm not used to cutting metal at all, this is a first.

I actually used that bandsaw cross cut sled for cutting some trim once, but I didn't use it on the bandsaw, used it on a router table. Worked pretty well. Got a good laugh when you mentioned it. You're right, they're really not needed, but I just have trouble throwing a tool away unless it's worn out or broken and not worth repair.

I've been using the Lenox bi-metal blades for years, now, and have been very pleased with them. You can damage even a good blade with tight radius's, but nothing on any boat mod I've done has ever had a radius too tight for a decent blade.

Whoever first put the crosscut sled on a bandsaw clearly had no grasp of the concept of blade lead, especially on some of the wood blades with a significant set to the blade. We've had some resaw blades that had a very significant lead.

I've always been fascinated with bandsaws, especially much older ones, more so than other tools in the shop. They are probably one of the most versatile sawing/shaping tools in existence.
 
bassboy1 said:
I've been using the Lenox bi-metal blades for years, now, and have been very pleased with them. You can damage even a good blade with tight radius's, but nothing on any boat mod I've done has ever had a radius too tight for a decent blade.

Whoever first put the crosscut sled on a bandsaw clearly had no grasp of the concept of blade lead, especially on some of the wood blades with a significant set to the blade. We've had some resaw blades that had a very significant lead.

I've always been fascinated with bandsaws, especially much older ones, more so than other tools in the shop. They are probably one of the most versatile sawing/shaping tools in existence.

Glad to hear about the radius. I'd not used any 1/2" on wood for anything but resawing, since a lot of what I did related to curves was scroll type work and I used the 1/8". (Decorating outdoor landscaping benches with fluff for the wife to sell. She's a landscaper.)

Yes, those Lenox blades are excellent. I chose the Timberwolf (bi-metal and wood blades) because they're less expensive than the Lenox and Timberwolf has great technical support if you need to modify your bandsaw for an application. You can also run them with less tension than other blades. They also give ya a 15% discount if you buy three, a good deal. Their shipping is USPS out of New York, so not a lot of money to have them delivered to your door in a reasonable amount of time.

I like bandsaws too. I'd prefer to have the older American iron like you have, but at the time I bought the HF one, I wasn't able to find one. This bandsaw is basically a copy of an older American type and has done really well with excellent power for a 14" bandsaw.

I agree bandsaws are extremely handy. I was very glad to get this one back from my buddy, who was basically letting it collect dust in his garage for the past three years. In fact, the little crosscut sled was still in the box where I packed all the accessories from the saw.

Sadly, the box was banged up and he'd managed to lose the manual, but I was able to download it from their website. But once I got to putting it back together, my memory broke off the rust and in a few minutes, I was able to get it running with metal like I used to have it running for wood: smooth, quiet and efficiently. I like to have my power tools tuned as much as possible. Makes them better to work with.
 
Looks like good progress. The transom is going to be the hardest part of the job, but only because you get to take so much apart to get it exposed. Quite often it's easier to use the flap wheel to sand the rivet head off vs. using a drill.

The engine is good news. Have you had a chance to check the reed valves or rebuild the carbs? They'll both need cleaned if it's sat for too long.

My bandsaw is a Porter Cable portaband held in a vise. #-o

Jamie
 
Ranchero50 said:
Looks like good progress. The transom is going to be the hardest part of the job, but only because you get to take so much apart to get it exposed. Quite often it's easier to use the flap wheel to sand the rivet head off vs. using a drill.

Yes, I'm currently working on removing the rear decks to get at the transome and it's being a beast. I used the HF grinder with what I think is a type of flap wheel to remove the rivet head off. Worked real well. I'm not looking forward to replacing all those rivets when it comes time.

The engine is good news. Have you had a chance to check the reed valves or rebuild the carbs? They'll both need cleaned if it's sat for too long.

No, I made a decision to set the engine aside, get the boat to a point I can remove it off the trailer, then complete the trailer first. I suspect this engine may have not been ran since the time most gasoline did not have alcohol in it. It's like the boat was put up by the original owner for the winter, then he dies and son takes the boat out of storage and leaves it in the backyard to rot in the weather. ](*,)

My bandsaw is a Porter Cable portaband held in a vise. #-o

If that's what I had paid for, I'd use it. I've already spent way too much in tools to work the metal with. May spend more before it's over.

Jamie
 
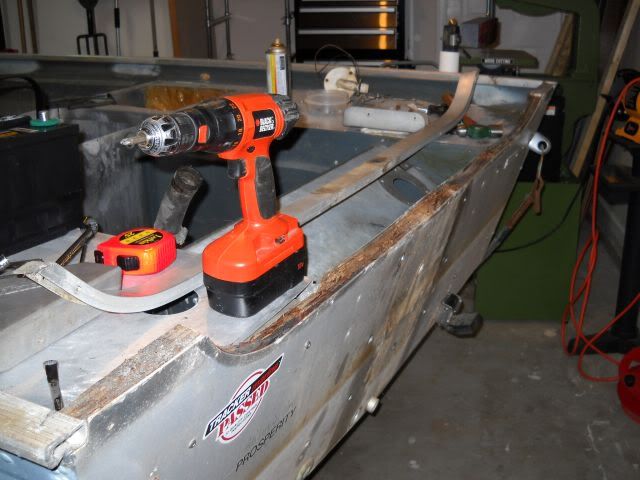
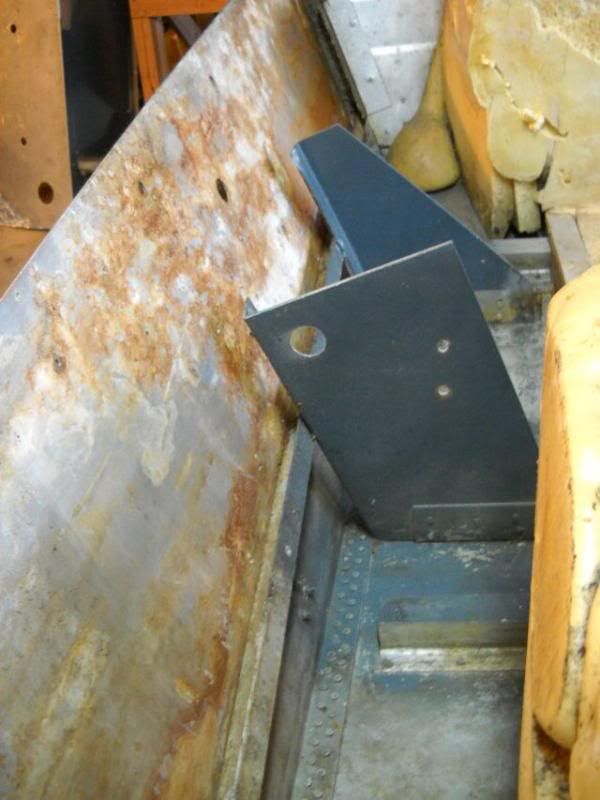
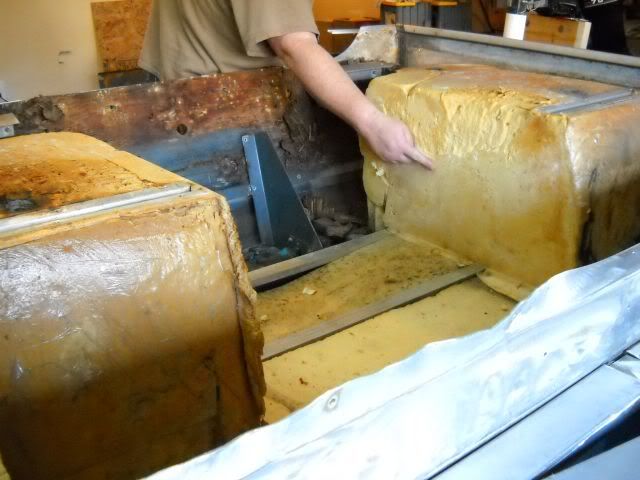
Managed to get the aft decking removed today and got the rotted transom cleaned up. Also started addressing the port aft deck separation due to excessive flotation foam expansion.

Some pics:

DSCN1025.jpg


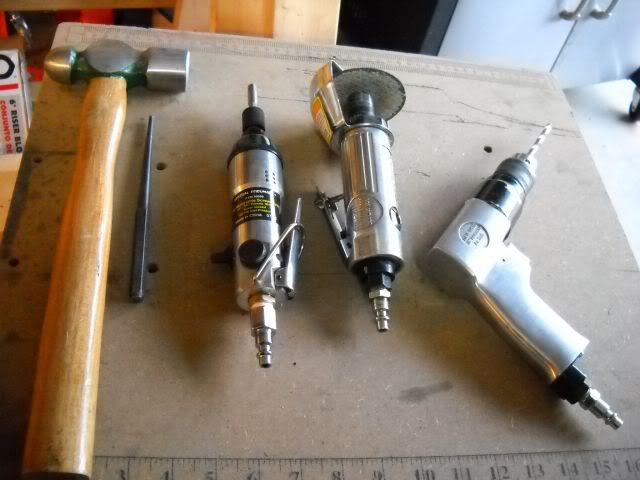
Some very handy HF air tools. Used the drill to drill out many of the standard rivets. Used the cut off tool to cut some hooks off the back deck allowing it to removed up and back, making removing it much easier. I also used it to cut off any rusted screw/bolt that I couldn't get to break loose. A big time/labor saver.

The air screw driver greatly sped up removing nuts/bolts from the transom. These inexpensive tools worked great. You just need to make sure they're oiled well with a few drops of oil and adjust them properly if they have adjustments. Well worth the cheap price. If you have a compressor that will run these, they are major labor savers.

DSCN1015.jpg


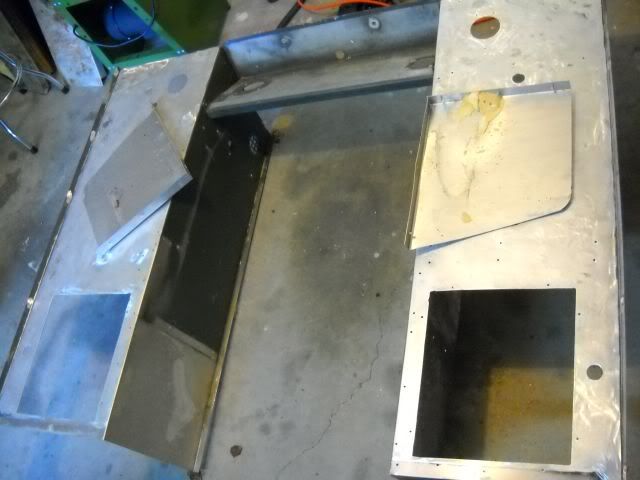
The rear deck removed. I removed it as an assembly after I realize it had been installed as an assembly and disassembling it further would gain me nothing. I'm going to strip the paint off of it, clean it and repaint it as well as reassemble all panels before reinstalling it.

DSCN1018.jpg


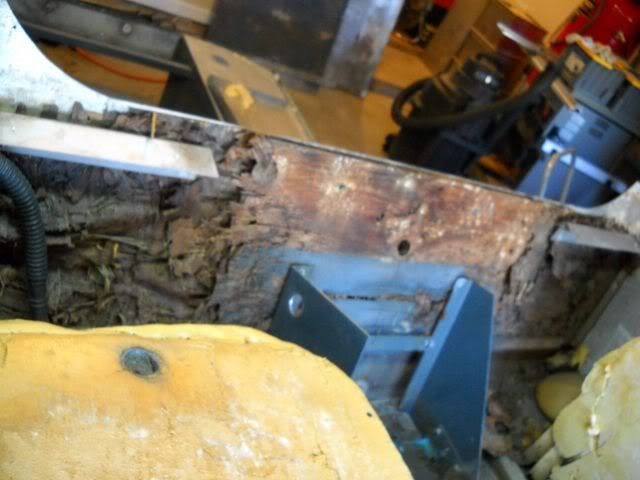
Rotted rear transom with all bolts removed. This was easy to clean up at this point and a shop vac took care of the crumblies.

DSCN1020.jpg


Cleaned up transom area. There was a elbow-shaped mount for a bilge pump mounted on the right hand the transom support, but I removed it before the pic. It is aluminum, so I'll clean it up, paint and reuse it to install a new bilge pump.

DSCN1016.jpg


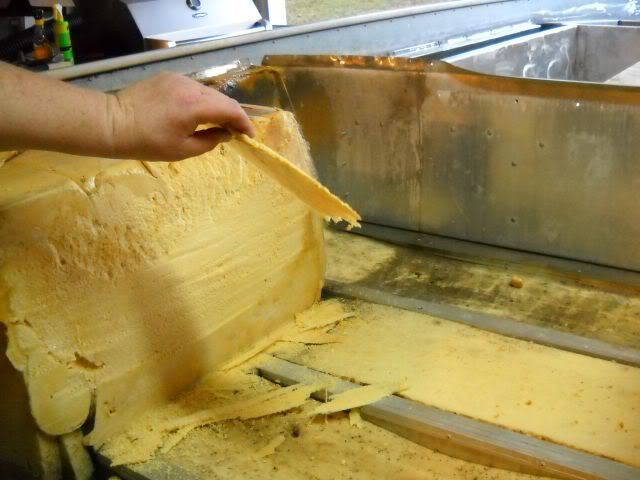
Here I'm pointing to an area where the foam expanded just a bit too much, pulling the port aft decking away from the port side. I'm going to trim this off a bit to allow the deck to be more square and reattach the deck to the port side.

DSCN1022.jpg


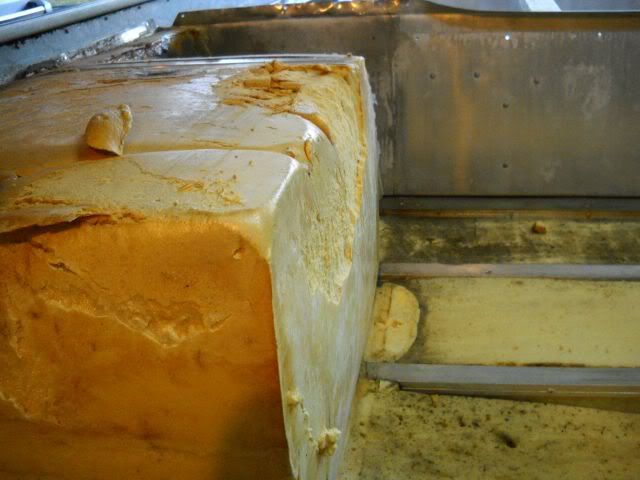
Another view with a different angle. You can see the excess foam sticking out.

DSCN1026.jpg


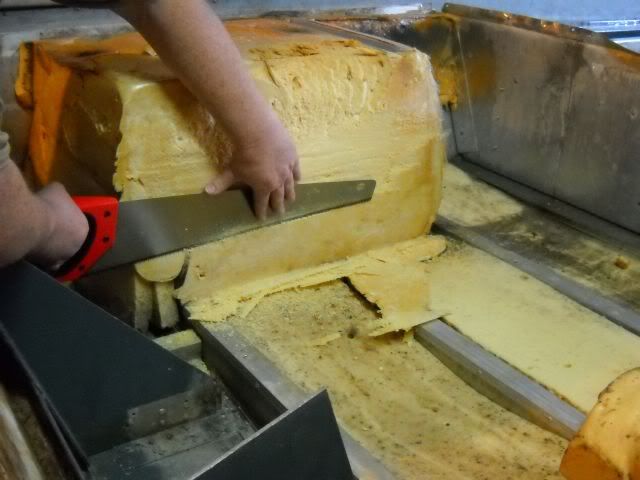
Using a handy dandy HF saw to trim off the excess foam. Using this five buck cheapie kept me from ruining my quality wood handsaws. It had a very aggressive cut that worked perfect for trimming the foam.

DSCN1030.jpg


The foam trimmed and squared up. Much better.

DSCN1031.jpg


Here you can see the thickness of the foam I removed. Not a lot. I'm going to also level the top a bit and then reinstall the deck to see how it fits. I'll do this process a few times until the deck fits properly, then I'll set the deck aside until I finish reworking the trailer and repairing the transom.

That's it for now. Since this is the lightest the boat is going to be, I'm going to finish fitting the rear deck, then I'm going to remove the boat from the trailer and start on the trailer. While the trailer is in process, I'll use boat clean up as "fill in time" whenever there is a work stoppage on the trailer.
 
Nice work again.
I know your trying to match the transom up the same way it was before,nice and tight like but have you ever thought about just strengthing it up with aluminum(transom) and scraping the wood all together?
Just wondering.
 
He could but I think it would flex too much based on how the motor mounts and twists the hull. Either wood or a fiberglass replacement would be better I think.

It looks good. One nice thing is you can unload the boat in the garage, then work on the trailer then the boat pisses you off too much.

Jamie
 

Latest posts

Top