TinBoats.net
The original aluminum boat site!
You are using an out of date browser. It may not display this or other websites correctly.
You should upgrade or use an alternative browser.
You should upgrade or use an alternative browser.
Pweisbrod's 79 18' mr pike DUCK conversion/rebuild
- Thread starter Pweisbrod
- Start date


Help Support TinBoats.net:
This site may earn a commission from merchant affiliate
links, including eBay, Amazon, and others.
Eddie Spaghetti
Well-known member
- Joined
- Oct 9, 2010
- Messages
- 45
- Reaction score
- 0
You mean pulling the plywood flooring? I was able to get some of the screws up with the drill. Others (maybe most) I just ground the heads down with the grinder. And then with the screws that hold the seat bases, I used a hacksaw blade on a couple.
Got some work done today.
swept up the scraped off carpet glue and paint in prep for floor removal and grinding off the remnants of carpet glue:
Hello wire wheel, goodbye carpet glue. The trick is to keep the wire wheel moving, it won't "dig in" that way, all the marks you see in photos are superficial. Will be hard to see under the bedliner anyway! LOL
Front storage area
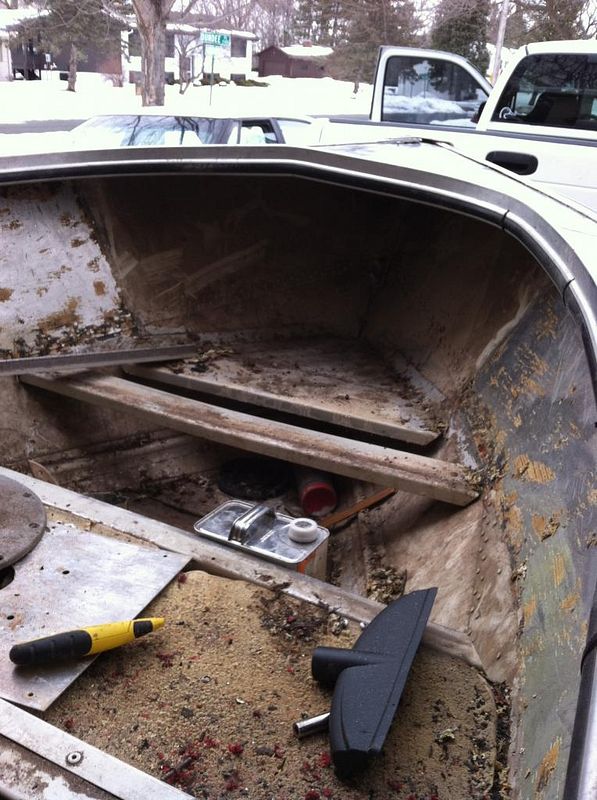
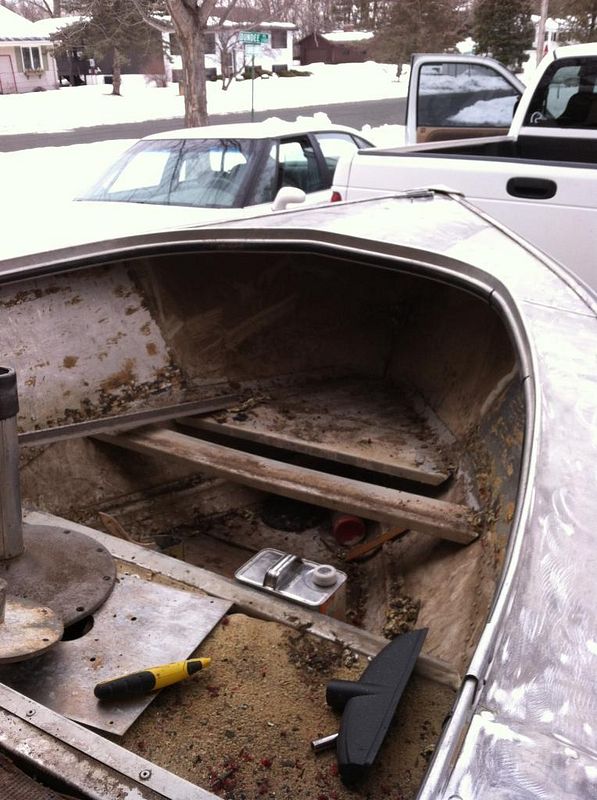
Fishingtech
Active member
Nice boat, I'll follow your progress as I complete my modifications on mine.


$60.74
Seachoice Sterling Series Boat Cover, Water Resistant, 14-18 Ft., Fish and Ski Boat
Autoplicity ✅


$21.89 ($21.89 / Count)
$26.88 ($26.88 / Count)
First-Aid-Kit-for-Car-Home-Travel-Camping-Businesses, 263pcs Compact Waterproof Hard Case, Public Emergency Medical Kits - Perfect for Survival, Vehicle, Boat, Sports, Hiking, Office, Dorm (PUMIER)
Pumier Medical


$29.39
$34.59
Seachoice Cast Aluminum “S” Dock Cleat, Corrosion Resistant Aluminum, 12 In.
Amazon.com


$104.98 ($104.98 / Count)
Ever-Ready Industries Premium Trauma First Aid Kit for Outdoors, Workplace, and Home - Exceed OSHA Guidelines and ANSI 2009 Standards - 240 Pieces - Includes Bonus Travel Kit
EVER-READY INDUSTRIES


$45.99 ($0.14 / Count)
$49.99 ($0.15 / Count)
330 Piece First Aid Kit, Premium Waterproof Compact Trauma Medical Kits for Any Emergencies, Ideal for Home, Office, Car, Travel, Outdoor, Camping, Hiking, Boating (Red)
THRIAID


$19.00 ($0.59 / Fl Oz)
$24.17 ($0.76 / Fl Oz)
STAR BRITE Instant Hull Cleaner - 32 Oz Gel Spray - Easily Remove Stains, Scum Lines & Grime on Boat Hulls, Fiberglass, Plastic & Painted Surfaces - Easy to Use Formula (096132)
Amazon.com

Got some stuff done today:
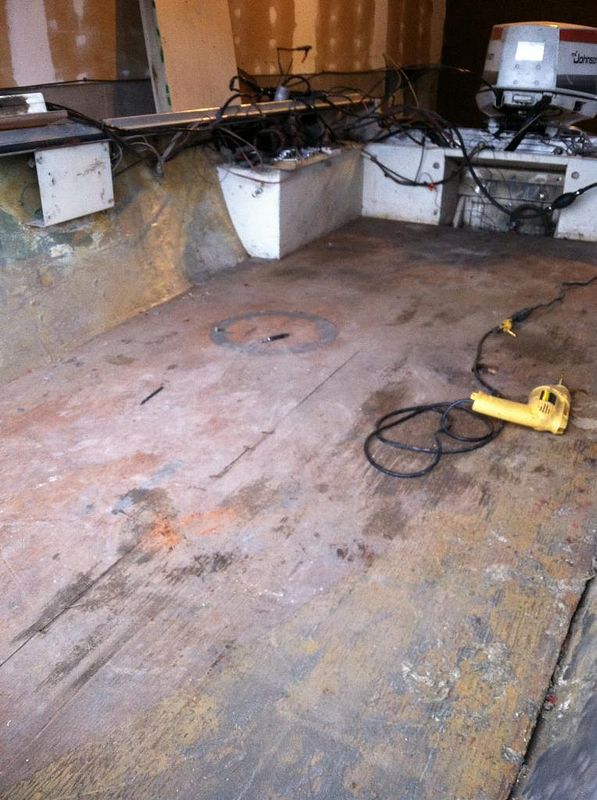
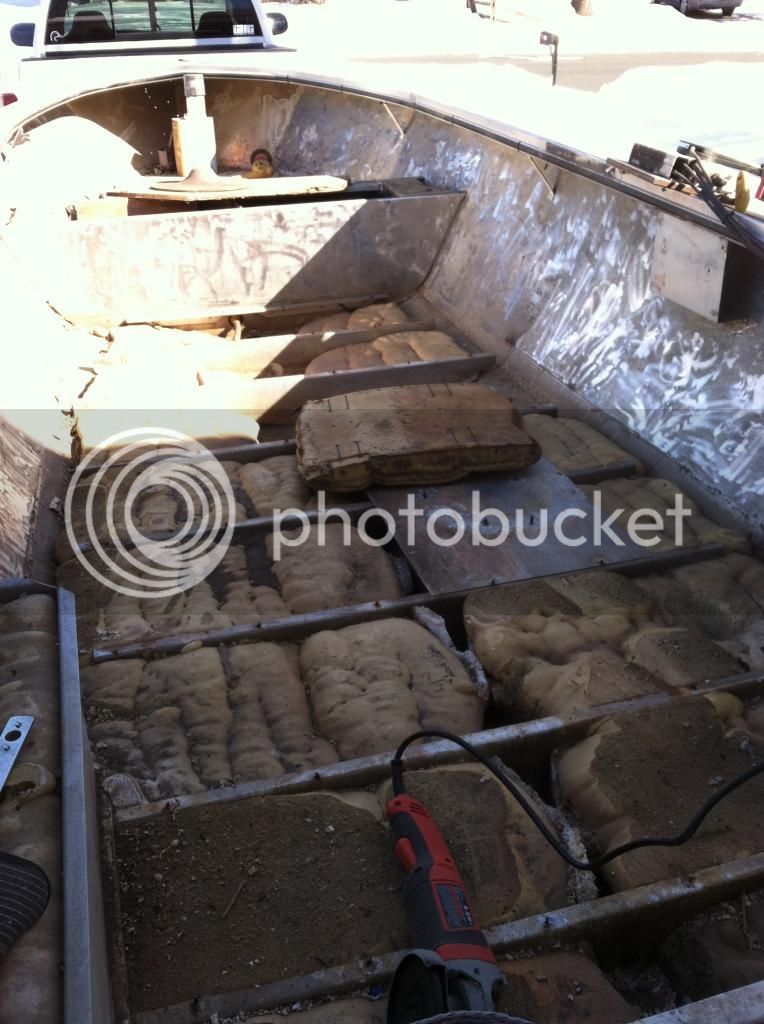
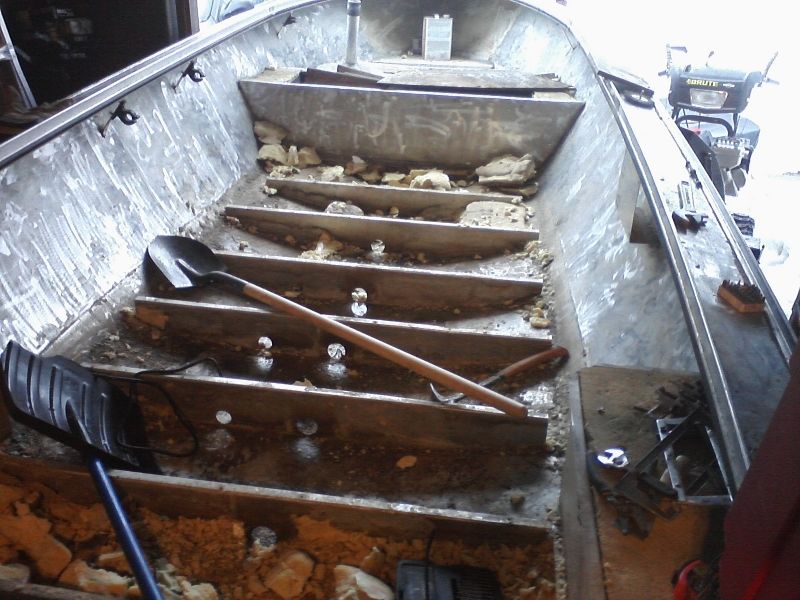
Removed the floor, one half at a time
second half out: (note the grinder, had to use it on just about every screw holding decking down.)
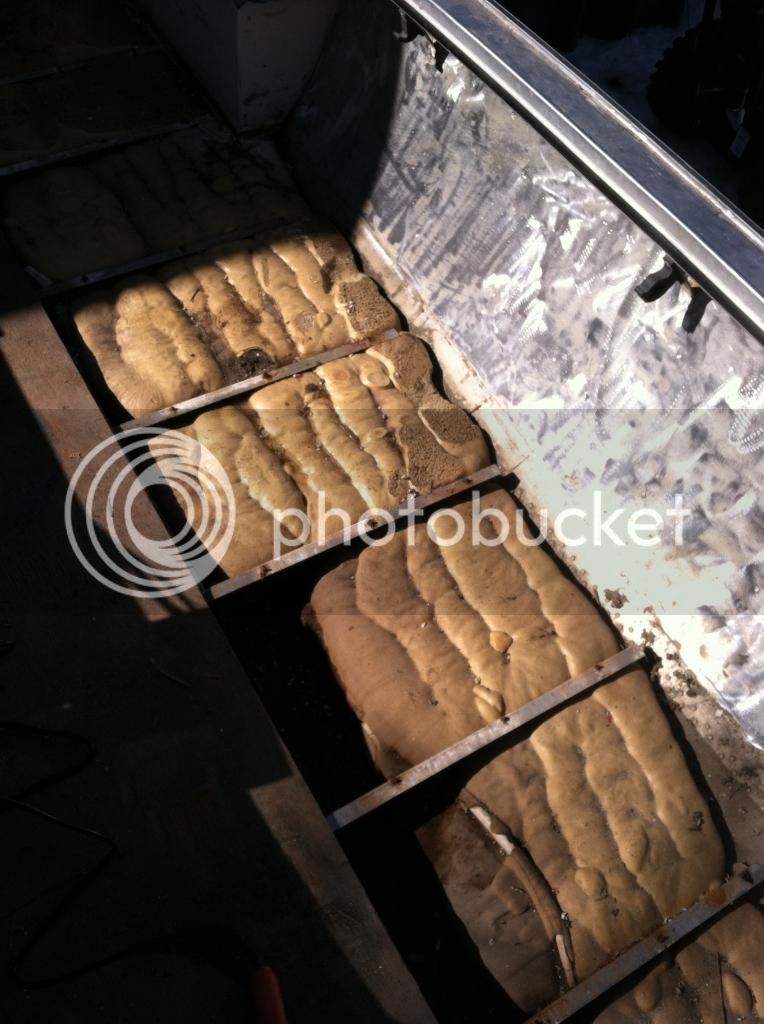
Then I was torn on whether or not to do new foam, because it seemed okay... but I psyched up and started hackin':
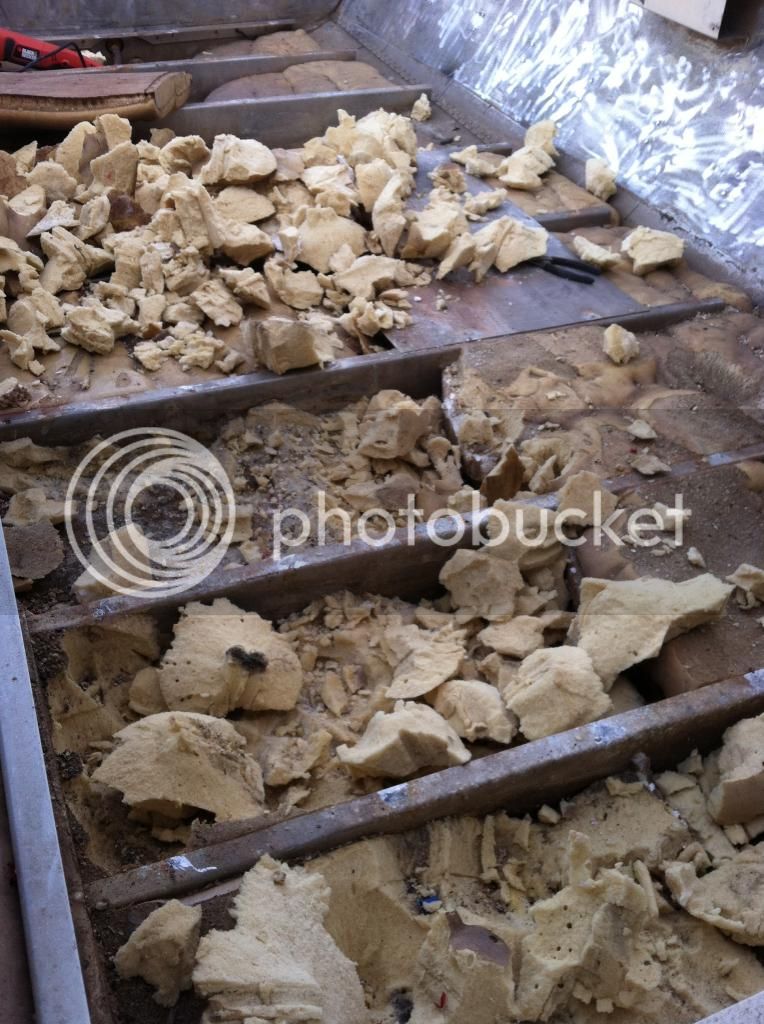
Which is when I met my nemesis: INVINCIFOAM. When little foams across the world dream of what they will become, they envision becoming invicifoam. (frozen waterlogged foam.)

And at some point a resident mouse with a knack for collecting bass worms stuffed them all over the place under the foam, I should have saved the whole pile of them!

Removed the floor, one half at a time
second half out: (note the grinder, had to use it on just about every screw holding decking down.)
Then I was torn on whether or not to do new foam, because it seemed okay... but I psyched up and started hackin':
Which is when I met my nemesis: INVINCIFOAM. When little foams across the world dream of what they will become, they envision becoming invicifoam. (frozen waterlogged foam.)
And at some point a resident mouse with a knack for collecting bass worms stuffed them all over the place under the foam, I should have saved the whole pile of them!
Eddie Spaghetti
Well-known member
- Joined
- Oct 9, 2010
- Messages
- 45
- Reaction score
- 0
I remember those days! That is why I left my foam. LOL Looking good!
hoosier78
Well-known member
Looks like lots of work! good luck and make sure you replace that foam. doing great so far
Iverson_4x4
Active member
Looking good! It just seems likes it was just a couple of weeks ago that I saw that much foam... Wait it was! I feel your pain, except for the frozen foam part. It was hard enough to get it all out without it being frozen. Can't wait to see the progress!
Thanks Iverson, I appreciate the helpful advice. Progress is slow, I study a lot and have a family to attend to. I could have finished the foam removal today but I decided to take it easy and relax! I work a physical job and can't afford to be totally worn out for my work week!
Eddie Spaghetti
Well-known member
- Joined
- Oct 9, 2010
- Messages
- 45
- Reaction score
- 0
Any progress this week?
Pictures to come tomorrow Eddie! I have 90% of the floor foam out right now, the rest is coming out tomorrow. I plan on going to the self serve car wash and giving this thing a good scrubbing out, and maybe (maybe) getting the new hatches cut out. The foam and flooring, then on to the transom inspection.
Eddie Spaghetti
Well-known member
- Joined
- Oct 9, 2010
- Messages
- 45
- Reaction score
- 0
I started a thread for you to see my mod. https://www.tinboats.net/forum/viewtopic.php?f=21&t=29558 Enjoy.
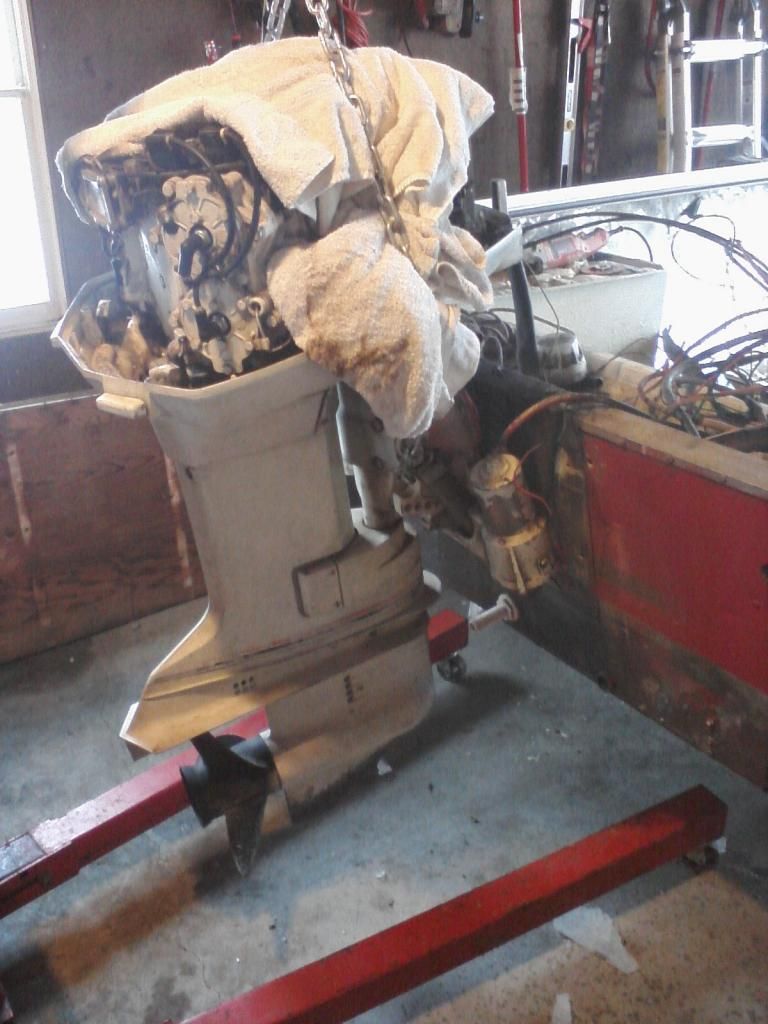
Got Started and finished on motor removal today, and pulled the transom cap.
All ready to start getting hoisted
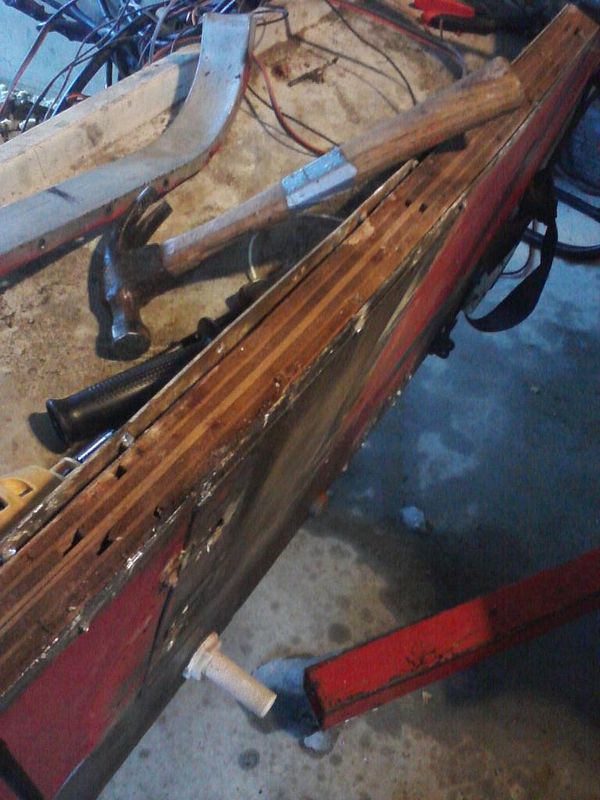
the transom! It looks pretty good, I haven't decided if I'm going to replace it yet or not.
Took forever, but this is the motor removed. I'm learning as I go!

Just have a little tiny bit of foam left in the back, and a few chunks up front that will take about 15 minutes to get out. the further forward in the boat I go, the easier the foam is to remove.
All ready to start getting hoisted
the transom! It looks pretty good, I haven't decided if I'm going to replace it yet or not.
Took forever, but this is the motor removed. I'm learning as I go!
Just have a little tiny bit of foam left in the back, and a few chunks up front that will take about 15 minutes to get out. the further forward in the boat I go, the easier the foam is to remove.
Eddie Spaghetti
Well-known member
- Joined
- Oct 9, 2010
- Messages
- 45
- Reaction score
- 0
What you can see of the transom looks pretty good. I'm wondering, while you have all the foam out, would it be worth filling the inside of the hull up with water (just to the water level outside). Just to see if any of the rivets leak. That is something I didn't do, and it kind of bugs me. Maybe overkill.
I am definitely going to do the leak test! I think I am going to replace the transom anyway. there are screws from previous depthfinders towards the bottom of the hull. according to PO it sometimes leaked down there, and when it did he removed the screws and put new sealant on them and put them back. the core looks to be two sheets of three quarter inch, should be easy enough to make a new one after I get all those giant rivets out. What's the best way to remove the large solid rivets anyway?
Would it be better to do solid rivets than gooped up SS bolts and locknuts in a transom replacement? I already have an air hammer, never done rivets before though. these ones look huge.
I have a 110 dollar gift card to Lowes, which is where I will be buying more plywood and getting the foam for the floor. I plan on taking the boat to the self serve car wash to clean it up before replacing the foam and all the wood, I am tired of getting dirty while working on the boat.
Iverson_4x4
Active member
Looking good!! Not far now from building instead of demolition. I just drilled out the solid rivets the same way that I done the pop rivets. Didn't have a problem.
Good to know Iverson. I'd like to replace with solid rivets as well, rather than SS bolts and goop. And thanks man, she's coming along! Hoping to start flooring in the next two weeks. I'll be lucky to have this thing done by FALL let alone fishing season! UGH!
Similar threads
- Replies
- 33
- Views
- 9K
- Replies
- 16
- Views
- 7K
- Replies
- 27
- Views
- 4K
- Replies
- 42
- Views
- 9K