'89 Tracker Pro 17 Investigation (lots of pics to come)

TinBoats.net

Help Support TinBoats.net:

This site may earn a commission from merchant affiliate links, including eBay, Amazon, and others.
Thanks for the info anyway. It's certainly better to know what I need instead of having to figure it out later. I've crudely played with the layout to reorient everything in one direction, and I think I'll be able to get away with the amount that I have. I might do a little patchwork with something less important like the seat boxes or something like that, but I think I can make it work. I might be able to seam one of the side panels behind the console or something. I'll update the layout tonight.

I dread having to go back to my wife and let her know that I need to order even more... :shock: I am way over budget already...
 
OK, here's the updated layout with all of the items oriented in one direction, to give the best appearance:
Tracker Vinyl Layout-a.jpg

I received the vinyl in last night, and upon initial inspection, I don't think that the orientation is very obvious. I'll have to check again when I get a chance to cut a larger piece off and inspect it better.

Last night I played around with some of the electrics, and I managed to get the flasher/sounder running. The power/sensitivity switch was not functioning properly, not supplying power to the flasher unit. I opened the switch enclosure and bypassed the switch contacts and got it running. Now I'll just have to install an external power switch.

It's a good thing to have the flasher running, but now I need to find a location for my Trim/Tilt gauge. I'm thinking I'll make a small panel in the location where the stereo head unit was. Additionally, I was going to use the mounting bracket for the flasher transducer to mount my Garmin 300C transducer. I'll have to add a second mount onto the transom now.

Oh well, more work to keep me busy.
 
kofkorn, I guess everyone around here uses carpet from Lowes, so I don't know that I've seen the Nautolex before. Is there anything you can compare it to that I might get a pic in my mind of what you're dealing with. I went to the website but that didn't help. Your project sound like some of mine, you get started and it just keeps getting deeper but it's easier and cheaper to do it now than to cut corners and have to lick your wounds later. Keep up the good work.
 
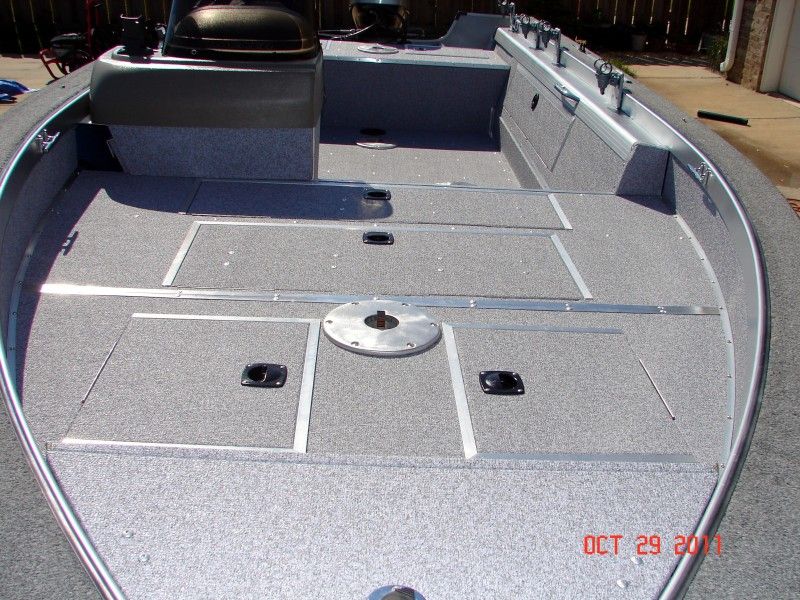
I just did my boat in Nautolex:
DSC02252.jpg


What are you doing with a flasher KK? Gonna fish straight down like fishing through a hole in the ice? :wink:

My HB 747 has a flasher mode, but I don't ever use it.
 
Hi Whistler,

I went into this expecting some re-work, but I didn't think it would go as far as it has. I was really hoping to only have to re-carpet the rear deck, thinking that the front and main casting decks were in good condition. I was going to just remove and put back the livewell and bilge covers, and re-carpet only what I had torn up. When I found that the plywood had been untreated before applying the carpet, it turned into a whole different project. At this point, I've taken so much apart that I decided to go with the vinyl instead of carpet. I hate having wet carpet, it never drys out and gets your pants wet when you kneel down. Now I need to replace every piece of carpet on the boat, a much larger and more laborious task than I originally hoped.

I am still very glad I did it, as I probably wouldn't have found half the issues that I've seen without it.

As to the flasher Jigngrub, I am a tinkerer at heart. It was as much of the challenge of getting it going again as finding a use for it. My thought is to use it more as a depth sounder than a fish finder. I've already got an Eagle 320 on the trolling motor, and I'll take my Garmin 300C and mount it so it is visible to the driver and the rear casting deck. In the end, it may get yanked anyway :). But I would have had to take it apart to find out what was wrong with it, as it would bother me to no end until I found out :).

I'm an engineer, and no questions can go unanswered... I have about a 95% success rate at finding out what is wrong and about a 75% success rate getting it back together after :) I've been this way as long as I can remember, and my wife just rolls her eyes and lets me go... Good woman :)

JnG, wanted to tell you that you did a great job on your boat. I hope mine turns out half as well as yours did. Mine didn't start with all of the nice aluminum trim around the covers, so it's certainly going to look a lot more plain.
 
I'm glad you mentioned the aluminum trim KK, I've been meaning to tell you about that.

There wasn't a single piece of aluminum trim in my boat before I ripped the carpet out. Carpet is a lot thicker and the pile/knap hides a lot of cracks and gaps, vinyl does not. You will find that your hatch openings will be a lot bigger than the hatch itself. You'll want to "fir" your hatch openings in with wood firring strips to make them smaller... but not too small.

I left about 1/4-5/16" on both sides and 3/8" on the front where the handles to the hatch are. This allows the hatch to open easily. I then fastened aluminum angle to the hatch lid to cover these gaps and hide any irregularities. All of the aluminum trim in my boat is aluminum angle, and all of it is hiding cracks/gaps and irregularities... I call it Sin Remover.

All I couls see is 3 hatches on your boat, 4 if you count the bilge cover... so you have half as many as I do. You may be a better saw man than I am and may be able to get away with tighter tolerances than I did and not need any angle at all... but I think it does give the final job a nice finished appearance.

It is imperative that you do a "dry fit" with your hatches in their openings before applying the Nautolex to your decking and hatches to make sure you have the fit you want... as a matter of fact, you should dry fit all of you plywood in your boat before applying the vinyl to see if you need to add any firring here or there for the fit you want... and since you're an engineer, I'm sure you'll finger it out with a lot less problems than I had.

If you have any questions, don't hesitate to ask or PM me.
 
Good point on the gap openings. One of the biggest problems I had with the carpeting that the PO did was that it made the compartments extremely tight. I had to use two hands to open each one. It was another reason for the switch to vinyl.

I'll be sure to do a dry fit as you suggested. I can probably quickly staple the vinyl to the wood pieces and maybe use some clamps or small applications of hot glue to tack the vinyl in place on the aluminum panels. The good thing is that I really only have two compartments to worry about, the Bilge and the Livewell. The cover on the front compartment doesn't set into a frame, and is just a panel over a hole, so there won't be any edge gaps to worry about. With the tight fit on the other two compartments, I'm hoping the gaps won't be too large, but I can easily adjust for them by adding in some wood spacers.

When you did your hinged compartments, did you go over the hinge with the vinyl, or did you cut it and leave the hinges exposed?? If you covered the hinges, how does it look when you open the compartments? Do you get bunching?

I'm waiting for the rivet gun and a few other miscellaneous pieces to come in so I can get started re-assembling in the next few days.

Thanks for the info!!
 
The hinges in the pic on page 3 look exposed to me.

I'm not sure that you could go over the hinges and make it look good.
 
Hinges exposed, wrap decking and hatches individually, then install hinge on hatch, then install hatch in decking, then install decking in boat.

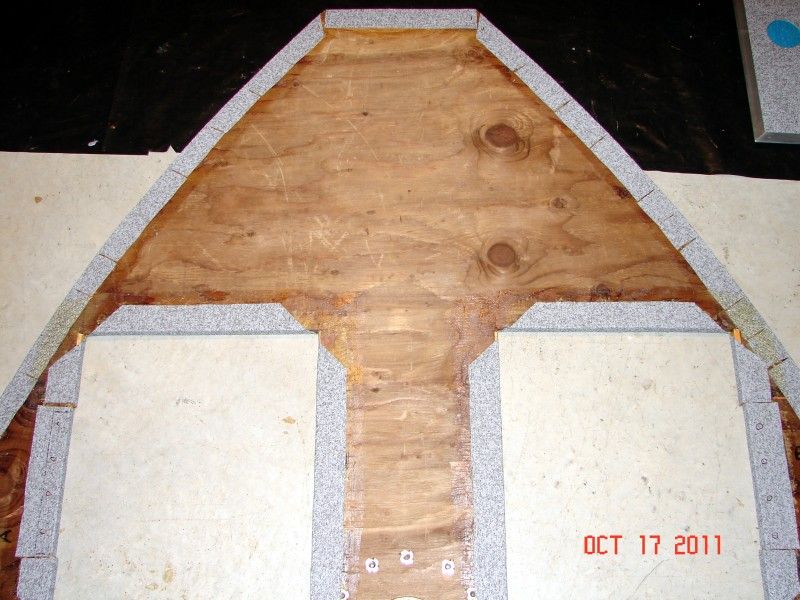
I did mortise (notch) out 1/8" for the hinge in the deck pieces so the hinge edge of the hatch would fit snug to the decking when the hatch was closed. You can see the cuts on the left and right sides of this pic.
DSC02239.jpg


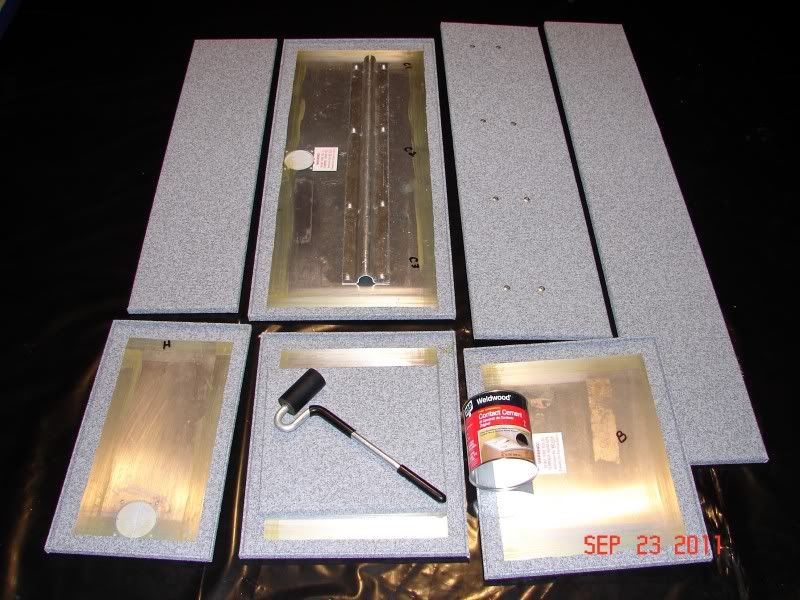
Here's a pic of the hatches wrapped
DSC02224.jpg


With only 2 hatches, it'll be a breeze for you. :wink:
 
Thanks for the details! The carpet that I removed went over the hinges, so now they are covered in the adhesive. I'll have to brush them well to get rid of it all and clean them up.

The hatches I have are all on the aluminum parts of the boat, so the hinges are welded onto the cover. That's going to make the vinyl have an edge near the hinge. I'm hoping the glue will be strong enough to prevent edges from peeling up.

I like the trim idea, It might be my fall back if the dry fit doesn't look too good.

I had a night off last night, but I'll be back at it tonight.

Thanks for all the help!
 
jigngrub said:
I just did my boat in Nautolex:

It absoultly looks great and like a brand new rig! You did a great job on the install. How does it feel to touch or walk on when wet? I might be asking dumb questions but everyone around here either leaves their boat as it comes from the factory or installs carpet. I live in a rural area and we have NO boat dealers closer than and hour. Even those carry minimal aftermarket supplies but give you the " we can order it for you" speech. I can't go look at this type of stuff. I'm just wanting to get some idea of what Nautolex is from a personal description and not what a magazine says about it.
 
whistler said:
How does it feel to touch or walk on when wet?

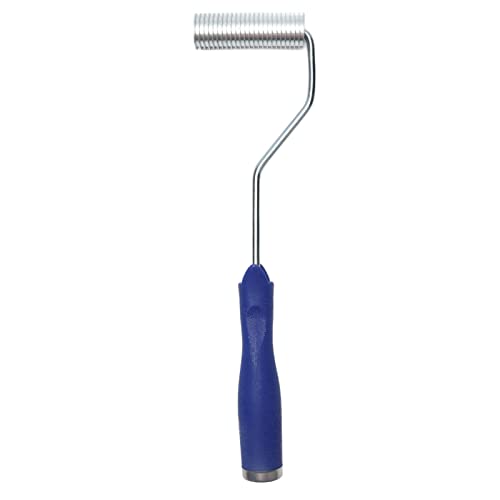
It is a smooth raised pebble grain finish to the touch (hand) and is very non slip wet or dry. It could actually be considered abrasive under the right circumstances, like if you make a fist and drag your knuckles over it while applying pressure... you'll end up with scraped knuckles. I know this from using the roller to install it and letting my knuckles get a little too close to the vinyl. It's kind of like a sidewalk, but smoother to the touch. I think the only thing that would make it slick is frost or ice, but everything is slick with that stuff on it.
 
jigngrub said:
whistler said:
How does it feel to touch or walk on when wet?

It is a smooth raised pebble grain finish to the touch (hand) and is very non slip wet or dry. It could actually be considered abrasive under the right circumstances, like if you make a fist and drag your knuckles over it while applying pressure... you'll end up with scraped knuckles. I know this from using the roller to install it and letting my knuckles get a little too close to the vinyl. It's kind of like a sidewalk, but smoother to the touch. I think the only thing that would make it slick is frost or ice, but everything is slick with that stuff on it.

Thanks jigngrub that certainly helps. This marine grade stuff is all new to me. As mentioned if not green paint as from the boat factories or gray carpet also from the factory or Lowes, I just don't know much about it. when you fellows start talking about vinyl I can't keep from thinking about my kitchen floor. In case my wife reads this I like our kitchen floor :D I just don't want a boat full of it! Thanks Again jig!
 
Tonight I finished removing the carpet from the aluminum panels and prepped them by quickly hitting them with a 36 grit disc.
111118-IMG_0556.jpg

I also took all of the carpet backing off of the casting deck, getting that ready for sealing. This was a little more challenging than I expected. It really took a lot of concentration to take off the carpet adhesive without digging into the wood too much. The surface of the plywood is really uneven now. I may flip it over to use the bottom side which didn't need as much sanding.
111118-IMG_0557.jpg

I used my angle grinder with a 36 grit disc with a backing disc. The glue was very intensive and really gummed up the discs. I had an older sanding belt eraser that really extended the life of the sanding discs. Even still, it took two discs to clean off the casting deck. You can see the little stub of the eraser that I used, it certainly has paid for itself many times over.
Here's the disc before hitting it with the eraser:
111118-IMG_0559.jpg

and immediately after cleaning it:
111118-IMG_0560.jpg

Now I've got a huge mess all through the boat and the garage to clean up before I get around to applying the sealer to the plywood panels. Hopefully I can get started on those this weekend.

One additional question for the group; What's the best way to get the solid rivets out of the hull? I am concerned that I won't be able to drill exactly in the center of the rivet and may have issues removing them. Should I grind them close to flush with the surface and then try to drive them through with a drive pin?
111118-IMG_0561.jpg

I've gotten most of my components and tools in, so now I should be able to move forward more quickly. Keeping my fingers crossed that I won't get too much snow on my car before the project is finished :)
 
You should be able to carefully grind those rivets off.

Looking good on the adhesive removal.

What are you going to use to seal the plywood with? Urethane? Epoxy?
 
I can grind the rivet flat from the inside, but they are under the stickers on the outside of the boat. I was hoping to keep from damaging them too badly.

I had been thinking that I could grind the inside flat, cut the outside sticker around the rivet and then use a nailset to drive it out. However when I grind the rivet flat, the edges disappear, and it becomes really difficult to find where to drive. I may try to reveal the edges using a bit of oil.

I received the 635 epoxy yesterday, so I can get started sealing this weekend. I'm sure it's going to take a while to dry, as the temps have dropped quite a bit. Hopefully today I can cut out the main deck and then clean up all of the dust. I need to give myself some space to work.
 
Use a marker and make some reference points around the rivet like a 2" square or right angle from the center of the rivet before grinding, then measure over to the center of the rivet if you need to.
 
Jig, your comment on marking the holes worked great. I had a bit of an issue figuring out where the rivets were that I had previously ground down, but the others worked very well. I had to back the side of the boat with a support, as the side would bounce when I struck the rivet. Once I put the board there and fixed it with my foot or knee, it took 2 or 3 strikes on the rivet to pop it out.
111119-IMG_0575.jpg

I cleaned out the back of the boat and started putting the vertical panel behind the seats back in place. I'll need to rebuild the entire rear compartments before covering it all with the vinyl. Getting the rivet holes aligned is quite a challenge. I had to use some persuasion to get them aligned and popped. I'm especially concerned with the through-hull holes, as I don't want to drill any extra holes through the hull. I was able to get them aligned this way.
111119-IMG_0577.jpg

However, there is a bit of an issue, as I am unable to access one rivet on each side. They are blocked by the wheel well on the trailer. I may have to find a way to either raise the boat or slide it back past the wheel well. I'm thinking that for the short time I'm going to need to get it riveted, that I should be able to raise it up with a jack and a few supports near the transom. If I slide it back I'll need to either remove the side bunks or carefully work around them. If I don't have the rivet tool square to the surface, the rivet won't be flush to the boat.
111119-IMG_0581.jpg

I am REALLY disappointed in the rivets that I purchased. On about half of them, the mandrel isn't properly captured in the rivet body. After you pump the tool the first time, the mandrel drops down, so when you go to re-grip it with the tool, it doesn't allow you to pull on the rivet any further. I end up having to use Vice grips to pull the mandrel out and then drill the rivet and re-set it with a new one. Don't get these if you have a choice!!
111119-IMG_0578.jpg

More to come...
 

Latest posts

Top