Alumacraft Model F Mod

TinBoats.net

Help Support TinBoats.net:

This site may earn a commission from merchant affiliate links, including eBay, Amazon, and others.
You sure you want to put the batteries in the rear of the boat?

Might solve your problem and distribute weight better if you moved them further up. Dunno the floor plan, but maybe one on either side of the front of the second bench?

And I agree, that's kind of high up on a semi-v with 52inch beam.
 
I have plenty of room and clearance in the front storage compartment but I've heard that weight up front is bad. Maybe larger battery up front. Smaller battery in the rear?
 
Swarrior?

With the engine, the gas (usually) and the driver of the boat in the back, distributing the weight throughout the craft will use the hull design better for engine efficiency.

I'm sure there are charts around, but keeping the bow down is a good thing.

Have fun.
 
Solved the battery dilemma. Thanks, K--keeping it simple and running the trolling motor off of the front battery and accessories off of the rear battery.

Sheet metal screws to secure the seats and decking to the benches?

Any preferences on carpet adhesive out there?
 
Watching the waterproofing sealer dry with cigar in hand.
Should I put on carpet or fasten to seats first--famous chicken or the egg conundrum.
Are stainless sheet metal screws into the seats going to have enough holding power for the carpeted benches and deck?
Can I place a standard battery on its side for more clearance or will it leak?
 

Attachments

  • 1407211591452.jpg
    1407211591452.jpg
    410 KB
  • 1407211591069.jpg
    1407211591069.jpg
    265.6 KB
  • 1407211591844.jpg
    1407211591844.jpg
    385.4 KB
Great carpet adhesive test by Jay at https://www.tinboats.net/forum/viewtopic.php?f=3&t=22430&start=15

Leaning towards Dap contact cement, but it seems like a one shot deal. I've noticed some have success with the Loctite spray adhesive. That seems almost fool proof.
 
I used the Dap. Worked great.

Worked some in high heat, and no so high heat.

Slathered some on each side of the wood and carpet... gave it a minute or so to cure, and pressed together in a rolling motion.

I did bigger pieces a bit at a time... glue some down roll it, add more glue, roll it....etc.

Seems to be holding up very well on my platform.

[url=https://tinboats.net/forum/viewtopic.php?p=362351#p362351 said:
sworrior » Today, 07:27[/url]"]Great carpet adhesive test by Jay at https://www.tinboats.net/forum/viewtopic.php?f=3&t=22430&start=15

Leaning towards Dap contact cement, but it seems like a one shot deal. I've noticed some have success with the Loctite spray adhesive. That seems almost fool proof.
 
A non AGM battery will leak if placed on its side. Vibration is also bad for standard batteries. I placed my battery on its side in front of the middle seat. It mainly powers my trolling motor and fish finder. My outboard motor does not have electric start. (good thing it starts easy.)
 
Haven't touched the boat in over a week. Working on a special project that takes about 12-15 hours a day which doesn't leave much time for building. I worked a bit tonight and started on the carpeting.
I was able to get the front bench carpeted and the front deck. I'll post some pictures tomorrow.

I'm stuck on where to put the battery. The large storage area in the bow (see earlier pics) is where I want to put the size 27 battery, but due to the front deck supports, it would have to go in the center so that it can be removed without uninstalling the front deck. This would severely limit my tackle storage (I want to have my cake and eat it too). One possible spot I could put the battery is if I cut a recess into the side of the bench seat. I would not be cutting all of the way through the bench, but I'm worried this would weaken the lateral support the bench provides to the hull. Any thoughts?
 
Hi there,

I used a self tapping screw on my bench seats for wood/metal that went through 3/4" ply, and a thin sheet of aluminum. They held rock sold with only 4-6 in each seat until I recently pulled them out to re-do the seats. I carpeted then fastened them, and some of the outdoor rug bunched, but I only used staples and my own strength to stretch a rather thick outdoor carpet around the ply. I imagine with adhesive on first, then attaching them, you should not get any pulling or bunching. Don't forget pilot holes. I made that boner mistake as well. #-o

Looking at your benches it appears they are like canoe seats where they do not extend to the hull floor. I would have to imagine cutting a large notch in them would weaken them for sitting, and possibly as a hull support brace. Maybe you could add supports under the seat where you notch it? I'm not sure I'd to do that, personally.

Like this?

Code:
 ___________________________________
|                     _________     |
|____________________|  notch  |____|
                    ||         ||
       supports --> ||         || <-- supports

Not sure if that's what you meant.
 
I solved the fastener issue. I am using Teks screws made by a company called Buildex. They are specifically designed to fasten wood to metal. They are also coated (ceramic, I believe) for exterior use.

I pre-drilled my holes, but I also drove a few Teks non pre-drilled and didn't notice a difference. In fact, the screws drove as easily as any twist bit. I picked these up at Lowe's, but I also saw them at Home Depot yesterday.

I will screw through the carpet into the deck, but use finish washers to neaten the appearance.
 

Attachments

  • 20140806_181821.jpg
    20140806_181821.jpg
    162.4 KB
...Soooo, I tried my hand at carpeting last night, and below are the pictures of the finished product. I used the DAP Contact Cement and was very impressed. A long open time allowed repositioning and stretching with a J-Roller I use for gluing up veneers. I will post some more detailed pics and a step by step tomorrow. I couldn't take any pictures of the process, because I wasn't sure what I was doing. Now, I still don't know what I'm doing but at least I'm an experienced idiot.
 

Attachments

  • 20140813_231612.jpg
    20140813_231612.jpg
    150.1 KB
  • 20140813_224622.jpg
    20140813_224622.jpg
    158.7 KB
:idea: The rounded shape of her hull may make standing on that casting deck a little tipsy. This could be improved by adding ballast so she will sink a little lower in the water. I suggest 1gal jugs of water. Stick them under the seats and into that front compartment. I use this trick on my 19' canoe which is designed to carry 2 people and 400# of gear. If its too light it tips very easy; load her up with water jugs and she is super stable.
 
Nahh... I did a very similar project on my 1952 16', and with the weight of the frame, deck, and gear up front... she sits quite well...not to mention my fat ***!!!

[url=https://tinboats.net/forum/viewtopic.php?p=363331#p363331 said:
SaltyGhost » 14 Aug 2014, 14:23[/url]"]:idea: The rounded shape of her hull may make standing on that casting deck a little tipsy. This could be improved by adding ballast so she will sink a little lower in the water. I suggest 1gal jugs of water. Stick them under the seats and into that front compartment. I use this trick on my 19' canoe which is designed to carry 2 people and 400# of gear. If its too light it tips very easy; load her up with water jugs and she is super stable.
 
Got a little more done on the boat this week--fishing is definitely in my near future.
Finished up carpeting the bow.
I used Dap Weldwood Contact Cement.

First I sealed the wood with whatever I had: exterior spray paint, deck sealer, spar varnish, a combination of leftovers

Next I cut the carpet to size, cutting it oversized to accommodate a finished edge and staples.

I applied contact cement to both the underside of the carpet and the deck. Use a short nap or foam roller to apply the contact cement evenly.

Smoke a short cigar and wait 15 minutes until the surfaces are slightly tacky. If the cement is too dry, just apply some more to soften it.

Afterwards, I placed the deck on the carpet and used a veneer roller to apply bonding pressure. I then stapled the underside with stainless staples to keep the carpet taut.
I was suprised by how easy this was and glad I went the carpet route.
 

Attachments

  • 1409096308160.jpg
    1409096308160.jpg
    445.5 KB
  • 1409096307798.jpg
    1409096307798.jpg
    433 KB
  • 1409096307340.jpg
    1409096307340.jpg
    343.7 KB
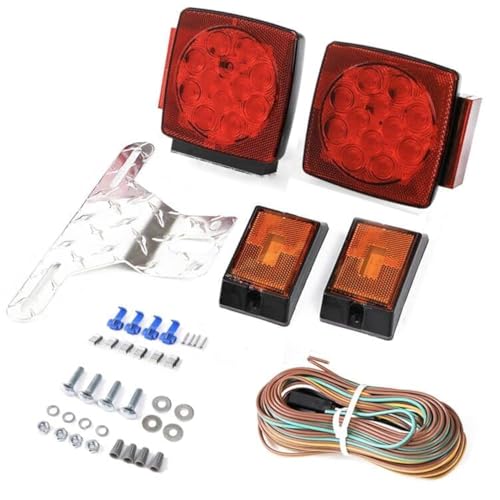
Built the front box for the trolling motor. This will raise it flush with the gunwale. I got a plug in connector from the trolling motor and mounted it in the vertical wall to reduce the chances of water intrusion. I also mounted the running light combo to this platform.
 

Attachments

  • 20140824_210456.jpg
    20140824_210456.jpg
    50.8 KB
  • 1409099397116.jpg
    1409099397116.jpg
    411.5 KB
The transom is complete. I replaced the stock aluminum screws and washers with stainless fasteners primed and painted to match. I couldn't bring myself to paint the curly white oak, so I used a flat spar varnish to keep more with the theme but still allow the wood grain to show.
 

Attachments

  • 1409099397851.jpg
    1409099397851.jpg
    371.4 KB
  • 1409099397526.jpg
    1409099397526.jpg
    383.5 KB
Now that the forward casting deck is carpeted, I framed in the front. The battery position gives me the most room, but it has to be muscled in to place.
 

Attachments

  • 1409099396783.jpg
    1409099396783.jpg
    400.4 KB
Loose fitted the rear seat/deck. Also got the battery selector switch and 2 bank charger installed.
 

Attachments

  • 1409116597787.jpg
    1409116597787.jpg
    486.4 KB
  • 1409116597382.jpg
    1409116597382.jpg
    473.7 KB
  • 1409116596923.jpg
    1409116596923.jpg
    531.2 KB

Latest posts

Top